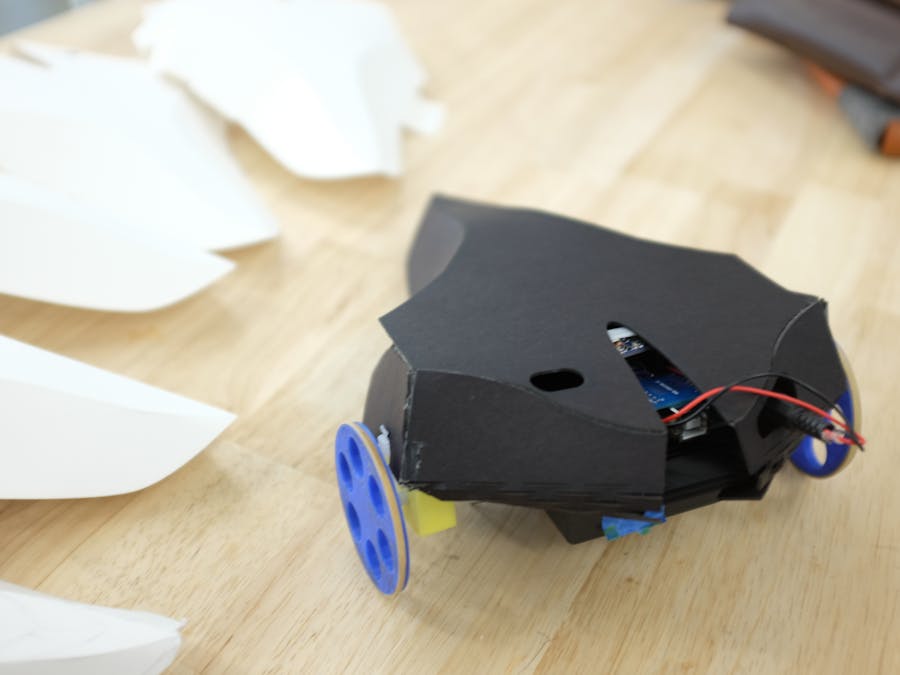
For the final iteration of my project, I redesigned the vehicle chassis and resolved the problems I encountered in my previous iterations. My new vehicle chassis is constructed with black mat board, and features two side curves. The edgy personality of the car inspired its name, Raven.
Design Goals
My previous iterations of this car featured a box design cut from econowood. It was powered by a continuous servo, and direction was controlled by a mini servo in the front of the car.
First Iteration:
https://www.hackster.io/jessmchang/hw-6-97c540?ref=user&ref_id=31406&offset=5
Second iteration:
Third iteration:
https://www.hackster.io/jessmchang/second-project-final-week-bfcb40?ref=user&ref_id=31406&offset=1
In retrospect, the previous iterations were not aesthetically pleasing, and didn't drive very well either. It could barely turn because of traction problems, everything was bolted and the individual parts were not modular so making adjustments to my design would be difficult. I wanted to make sure that this time, my car would be able to maneuver smoothly while also being able to go up a ramp smoothly.
Inspiration
The form and curves of the car are inspired by a majestic black raven. The material and body are inspired by a few car and ship concepts. I made the design simple and edgy.
Sketches and Iterations
After the three weeks of designing my car, I decided to scratch all the electronics. Instead of using the two servos to power the car, I decided to go with two DC motors. I wanted to make sure the electronics worked before moving on to form, because what is a beautiful car that can't work?
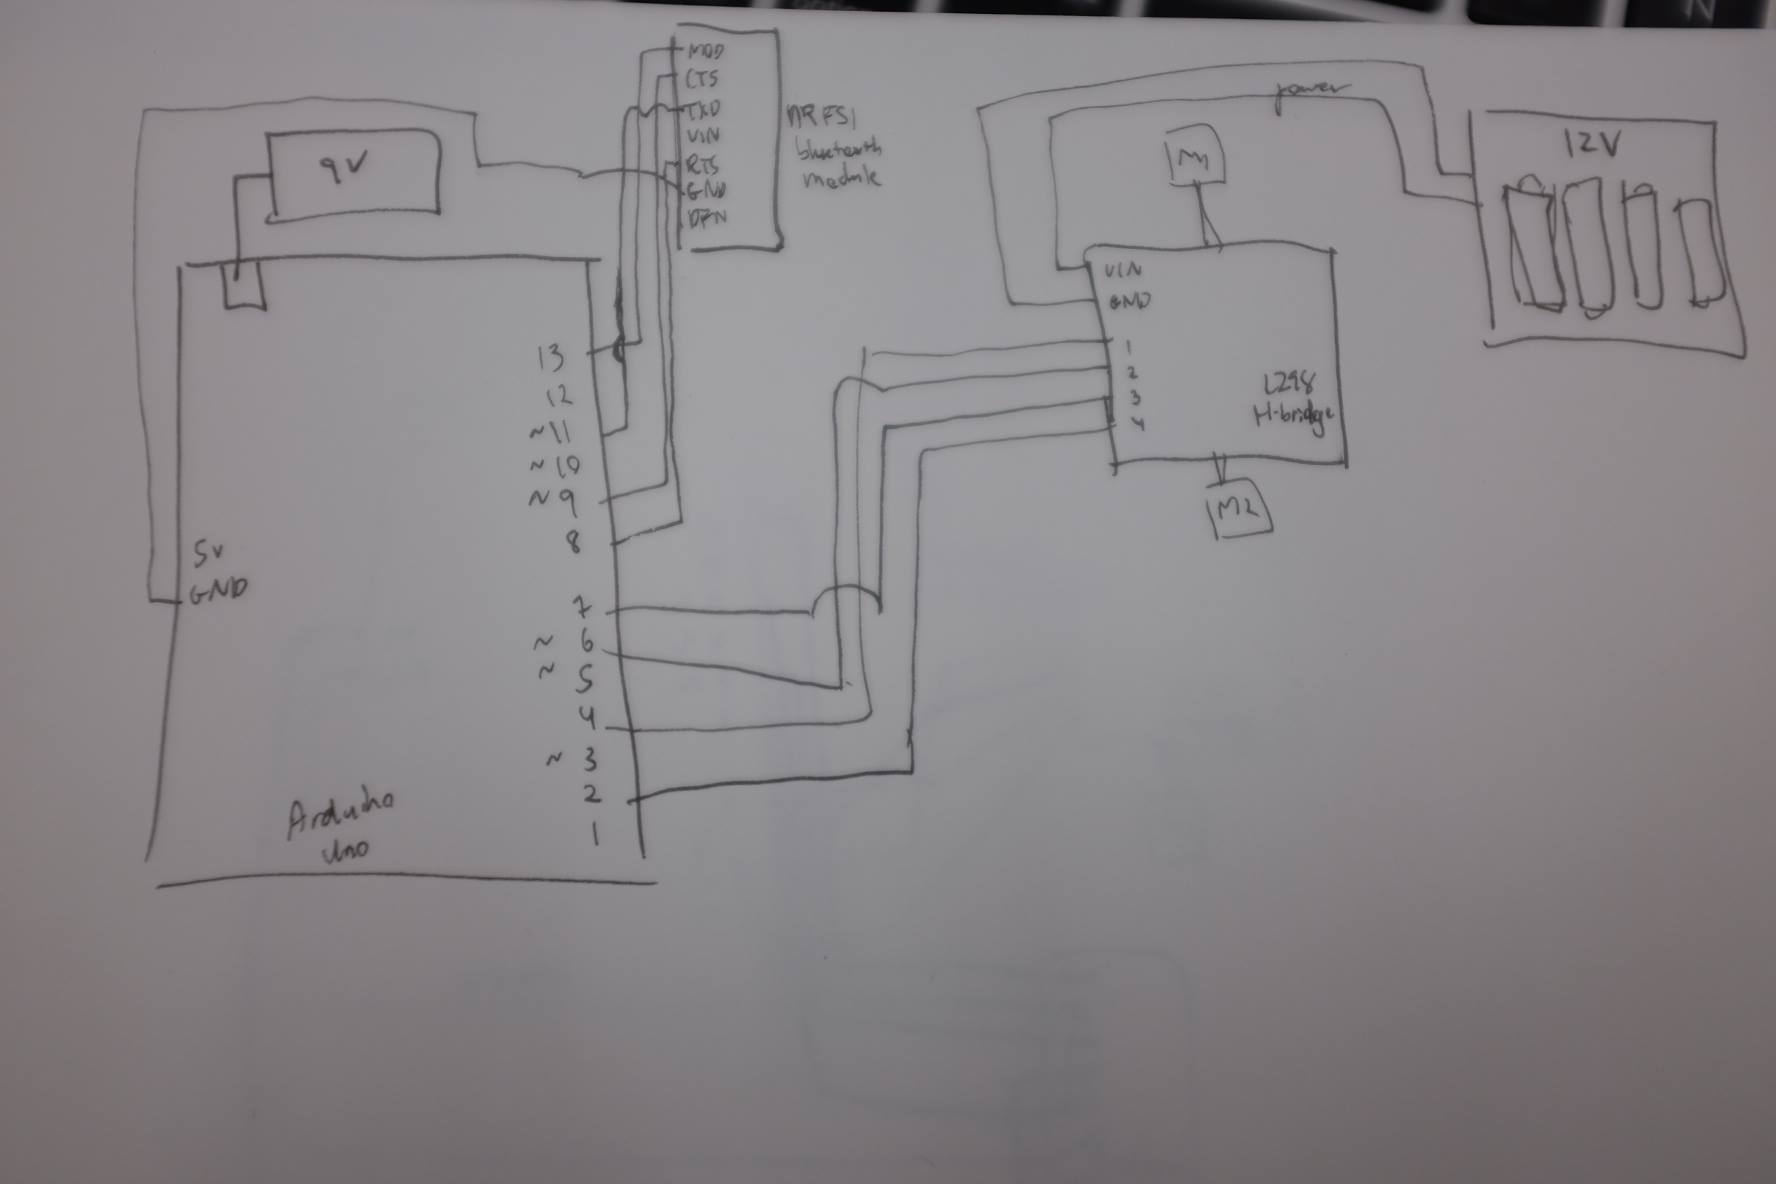
Step 1: During Thanksgiving break, I took apart my car, and started from scratch. I made sure my electronics were working and quickly taped them to a piece of cardboard.
Step 2: I soldered my electronics together and stuck it on a body that I designed and laser cut out of econo wood. I ran into some issues while doing so. I didn't do a great soldering job on my first try and unfortunately overheated my nrf8001 bluetooth module. Chris didn't have any more so I was forced to use the other type. I was quite nervous about this because of the limited time I had and had to rewire my electronics, but it turned out to work fine in the end. :)
Below is an image of the rough mid-fidelity prototype of my car base. Unfortunately the cuts didn't go all the way through so when trying to take out the cut pieces, I snapped the top layer of my base in half. Luckily this was only my mid-fidelity version so I just taped it together. The left plate features the top part of my body and the right plate features the bottom part. I designed it to have a ton of holes to lessen the weight of the car and to secure my electronics with zipties. The holes are also useful for wire management.
Step 3: I began to design my shell. Below is one of my earlier versions of the shell, made out of Bristol paper. It didn't fit perfectly with the base at first, so I taped it to the base, and used a pencil to mark the areas that needed to be cut, and areas where there needed to be more paper. Further down is an image of all the iterations, each with a minor adjustment from the previous version.
Below, I cut out my base plates with matte black acryllic. I secured everything with zipties.
I also added a ping pong ball in the front of a car that acts as a wheel and to reduce friction. It works extremely well, even if it's not being dragged in the back.
Below you can see all the iterations and adjustments up close. Towards the end I added two holes--one hole for easy access to the on/off switch and another for the 9v battery barrel plug.
Below is the final version of my shell, cut out with black matboard. I used a laser cut folding pattern for areas that needed to be folded over and secured with velcro.
Below is an image of all my iterations. I began with a cardboard prototype and ended with a final version.
Illustrator
Final Product and Video
Video of working design: https://youtu.be/o2_ULavztqg
Future refinements
Still, my car could use a bit more work. I realized upon folding the mat board that the corners would stay up, and tear the corners.. In the future I would experiment with different materials to prevent that from happening.


_ztBMuBhMHo.jpg?auto=compress%2Cformat&w=48&h=48&fit=fill&bg=ffffff)


Comments