This part was to finish the final project. There were a few things I wanted to fix from last week. First, because the gears were wooden, it was easy for the gear teeth to break. I ended up using acryllic to print the gears. This proved to be a lot more sturdy. In order to ensure that the top gear would stay fixed on the metal axel, I used a lock pin and collar fastener, glued to the gear and set in place using a set screw. This is shown below
Above, I am showing the new axel that I am using. It is thicker in diameter, which proved to be a lot sturdier than my previous axel. I also used this axel because it perfectly fits the 3d printed wheels that Chris gave me. Below is a picture of the 3d printer wheels. I'm using a set screw to keep the wheels on the axel.
I had to print a few wheels with different sizes in order to match with the 3d printed wheel. I also made sure that the wheel in between the 3d printed wheel and the laser cut wheel would be a bit smaller in diameter in order to provide a channel for the rubber bands that I would later place to provide traction.
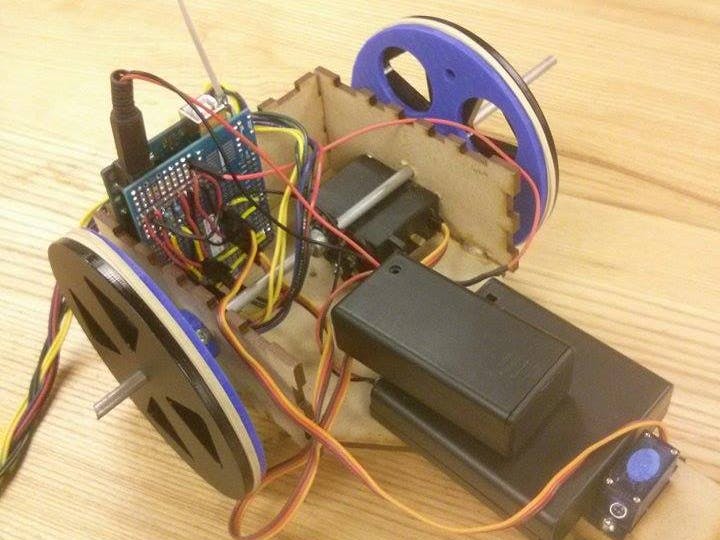
After upgrading my mechanical components, I used a protoshield, with wires soldered on to them. This process took a while, maybe 5 hours to ensure that I wouldn't generate a short circuit. After soldering the wires, I made a mistake by powering the servos to the 5V rail. However I found out that the 5v cannot power the servos so I had to resolder the servo power wires to a wire that would run to the external battery pack. Above is a picture of the final solder job.
Finally, I created a game console by placing a larger potentiometer, and two larger switches onto a protoboard.
In conclusion, my vehicle could not steer very well because there is so much more traction on the back wheels and not much on the front wheels. In the future I will hope to make the back wheels smaller and front wheel larger, and also keep more weight in the front so that the steering would be better.


_ztBMuBhMHo.jpg?auto=compress%2Cformat&w=48&h=48&fit=fill&bg=ffffff)


Comments
Please log in or sign up to comment.