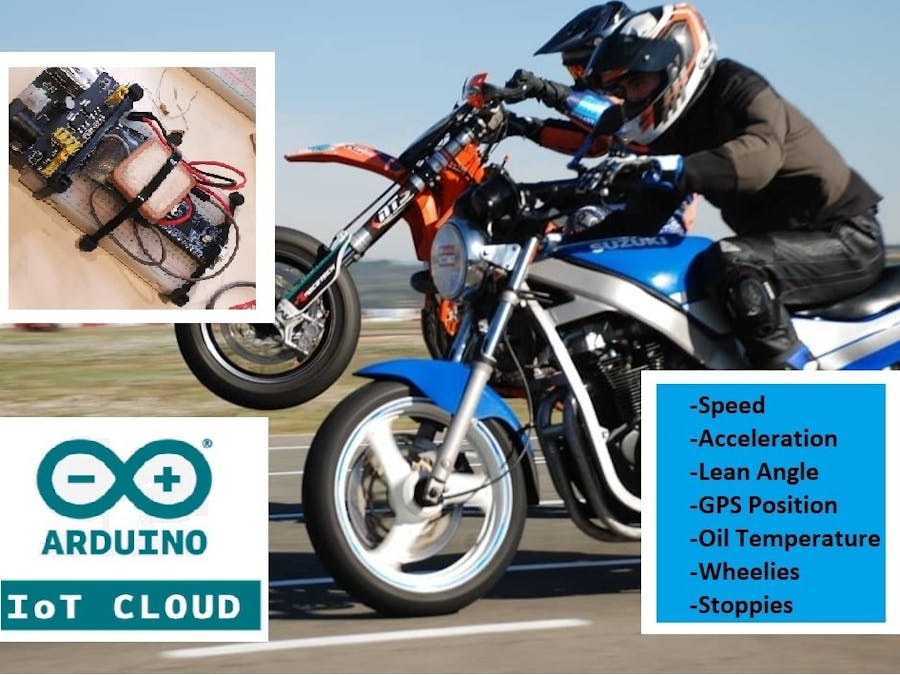
When I bought my first motorcycle, I started thinking on a system that could monitor my routes. I usually rode with my friends in Kartodromo Lucas Guerrero, and we always wanted to know who was leaning more the bike in each curve, breaking later or achieving more top speed.
The Idea
So I started looking for a system that could monitor all of this variables. When I saw Arduino Nano 33 IoT capabilities, I knew it was the perfect micro for this project. It had integrated gyroscope and accelerometer, so I could register pitch, yaw and roll from motorcycles. Adding a GPS module, I could also monitor speed and position.
We could even upload all of this information in real time to Arduino Cloud to see how was the rider performing on track, because the Arduino 33 IoT has an integrated Wi-Fi module.
Building Process
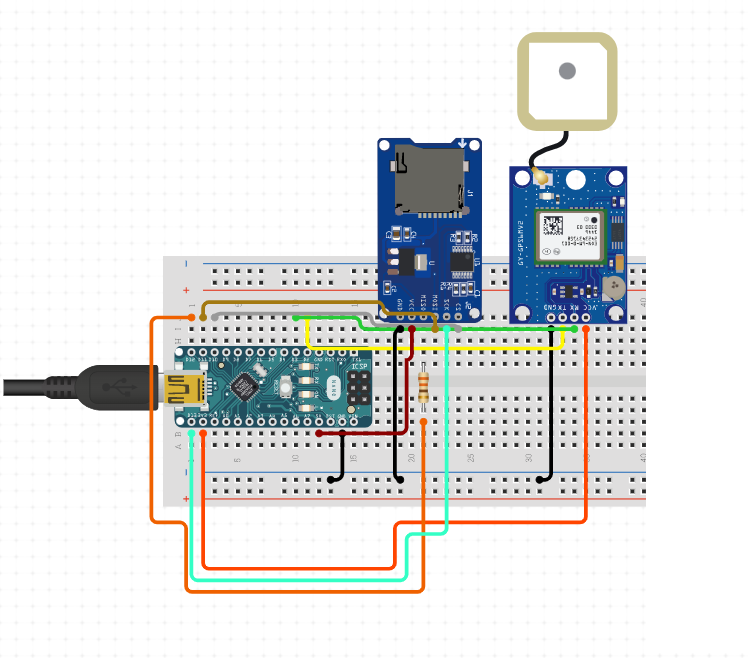
We only have to connect the Micro SD Adapter (will be used to store physically all the data from the sessions) and the GPS module. In the next image you can see how is this performed.
Micro SD Adapter:
- MOSI - D11
- MISO - D12
- SCK - D13
- CS - D9
GPS Module:
- TX - D0
- RX - D1
Arduino Cloud Setup
First, we will have to acces Arduino Cloud, register our new board and create a thing, where we will receive all the data from our Arduino Nano 33 IoT
Here, we can edit online our code, or create and modify our Arduino's parameters. We will select IoT Cloud to perform this second action.
Next, we will create a new thing. Here we will configure which variables we want to receive from our Arduino Nano 33 IoT.
Now, we will create the dashboard, where we will see all the data from our device in enjoyable graphics.
We will add some nice graphics to show our information. For position, we will add the tool "map", and for lean angles we will add the widget "gauges". During this process, we will have to link this graphics to the projects' variables.
Next, we will compile the code and upload it to the board. We will have to modify the file "arduino_secrets.h" and change SSID and PASS fields.
Then, you will have to create a hotspot in your mobile phone with the same SSID and PASS, so Arduino will automatically connect to the network and will start sending data to cloud.
Finally, you will have to install the hardware in your motorcycle, power up and... ¡enjoy testing the device on track!
This project can work also without cloud integration, saving data on a micro SD card. We will explain now how it works.
Micro SD Setup
First, we will have to upload the modified code so Arduino Cloud is disabled, and data storage is enabled. It is attached in "attachments".
Next, we will put a micro SD card in the adapter, and power up the device. Data will be written in a.txt file. We will open it using the NI DIADEM software. Matlab or Excel can be also used for this purpose.
Finally, we will import micro SD data to the computer, and open it with the software.
Thanks for reading and... ¡happy riding!


_3u05Tpwasz.png?auto=compress%2Cformat&w=40&h=40&fit=fillmax&bg=fff&dpr=2)


Comments
Please log in or sign up to comment.