BLE (Bluetooth Low Energy) handles wireless communication between hardwares and softwares at low energy consumption. It is a very handy tool to create smart home devices, wearables and all kinds of IoT projects. However, to build a customized app to communicate with the device can be confusing and intimidating for beginners.
What Is p5.ble.js?p5.ble.js is a JavaScript library that enables communication between BLE devices and p5 sketches. It uses Web Bluetooth API and turns complex setup into several simple functions. It can help you create a customized web app that interacts with your BLE enabled circuit.
About This TutorialThis tutorial walks you through an example that demonstrates some basic functions of p5.ble.js: read, write and subscribe. By following this tutorial, you will get your Arduino Nano 33 BLE to talk to your web app running on the Chrome browser.
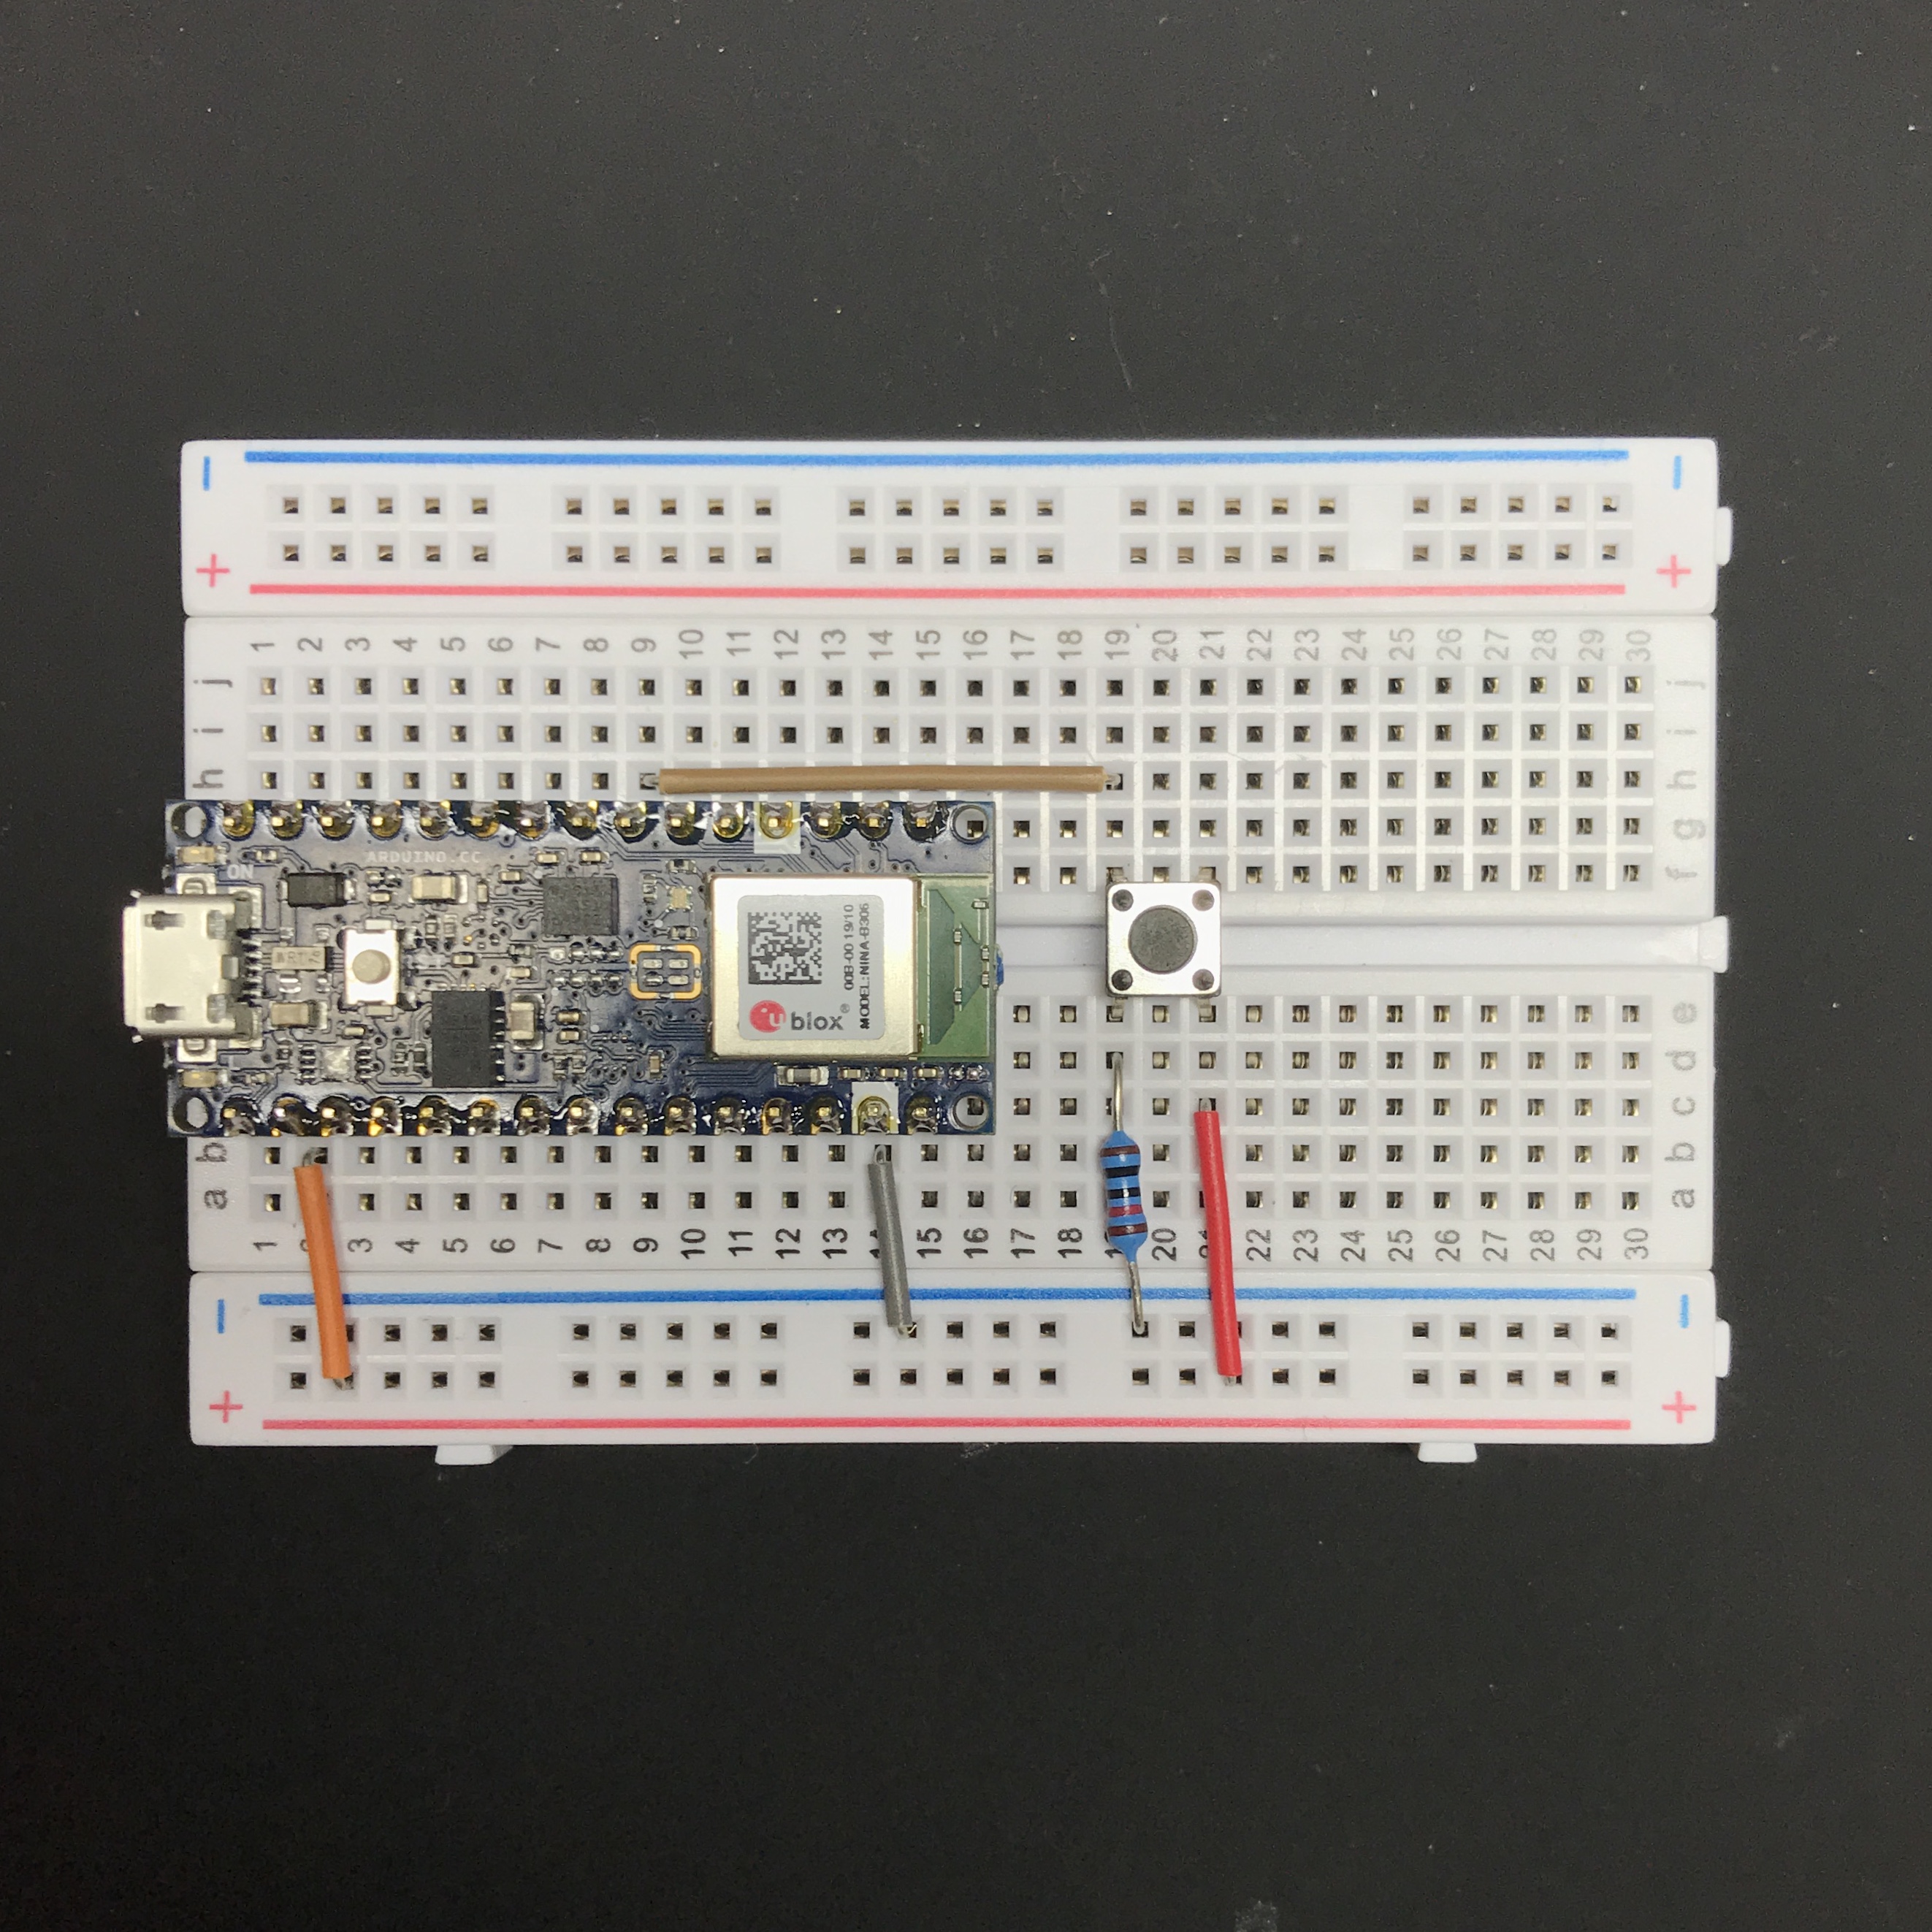
Step 1: Assemble the CircuitArduino Nano 33 BLE or Arduino Nano 33 BLE Sense might not come with header pin soldered. You would need to solder the header pins. Using a breadboard could help you align the header pins.
Then, wire up a button to digital pin 4.
To program Arduino Nano 33 BLE, we need to install the corresponding library. Go to Tools >> Boards >> Boards Manager, search Arduino Nano 33 BLE, click install (or update if you have previously installed).
After installing it, go to Tools >> Boards, select Arduino Nano 33 BLE.
Note: Arduino Nano 33 BLE and Arduino Nano 33 BLE Sense use the same board settings. Arduino Nano IoT uses a different one. Please double check your Arduino name before programming it.
Then, go to Tools >> Manage Libraries, search ArduinoBLE, click install (or update if you have previously installed).
Then, we are ready to program the Arduino Nano 33 BLE.
Step 3: Program the ArduinoIn this tutorial, we will use an example sketch. Go to File >> Examples >> ArduinoBLE >> Peripheral, open example ButtonLED
Verify the sketch and program it.
After programming done, open Serial Monitor, you should see "Bluetooth device active, waiting for connections..."
If you press the button on the breadboard, you should see the onboard LED lights up and "LED on" printed in Serial Monitor. This is to verify that your circuit is wired correctly. If you are not seeing the LED or the printing, check your wiring.
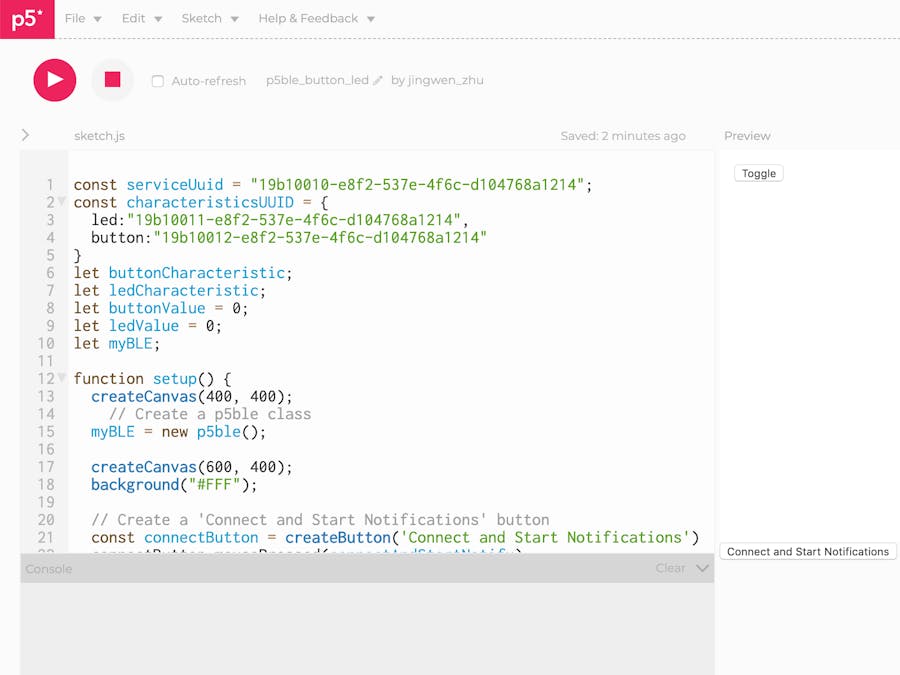
Step 4: Add p5.ble.js libraryOpen p5.js Editor in Chrome browser, click the arrow shape icon to open index.html file. Paste the following line of code as indicated below.
<script src="https://unpkg.com/p5ble@0.0.4/dist/p5.ble.js" type="text/javascript"></script>First of all, we will declare UUID of the services and characteristics. These are unique identifiers for the characteristics in our Arduino sketch.
const serviceUuid = "19b10010-e8f2-537e-4f6c-d104768a1214";
const characteristicsUUID = {
 led:"19b10011-e8f2-537e-4f6c-d104768a1214",
 button:"19b10012-e8f2-537e-4f6c-d104768a1214"
}
Then, we would need to create instances of the BLE object and characteristics in our p5 sketch.
let buttonCharacteristic;
let ledCharacteristic;
let myBLE;
Next, we will create a global variable to keep the value read from the button
let buttonValue = 0;Inside the setup function, we will initiate the BLE object and interface buttons.
function setup() {
 createCanvas(400, 400);
 myBLE = new p5ble();
 createCanvas(600, 400);
 background("#FFF");
 const connectButton = createButton('Connect and Start Notifications')
 connectButton.mousePressed(connectAndStartNotify);
 const toggleButton = createButton('Toggle');
 toggleButton.position(15, 15);
 toggleButton.mousePressed(toggleLED);
}
Then, we will declare the callback functions corresponding to each action: when connectButton is pressed, connectAndStartNotify function will be triggered. When toggleButton is pressed, toggleLED function will be triggered.
function connectAndStartNotify() {
 myBLE.connect(serviceUuid, gotCharacteristics);
}
function gotCharacteristics(error, characteristics)
 if (error) console.log('error: ', error);
 console.log(characteristics[1].uuid);
 for(let i = 0; i < characteristics.length;i++){
   if(characteristics[i].uuid == characteristicsUUID.button){
     buttonCharacteristic = characteristics[i];
     myBLE.startNotifications(buttonCharacteristic, handleButton);
   }else if(characteristics[i].uuid == characteristicsUUID.led){
     ledCharacteristic = characteristics[i];
   }else{
     console.log("nothing");
   }
 }
function handleButton(data) {
 console.log('Button: ', data);
 buttonValue = Number(data);
}
function toggleLED(){
 myBLE.read(ledCharacteristic, handleLED);
}
function handleLED(error, data){
 if (error) console.log('error: ', error);
 console.log('LED: ', data);
 myBLE.write(ledCharacteristic, !data);
}
Then, inside draw function, we will use the buttonValue to draw a square.
function draw() {
  noStroke();
 if(buttonValue>0){
   fill(color(200, 200, 200));
 }else{
   fill(color(100, 200, 200));
 }
 rect(15, 40, 60, 60);
}
Now, we are ready to run the p5 sketch.
Step 6: Run p5 SketchClick the play button at the top left corner of the editor, we could run the sketch. When the sketch is running, you would see the Connect and Start Notifications button. Click the button, you would see a pop-up window in your browser. This is the window for choosing the BLE device. If there's only one Arduino with the ButtonLED sketch programmed and powered, then you should only see one option listed in the window. Pair it.
Then, you should see the following logs in the console:
Now, if you click the button on the breadboard, the square in the web app will change color. If you click the button in the web app, the on-board LED will toggle.
Now, you've successfully run your first p5.ble.js project. You can follow the examples to create your own web apps for your Arduino BLE projects.
Tips- If you are in a situation with multiple BLE projects around, it's a good practice to change the service UUID in the examples to a different one. You could use the UUID Generator to generate it. Please don't forget to replace the UUID in both of your Arduino sketch and your p5 sketch.
- If you cannot get your p5 sketch connected to your Arduino properly, you could use a generic BLE mobile app, such as LightBlue to test your Arduino first.


Comments
Please log in or sign up to comment.