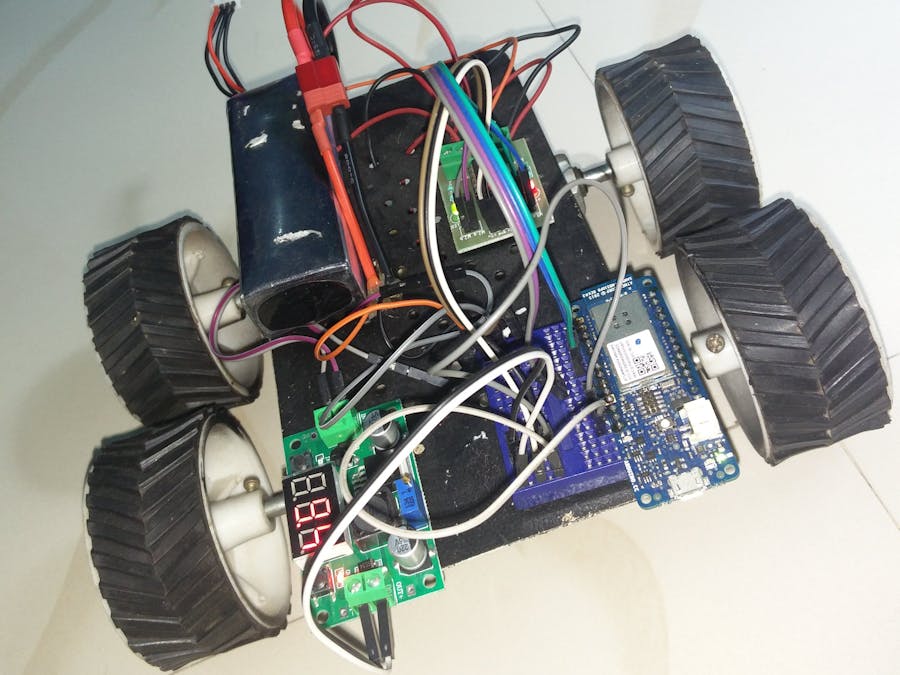
Few weeks back, I published an tutorial on building a robot that can be controlled using WiFi and an App RootSaid – WiFi Command Center using Raspberry Pi. I got so many questions about making the same thing using Arduino. So in this tutorial, I will be showing you how to make a WiFi Robot that can be controlled via Mobile phone using Arduino. Yes; an Arduino WiFi Robot.
Here, I will be using an App RootSaid – WiFi Command Center to send UDP strings over the local network or the Internet to the Arduino which will be listening for UDP packets in a particular port. The listener accepts the UDP packets, process it, extract the string and then use it to run a commands to drive the motor. Now lets get started.
Video DemoComponents RequiredClick on them to purchase from amazon
- Arduino MKR 1000
- A 12V Battery
- DC motors
- Chasis
- L293D Motor Driver IC
- An Android Phone with RootSaid – WiFi Command Center installed
- A WiFi network
First thing to do is build a the chassis for WiFi Robot using Arduino. You can build it the way you like. Only think you should keep in mind mind is, it should have enough space for Arduino, L293D Motor Driver and a LIPO battery. For our project, I will be using a 12V LiPo Battery. You can use foam board or aluminium sheet or wood piece for building the base. If you want you can purchase one from here.
Step 2 – Power SourceAs mentioned earlier, I will be using a 12 V LiPo battery for powering our entire robot; that is the Arduino MKR1000 and the L293D Motor Driver IC to drive the circuit. We can provide 12 V directly to the motor driver Board I am using as it have an inbuilt regulator to power the motor and Circuit separately. But powering Arduino MKR1000 with this 12 V LiPo battery will fry the chip. So the best way is to use a voltage regulator that will step down 12 V to 5 V. You can Purchase your Lithium Polymer Battery From Here.
Step 3 – Arduino and DC MotorFix a DC motor on either side of the chassis. You can drive the DC motors using using a good motor driver IC. In this project, I will be using Dual H Bridge Motor Driver IC – L293D which can control two servo motors at a time.
Design your own PCBs for your Project!I used Altium designer to draw the circuit and design the PCB. It is a powerful tool that can be used to design and create our own PCBs for our project as well as complex and multi-layer PCBs for industrial use.
If you are a DIY Electronic enthusiast, I bet this is gonna be really useful for you guys. I have been using it for the past 3-4 years and let me tell you guys, this is amazing! You can download the Free Trial of Altium PCB Designer from here.
PCB Design Tutorial using AltiumCheck out the below video to start designing your own PCBs in Minutes!
For more details on driving DC motors using L293D IC click here. If you are new to this, it is better to go through this before proceeding to the next step to get a better understanding of the project.
Get your Products – L293D Driver Board
Learn More About L293D Motor Driver IC
Step 4 – The Arduino


Comments
Please log in or sign up to comment.