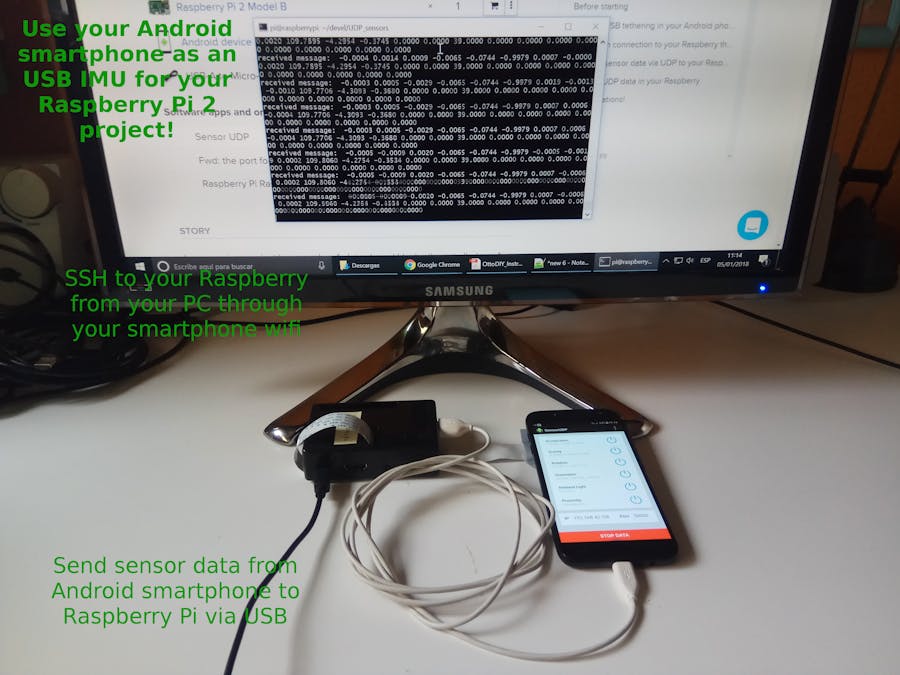
In my previous project I prepared an Arduino-based bluetooth controlled car. As a following step, I want to add the car an IMU. I bought one but found out that programming it with the Raspberry is not totally straight forward (besides, I think my IMU is broken :( ), so I thought that I could try to use the sensors in a smartphone as the IMU.
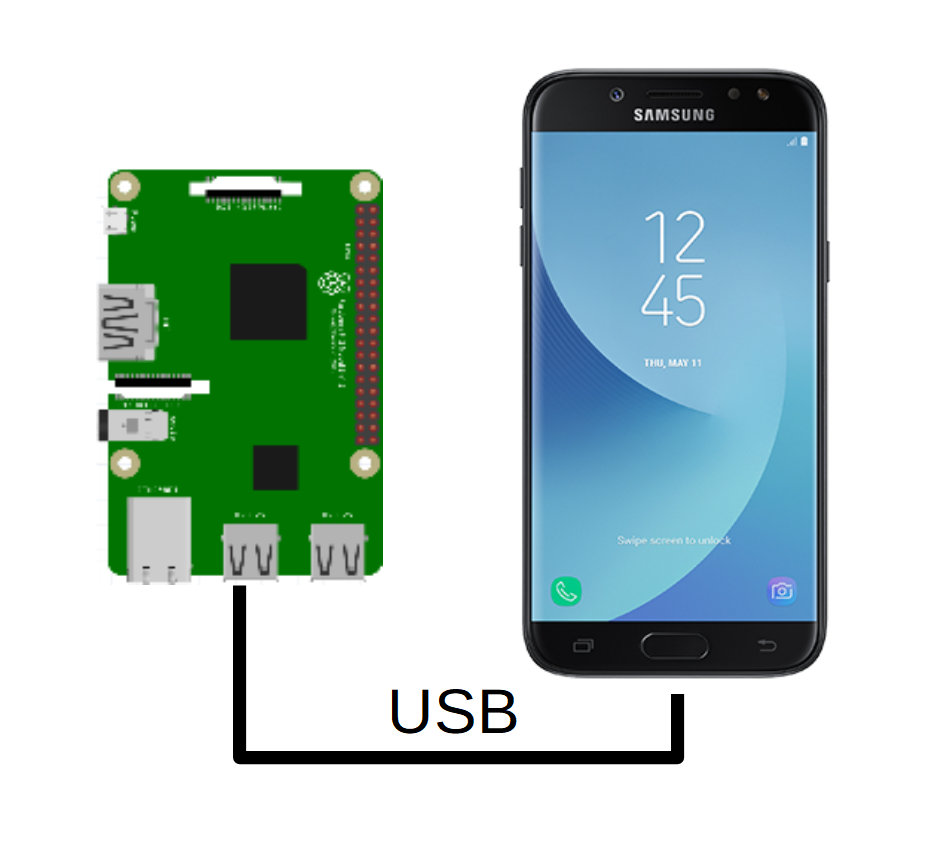
I thought that I could connect the smartphone to a Raspberry with an USB cable and send the sensor data to it through an UDP socket. Fortunately, some people already programmed some of the functionality needed and the project consisted in more configuration than programming.
At the end I have a functional system with a Raspberry connected to an Android smartphone with an USB cable. The Raspberry receives sensor data from the Android phone and you can even connect to the Raspberry via wifi through the Android phone (no need for a Rasberry wifi dongle or Ethernet cable)
Before startingYou will need some way to connect to your Raspberry during the configuration phase. That means you will need either your Raspberry to be connected with an HDMI cable and its own keyboard (and mouse if you normally use the graphical environment), or a wifi/ethernet connection set in your Raspi so you can ssh
to it.
Please note that basic use of the Raspi is out of the scope of this project so please refer to the official Raspberry web in order to learn the specifics of Raspi initial configuration and use, including connecting through ssh
.
I will interchangeably use Raspberry, Raspberry Pi and Raspi for referring to a Raspberry Pi model 2B. Probably all said here is compatible with Raspberry model 3, but no tests with other Raspberry Pis models has been done.
I am assuming you have a working LAN in which you have a PC and your smartphone connected through a wifi enabled router. With small changes (in theory only the IP addresses used would change) you could just prepare an small wifi LAN by using the smartphone mobile hotspot function to connect your PC and your smartphone. I tested this last option and also works.
I am using Raspbian Stretch version released in November 2017 and a Samsung J5 smartphone with Android 7. Sometimes, different phone brands have slightly different settings menu items. You will have to look for your specific menu item although it should be very similar to the examples provided. Please use the comments to add your setting and help people with other devices.
I tried several phones. Some worked and some did not. In the next lines I summarize some of the phones tested.
- I tested a Lenovo A806 (Android 4.4.2 based) and everything worked!
- I tested a Xiaomi Redmi Note 4 (Android 6.0 based) and all ok!
- I tested a Cubot phone but were unable to initiate USB tethering correctly. :(
- I tested a Leeco Pro 3 (Android 6 based) using a USB type A to type C, but were unable to start USB tethering correctly. :(
The first thing I will do is configure the phone and Raspi so the Raspi has LAN communication with the phone and the Raspi is (at least partially) accessible from the same LAN as the smartphone is connected via wifi.
- Boot your raspberry.
- Connect the USB cable between your Raspberry and your smartphone.
- In your phone, go to Settings -> Connections -> Mobile hotspot and tethering and activate USB tethering (this can be different in your phone. Search the internet for USB tethering or USB shared connection in your specific model and Android version). Your Raspi will automatically notice this and set up a new network interface using USB and with an IP address dynamically assigned by the phone. (In Lenovo A806, the link for the setting is Settings -> (Wireless & networks) More -> Tethering & portable hotspot -> USB tethering) (In Xiaomi Redmi Note 4, Settings -> (Network) More -> USB tethering
- Go to your Raspberry (physical screen or
ssh) and check the IP address it has been assigned through its USB. In order to do this, just use the console/xterminal orsshand callifconfig(see image below). Look for the section that describes the interface calledusb0. In that section you will see the word inet followed by an IP address. That is the address that the phone assigned to your Raspi. In the image below, address192.168.42.100has been assigned to the Raspi.
In theory, every time you activate the USB modem for your Raspi, the phone could assign a different IP to your Raspi. This is not convenient as you need to know the Raspi IP in order to send the sensor data to it. If the Raspi IP changes every time you connect it to the phone, you will need to look for the Raspi IP and change your configurations in the phone in order to use the new IP. This can be avoided by telling the Raspi to set a specific static IP.
I searched how to do this and found some places where you are suggested to make changes in the Raspi /etc/network/interfaces file, but I found that if changes are made there, I lost my other automatic wifi connection. Although the automatic wifi connection is not needed at the end of this project configuration, I found a way not to loose it. I just read the note in the top of the interfaces file and followed the instructions there.
I just went on and changed the file /etc/dhcpcd.conf . I added the following lines at the end of the file:
interface usb0
static ip_address=192.168.42.100
After that, reboot the Raspi and remember to activate the USB modem in your phone again once the Raspi is restarted. If everything went well, you should see that IP in your Raspi usb0
interface when you call ifconfig
. Notice that the IP address you set as static does not need to be the same that the phone dynamically assigned.
At this point, your Raspberry should have a known IP set (192.168.42.100
) and it should be connected to your phone correctly. It would be cool to enable ssh
through the phone wifi, but the Raspi does not seem to be reachable from devices connected to the same wifi as the phone.
There are more correct ways of doing what I will explain in this step, but they would require a rooted Android device... and I don't want that! Fortunately there are apps that allow you to perform port forwarding in your android. They are limited, but they are enough for this project.
I used the very useful app called "Fwd: the port forwarding app" by Elixsr Ltd.
You need to add a rule telling the app that connections coming to the phone through some non-restricted port should be forwarded to another port on your Raspi.
In our Raspi (IP 192.168.42.100
) we have a running ssh
service which is attached to its default port 22. Now we need to set a rule in the app to forward connections coming to a port (let's say 52000, for example (low numbers are reserved, so 22 is not allowed here!)) to the Raspi. We also need to set which interface in the phone is receiving the connection. In our case should be wlan0
(the wifi interface):
This could be read as "forward connections to this phone's wifi interface (wlan0
), at port 52000 to our Raspi (192.168.42.100) at its port 22".Once the rule is created (remember to save and enable), just go back and press start
.
At this point, connection to your phone via wifi on port 52000 should be forwarded to the Raspi's port 22. That means you can ssh
to the Raspi connecting through your phone's wifi IP (you can see it in Settings -> About this phone -> Status -> IP address
) using port 52000.
If you use the standard Linux ssh
command it should be something like (assuming your phone's IP is 192.168.1.56
and your Raspi user is pi
):
> ssh -p 52000 pi@192.168.1.56
You can, of course, use ssh
options like -X
or -Y
if you have a running x server.
If you use other ssh
applications like Putty or Bitvise, just remember to change the port to 52000, because those apps will just try to connect to the default port 22 if not otherwise specified.
Notice that at this point you can just disconnect your Raspberry from its monitor/keyboard and remove its Ethernet and wifi dongle, leaving it with just your smartphone as its connection provider. You can just connect to it via ssh
through the smartphone!
You could just develop your own Android app to send sensor data through an UDP socket to the Raspi. In theory it shouldn't be very difficult but very fortunately, author Pasan Weerasinghe already did that for us. Kudos for him! You can find the "Sensor UDP" app in the google play store.
This app reads the sensors that we set and just sends them to a host and port that we specify, using UDP protocol. You just need to set the host IP and port that you want to send the data to. In our case we want to send to the Raspi (192.168.42.100
) and to port 50000 (for example). Just set those values and press the "SEND DATA
" button.
At this point, data should just be being sent to the Raspi's port 50000. But ... we need to read them somehow!
A simple python script should suffice as an example of how to do it. The code is very simple and was taken from the link in the UDP sensor app page in the google play store. The file is in the code section and named "sensors
". You should copy it to your Raspi and you can run it invoking python sensors.py
in the folder where you copied it.
> cd <folder_where_you_copied_the_sensors.py_file>
> python sensors.py
The output to your console is just a continuous stream of lines with the values of your sensors. You can change the activated sensors in the Sensor UDP app to know which fields in the strings correspond to which sensors.
This is not a very exciting use of the sensor values, but the script shows you how to get the pieces of data from the connection and from the pieces of data that are sent to the Raspi. Just locate the pieces you want and use them as you please. The key python function is unpack_from
in the struct module.
Hopefully you arrived to this point and every thing worked! Most probably not all went well in the first attempt and you needed to fiddle a little. I hope not much! From here, just add IMU power to your Raspi project! I am planning on preparing a small Android app that sends also the location (GPS) data through UDP. The idea is having a smartphone as a bunch of sensors and then use the Raspi as the robot/rover/crazy-monster brains. While doing all this I also thought that I could just use the smartphone as the brains and remove the Raspi in favor of an Arduino in order to act on motors and read other platform-specific sensors... but I will do that when I have some free time!
I hope you succeeded and enjoyed the project! Cheers!


Comments
Please log in or sign up to comment.