/*
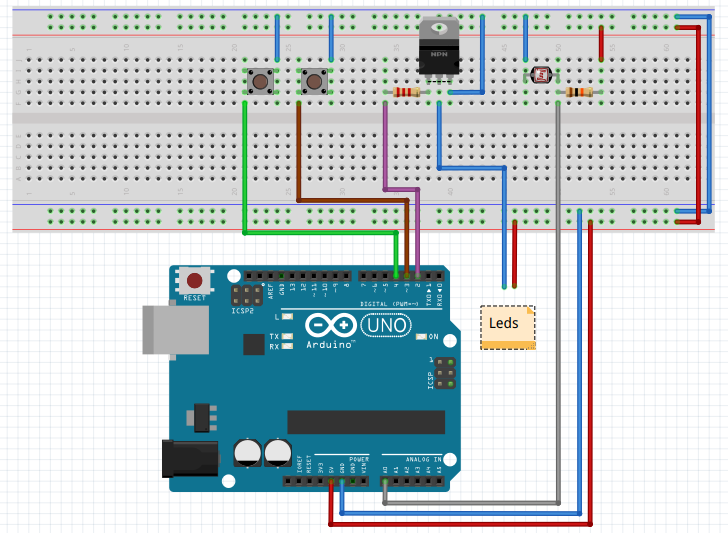
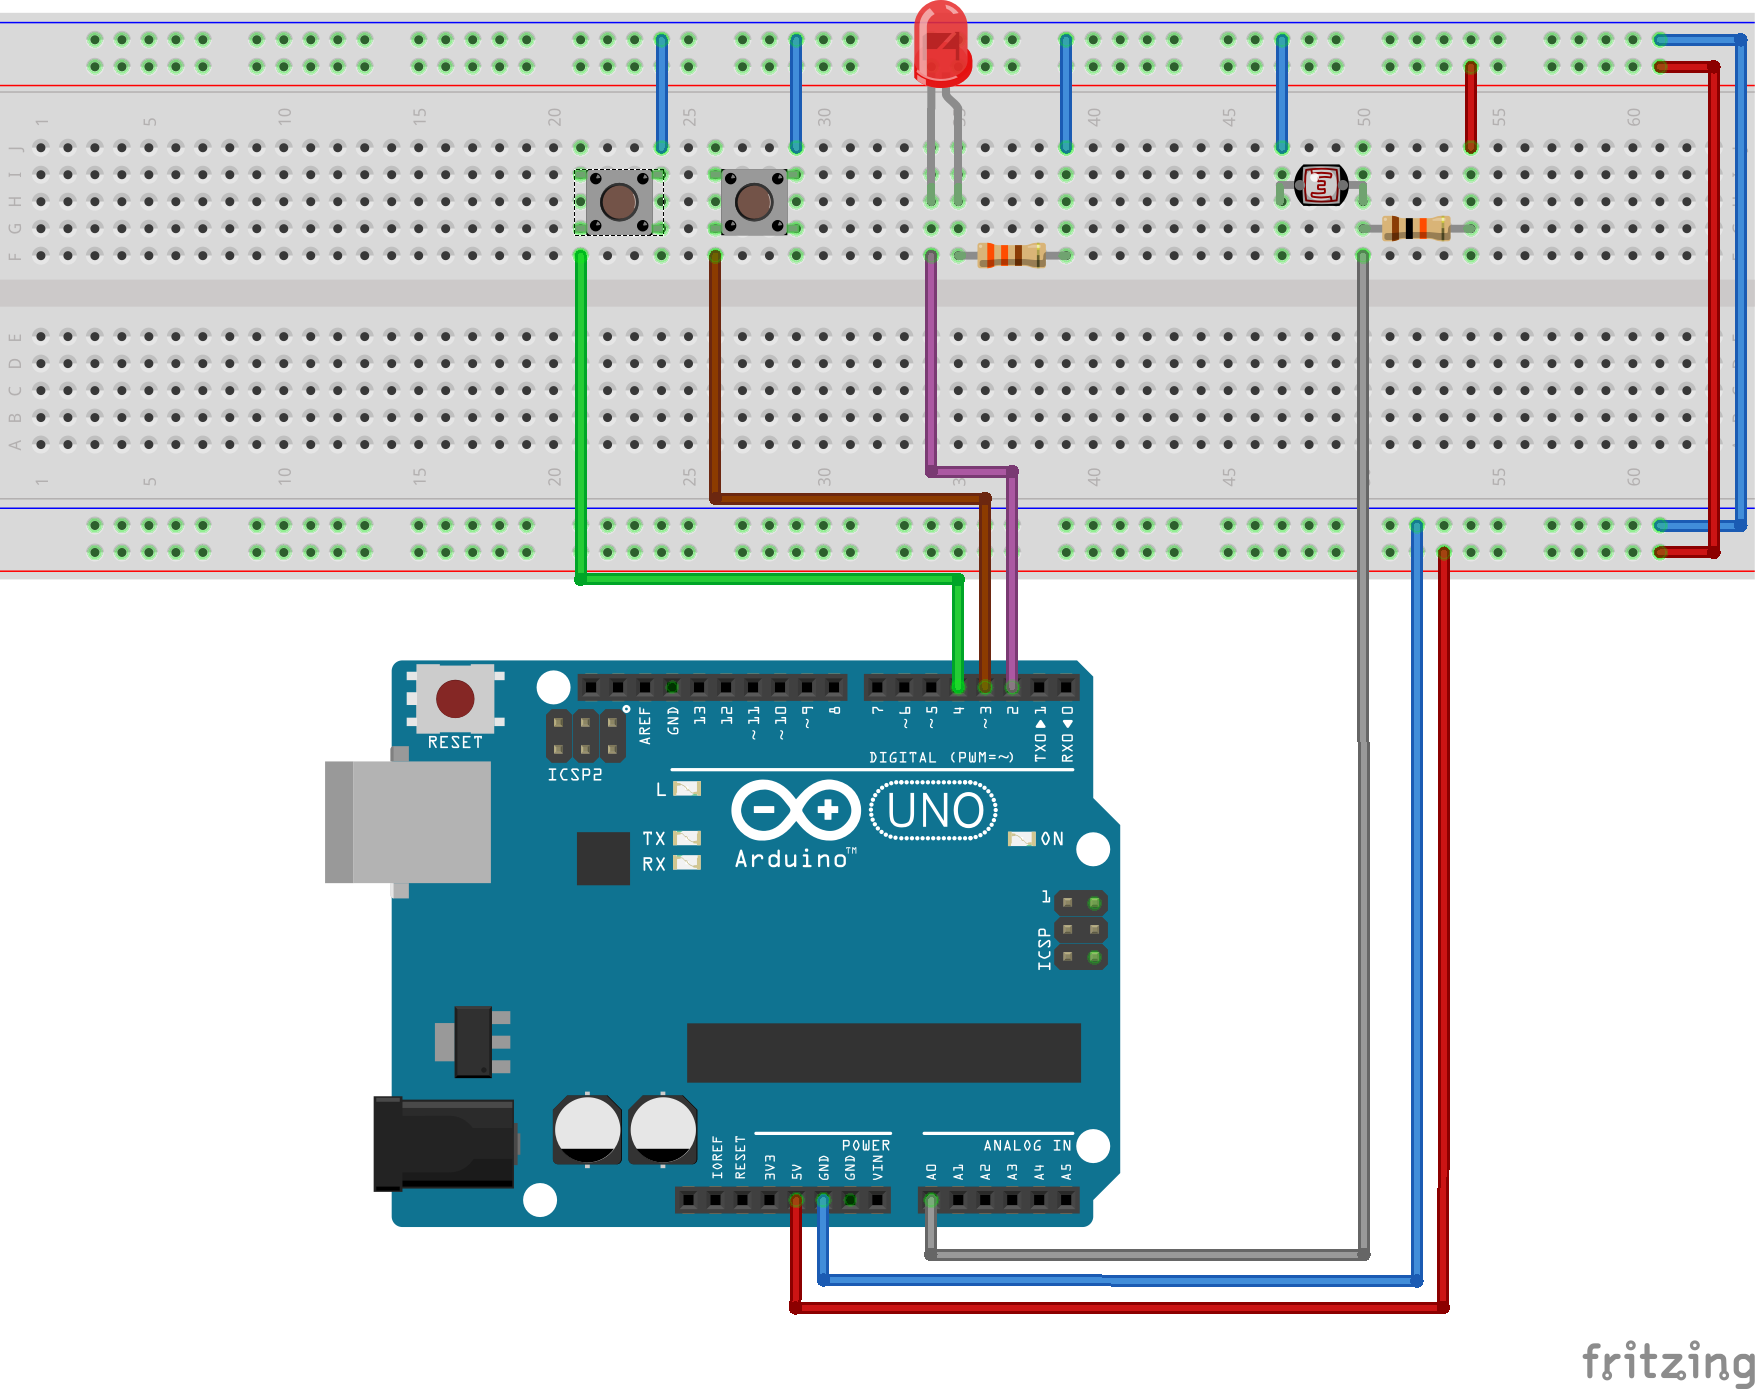
* Titulo: Sensor LDR
* Autor: João Pereira
* Email: joaodper@gmail.com
* Data: 25/07/2021
*/
#include <EEPROM.h>
#define SAIDA 2
#define B_MAIS 3
#define B_MENOS 4
const int LDR = A0;
int input_ldr_val = 0;
int val_saida = EEPROM.read(0);
void setup() {
// Configura a porta serie
Serial.begin(9600);
//Define a porta como saida
pinMode(SAIDA, OUTPUT);
pinMode(B_MAIS, INPUT_PULLUP);
pinMode(B_MENOS, INPUT_PULLUP);
// Desliga a saida
digitalWrite(SAIDA, LOW);
}
void loop() {
if (digitalRead(B_MAIS) == LOW) {
val_saida = val_saida + 10;
if (val_saida > 1024){
val_saida = 1024;
}
EEPROM.update(0, val_saida);
delay(200);
}
if (digitalRead(B_MENOS) == LOW) {
val_saida = val_saida - 10;
if (val_saida < 0){
val_saida = 0;
}
EEPROM.update(0, val_saida);
delay(200);
}
input_ldr_val = analogRead(LDR);
if (input_ldr_val < val_saida){
digitalWrite(SAIDA, HIGH);
} else {
digitalWrite(SAIDA, LOW);
}
Serial.print("LDR Value is: ");
Serial.println(input_ldr_val);
Serial.print("Value: ");
Serial.println(val_saida);
delay(10);
}

_ztBMuBhMHo.jpg?auto=compress%2Cformat&w=48&h=48&fit=fill&bg=ffffff)


Comments