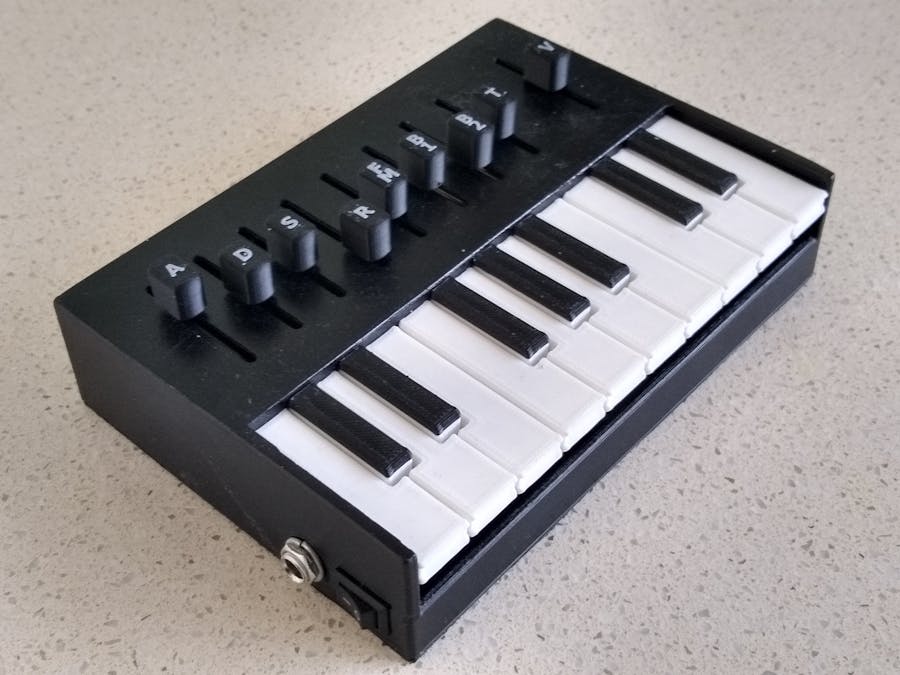
About a year ago, a small synthesizer called Scout Synth was uploaded to Thingiverse by oskitone. I really liked the 3D printed keyboard. A few years before, I had build a synthesizer called Arduino Soundlab based on an Instructable by rgco. So I decided to update my version to include this keyboard.
"Soundlab V2 - Key.stl" - 0.2mm layer height, start printing using white filament and change to black filament at the start of layer 35.
"Soundlab V2 - Knobs.stl" - 0.1mm layer height, start printing using black filament and change to white filament at the start of layer 101.
"Soundlab V2 - Top.stl" - 0.2mm layer height with supports
"Soundlab V2 - Bottom.stl" & "Soundlab V2 - Bar.stl" - 0.2mm layer height
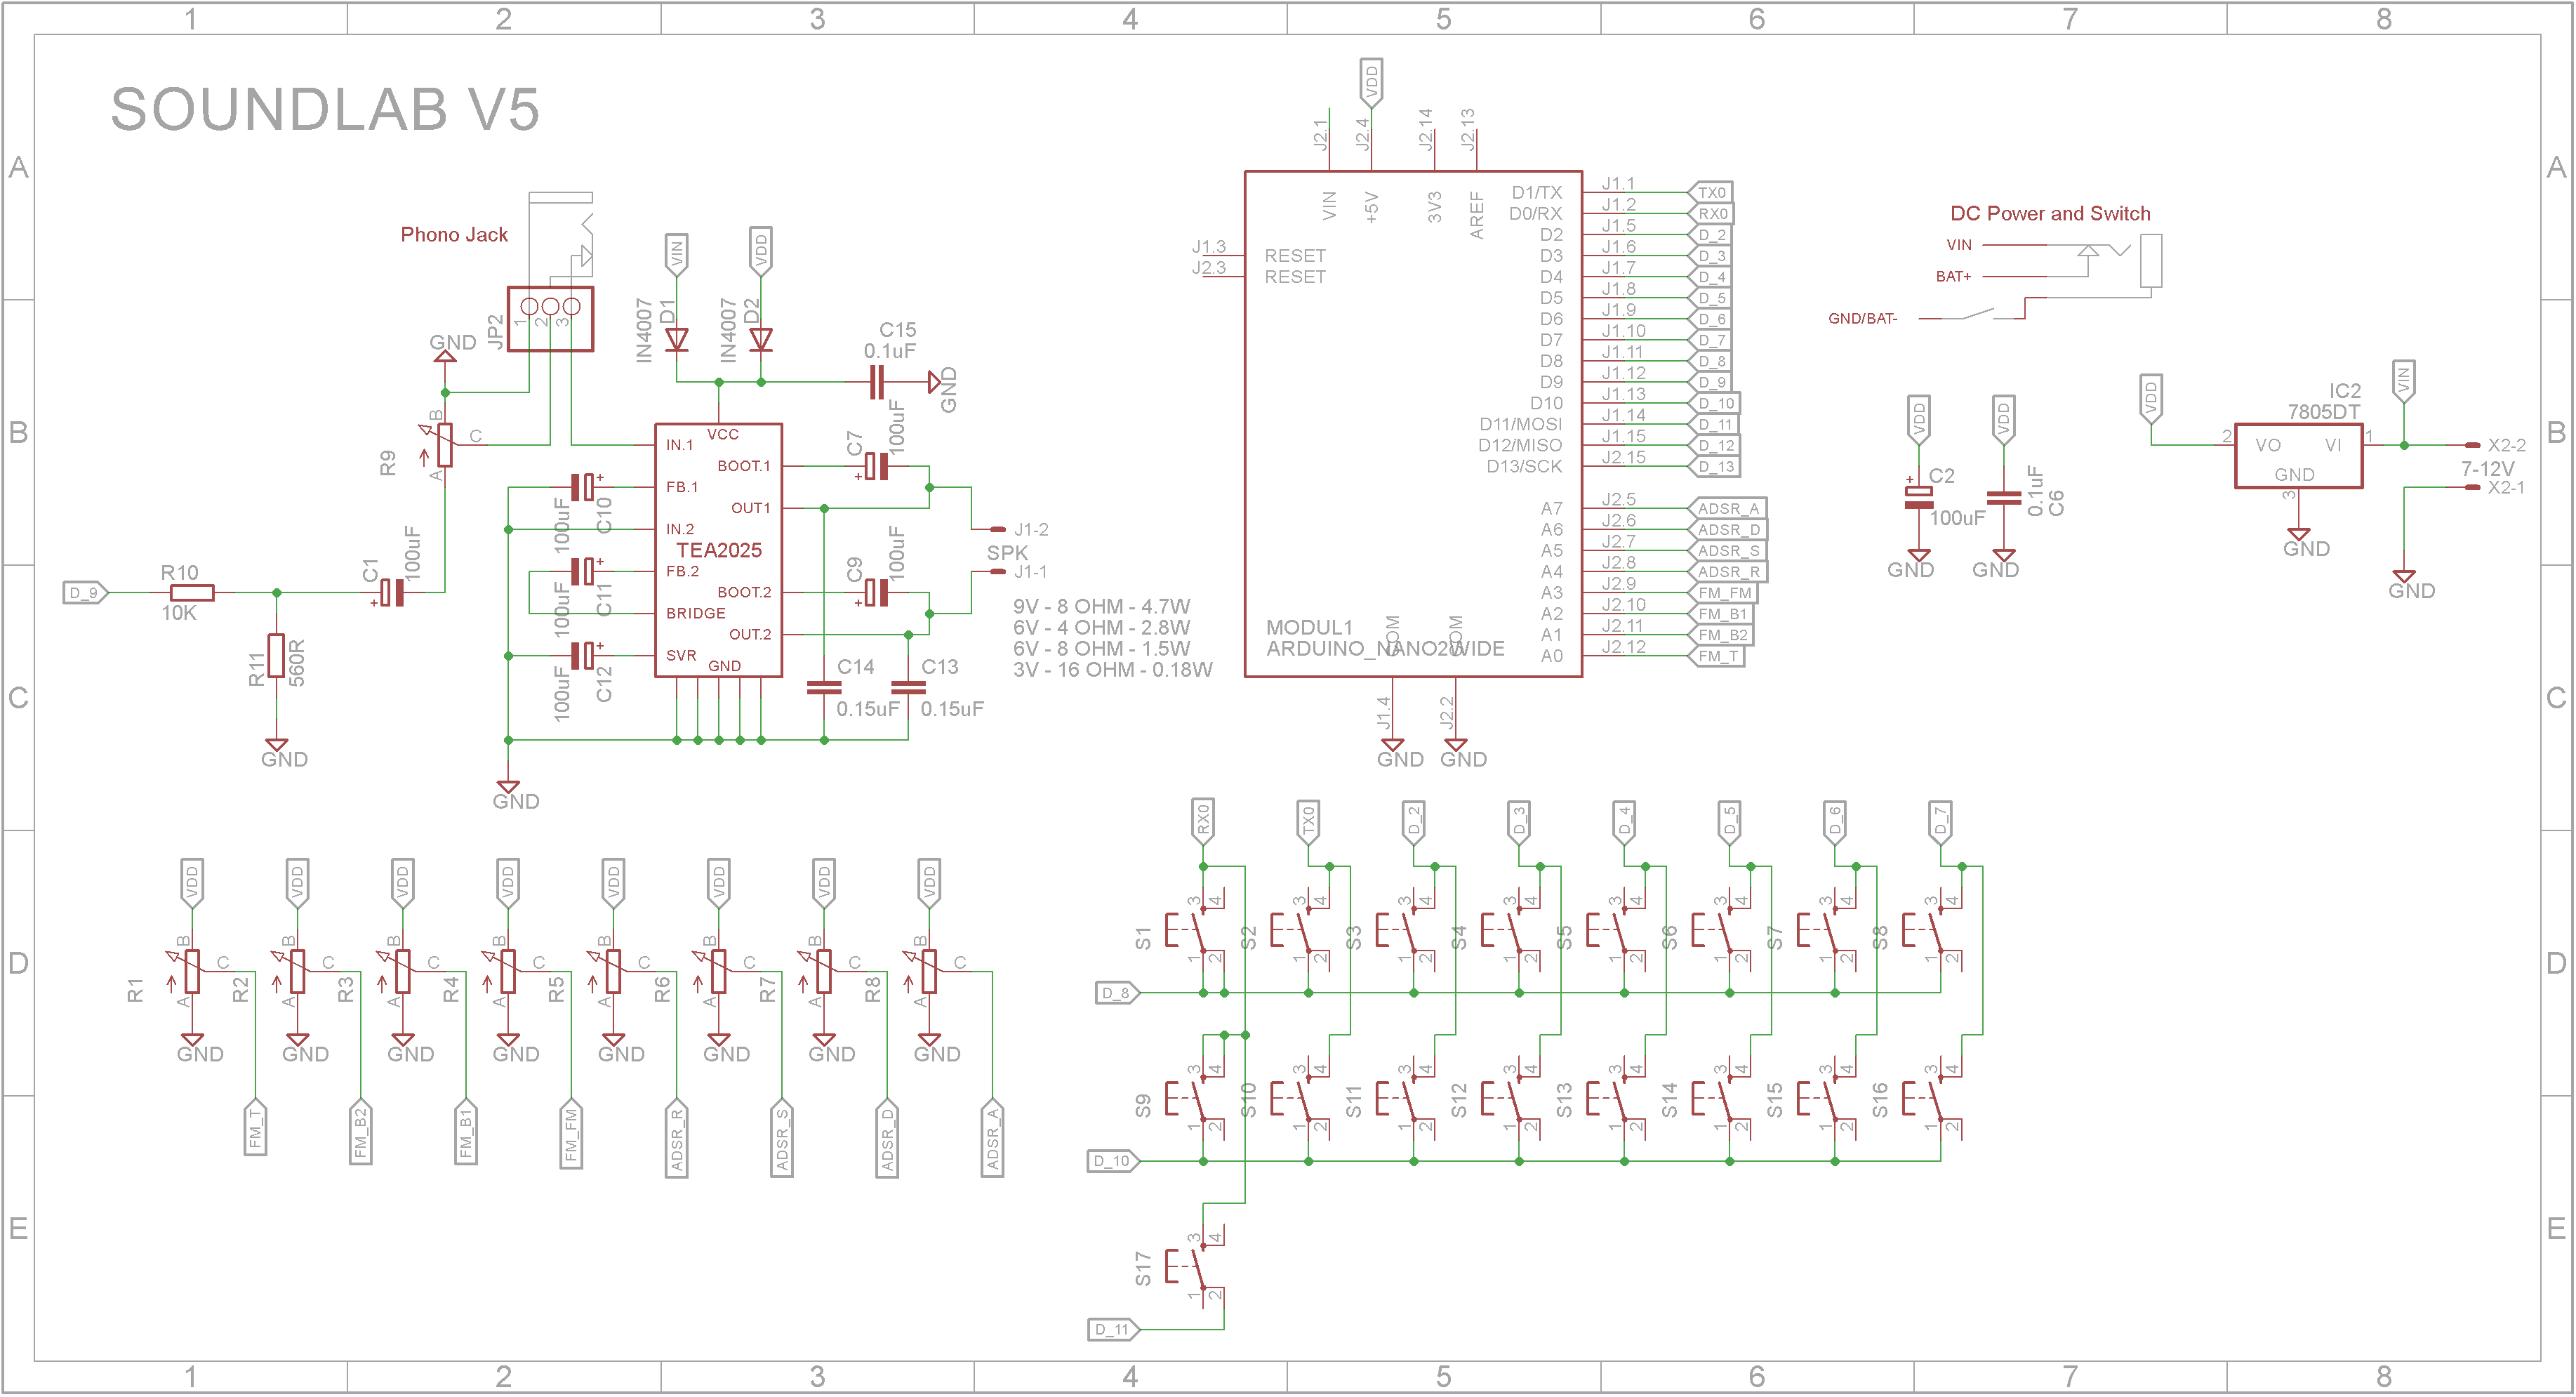
Electronics - DesignThe design uses a TEA2025 stereo amplifier IC wired in a mono bridge configuration. The TEA2025 can operate down to 3V and up to 15V. The output power is determined by the supply voltage and speaker impedance.
The final unit can run using an external power supply or it's internal battery (if fitted).
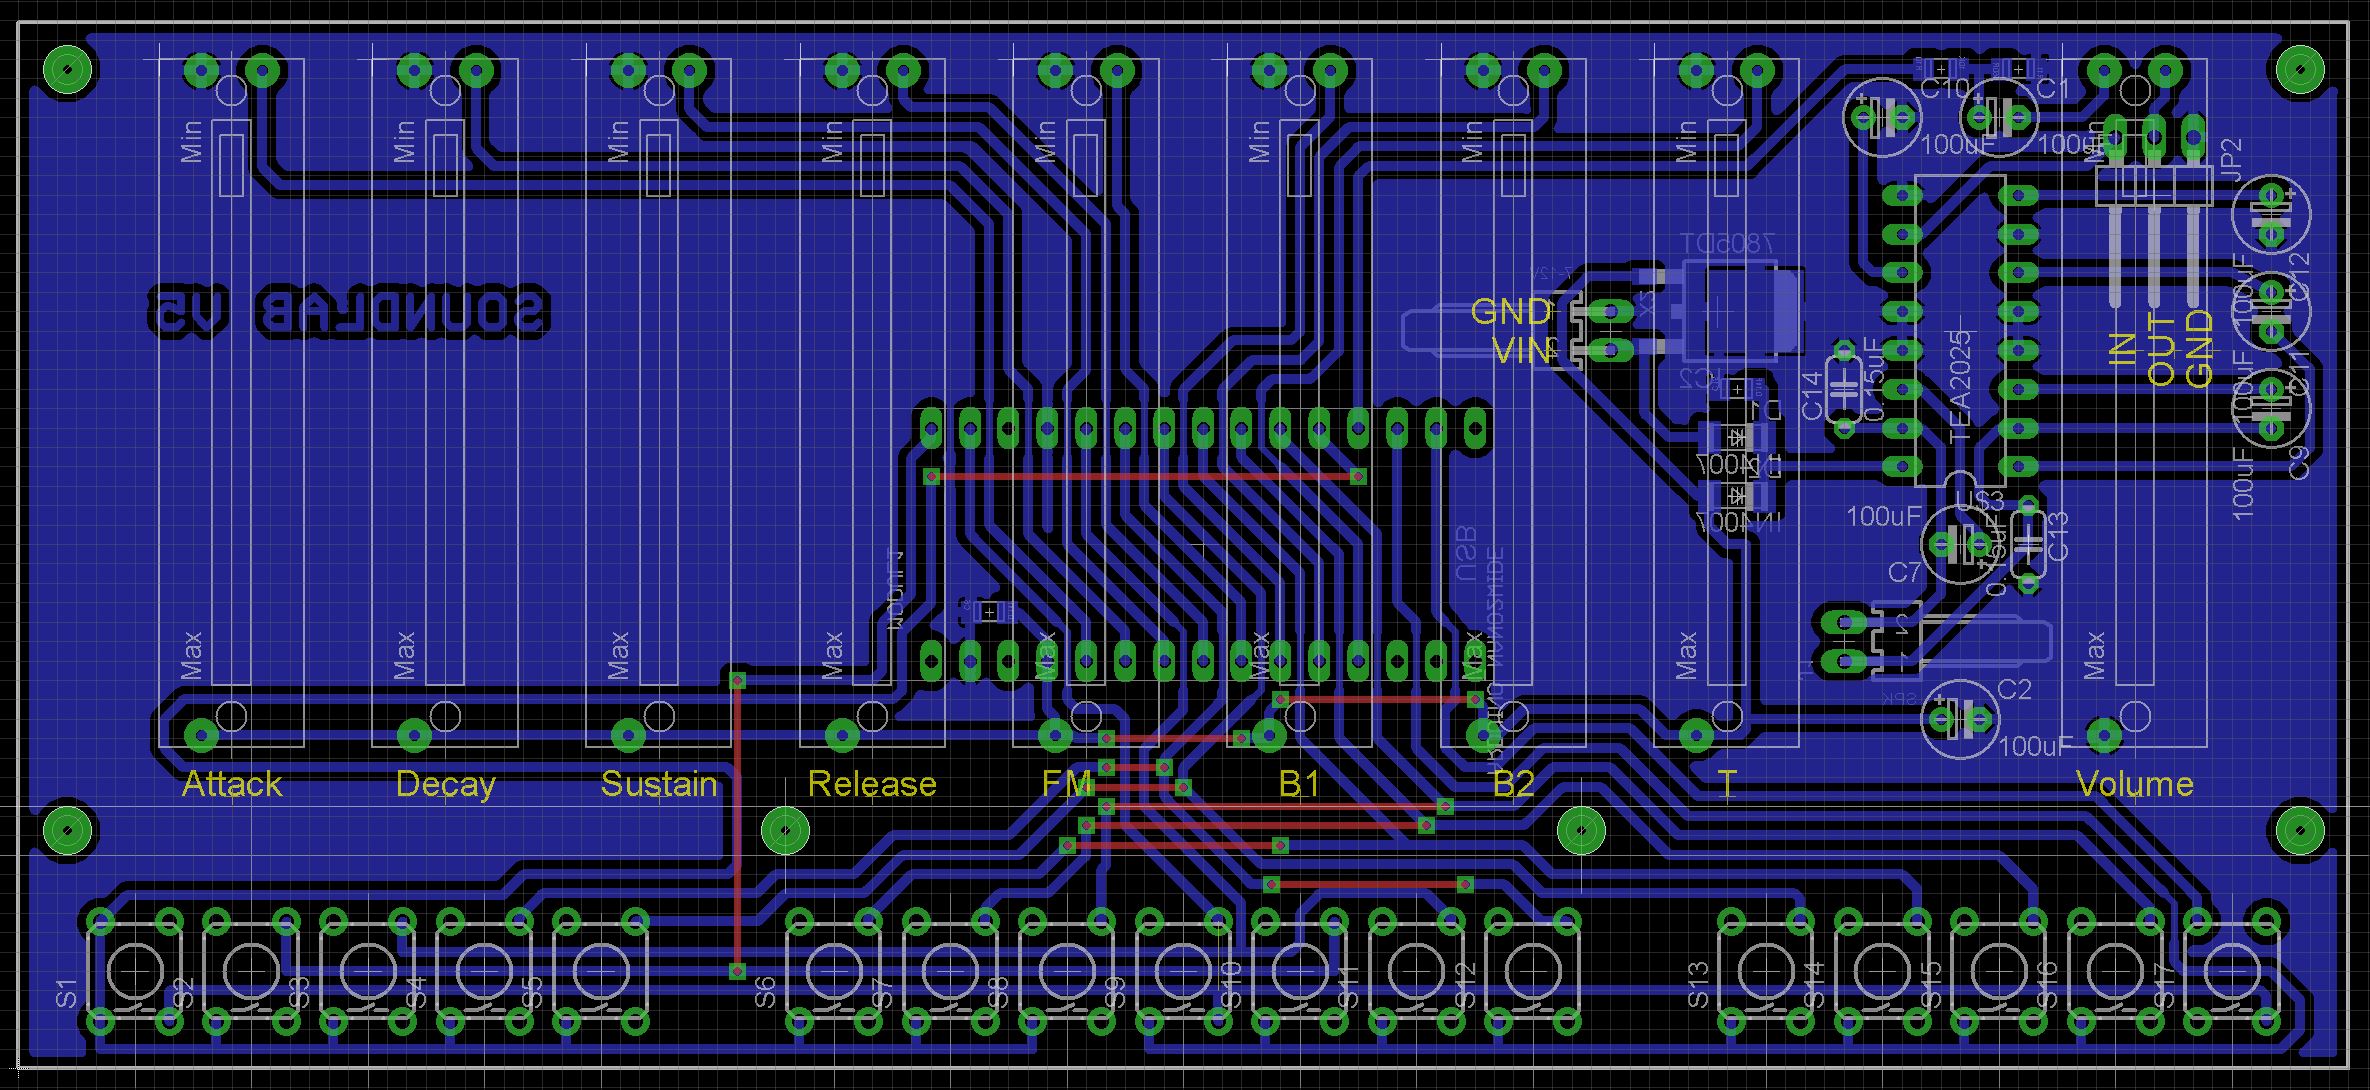
The Arduino Nano and 5V regulator is mounted on the copper side of the board so as to allow room for the slider pots and switches that sit on the component side.
I have included the Eagle files in case you want to get the board commercially made or do as I did and make it yourself. I used the Toner method.
Electronics - AssemblyStart by adding SMD components.
Add the links if your board is single-sided.
Next add the headers for the Arduino Nano
Add the right-angle pin headers for the speaker connection and headphone connection.
Add the right-angle KF2510 2.54mm 2-pin male right angle connector for the power connection.
Add the TEA2025 and capacitors.
Add the 17 6x6mm tactile switches.
Add the 35mm slider potentiometers. The Volume control should a log type and the others should be linear.
Add the Arduino Nano to the pin headers you added on the copper side previously.
The slider potentiometers that I used were bought from Rockby Electronics when they had them on one of their sales. Unfortunately they were all 10K log pots.
To address this issue, I modified the code to convert the log values to linear values. If you are using linear potentiometers, comment out line 18 in the code before you upload it to the Arduino Nano.
Use the Arduino IDE to upload the sketch attached. Make sure you set the board for a Arduino Nano first. If it fails to upload, your Arduino Nano might have a earlier bootloader (mine did) so you need to select "ATmega328P (Old Bootloader)" for the Processor option first.
Final AssemblyDrill out the 6 mounting holes with a 2.5mm drill and create a thread in each using a 3mm tap.
Add the keyboard first, followed by the bar and then the PCB. The four screws that go through the bar are 16mm M3 screws and should have a nylon or plastic washer to ensure the screw head doesn't short out any tracks. The other two screws are 10mm M3 screws and don't need a washer.
Wire up the DC power socket and switch. If you want to use a battery, wire the DC power socket so that the battery is disabled when the DC power plug is inserted.
Wire up the headphone jack. It should be wired in such a way to disconnect the speaker when the headphone plug is inserted.
Using double sided tape, fix speaker to the bottom so that it sits under the keyboard. Plug it into the two pin speaker connection.
Add the knobs to the slider potentiometers as shown below.
While not having as many keys as the other versions, you have to admit, it looks way cooler 😎. All in all, a fun build.


Comments
Please log in or sign up to comment.