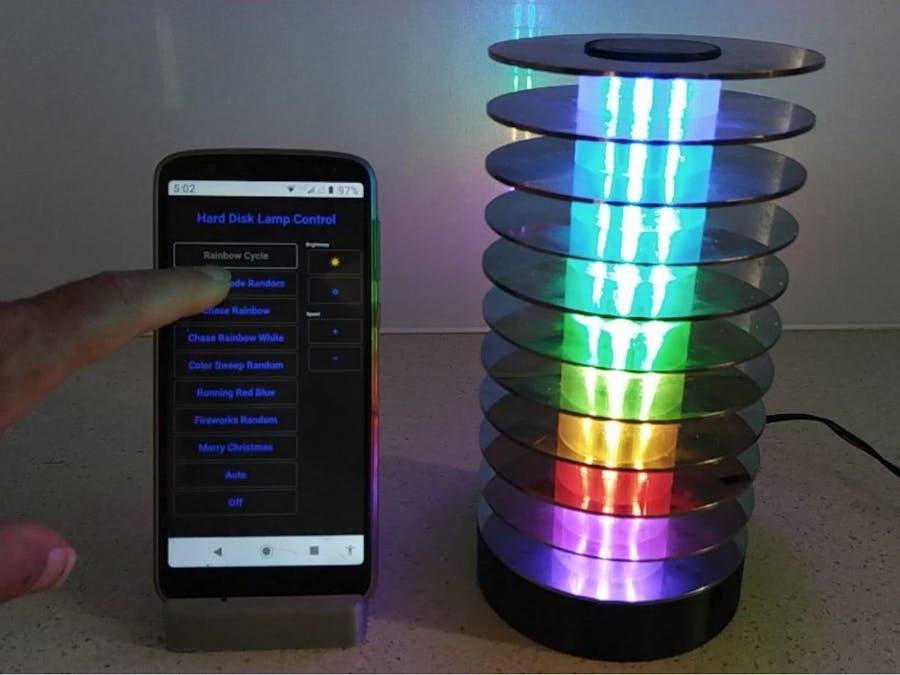
This unique lamp uses 11 hard disk platters and 60 RGB LEDs and would adorn any room in your home. It is controlled by a Web browser over a WiFi connection. It has eight animations that show off the beauty of this lamp.
Original VersionI would like to take credit for the design but this goes to Cosmic Mac (https://www.thingiverse.com/thing:3967804). The changes I have made are:
- Increased the height of the "Lampshade_centering_disc.stl" to make assembly easier.
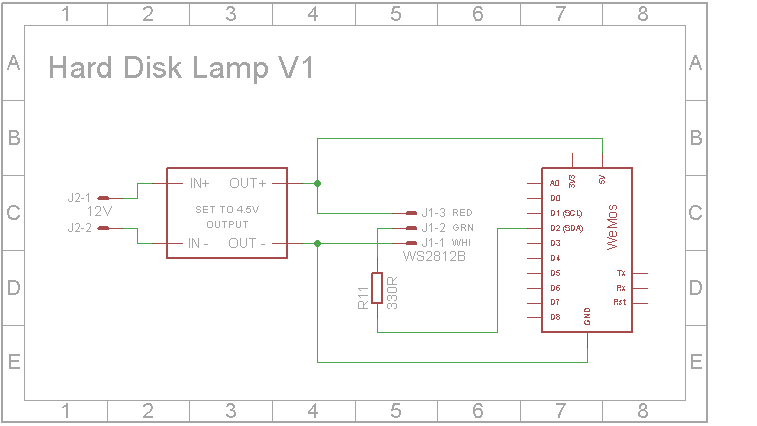
- Added a 3 Amp power supply because the WeMos cannot provide enough power through its USB port.
- Removed the infrared control system because to detect and decode the infrared signal from the remote, the processor needs to be dedicated to the task. The problem with WS2812B strips is they also need a dedicated processor because they are also timing critical when being updated.
- Added a Web Server so that the lamp can be controlled via a browser over the WiFi connection.
- Modified the WS2812FX library so the animations work well with the platters.
3D print Base, Lid, Axis and Nut in black PLA or ABS. 3D print Lampshade and Lampshade_centering_disc in transparent PLA or ABS. 3D print files can be found at Thingverse.
Cut the strips into 6 pieces with each piece having 10 LEDs
Solder three wires to VCC, DIN and GND on the first strip. Solder a short wire to DOUT on the same strip (this will connect to DIN on the second strip). Push the three wires through the hole at the thread end. Once in, remove the backing tape and stick it to the form.
The second strip must have its DIN at the opposite end where DOUT from the first strip ended up. Again solder a short lead to DOUT on the second strip. Solder the wire coming from DOUT of the first strip to the DIN of the second strip. Once this is done, remove the backing tape and stick it to the form. (Assuming the thread is at the bottom, the strips go anti-clockwise).
Continue this process until all 6 strips are in place. (Note, DOUT on the 6th strip is not needed so don't solder a wire to it). Next using some tinned copper wire, join +5V to +5V and GND to GND at one LED up from the thread.
At the other end, use hookup wire to join +5V to +5V and GND to GND where-ever there isn't already a connection between adjacent strips.
Start building the lamp. Stand the core on its top.
Put on a hard disk platter followed by "Lampshade.stl"
Next insert a "Lampshade_centering_disc.stl" into the next platter and then place on former. It should sit inside the shade and center itself.
Repeat the process until you reach the top. (Total of 11 Platters and 10 shades & centers). Finally add the base. I found that I needed a washer before putting on the nut. Use one of the washers that separates the platters on a Hard Drive.
Add the power socket and regulator.
Add the WeMos and the 330 ohm resistor and wire up the lamp.


Comments
Please log in or sign up to comment.