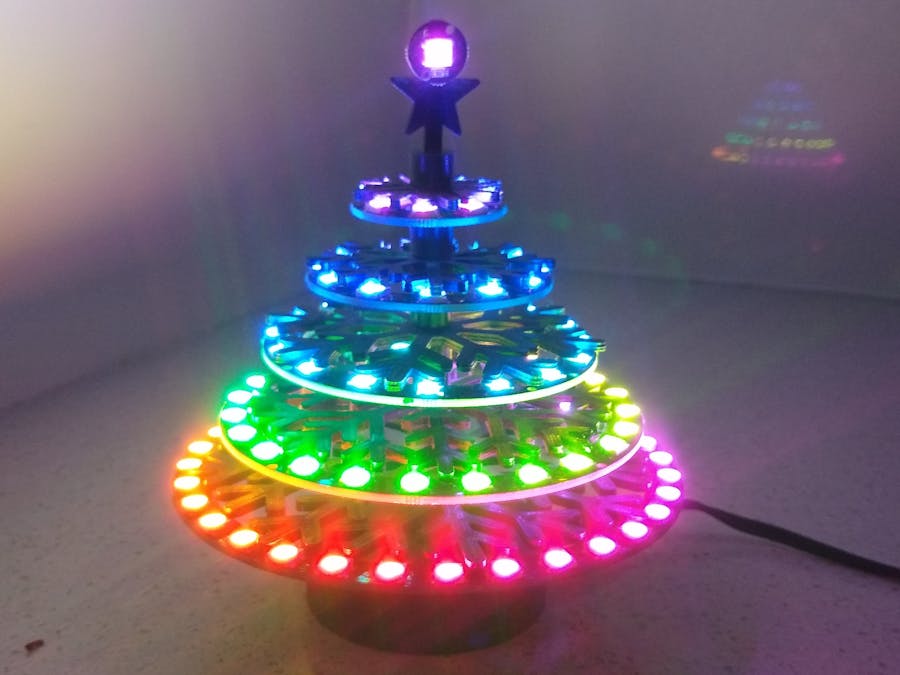
This NeoPixel tree is a 3D-printed variant of a laser-cut NeoPixel tree by Craig A. Lindley published in the November 2017 issue of Nuts & Volts Magazine. The base holds a ESP-01 board which acts as a web server allowing the tree to be controlled from a web browser. There are over 50 patterns to choose from.
VideoPrinting the PartsPrinting of the parts are straight forward. You may need a raft when printing the trunks. TreeV2 - Tree Bottom Trunk will need supports as well.
See: https://www.thingiverse.com/thing:3910914
Tree AssemblyPrint the five tiers and star. Using super glue, attach the tiers and star to their corresponding NeoPixel ring. I used wire-wrap wire to wire each segment. Solder and insert the wires on each segment before super gluing each segment and trunk. Start with the TreeV2 - Tree Bottom Trunk, followed by TreeV1 - 1st Tier.stl, followed by TreeV1 - Trunk x 5.stl and so on up to the star at the top.
Wiring example
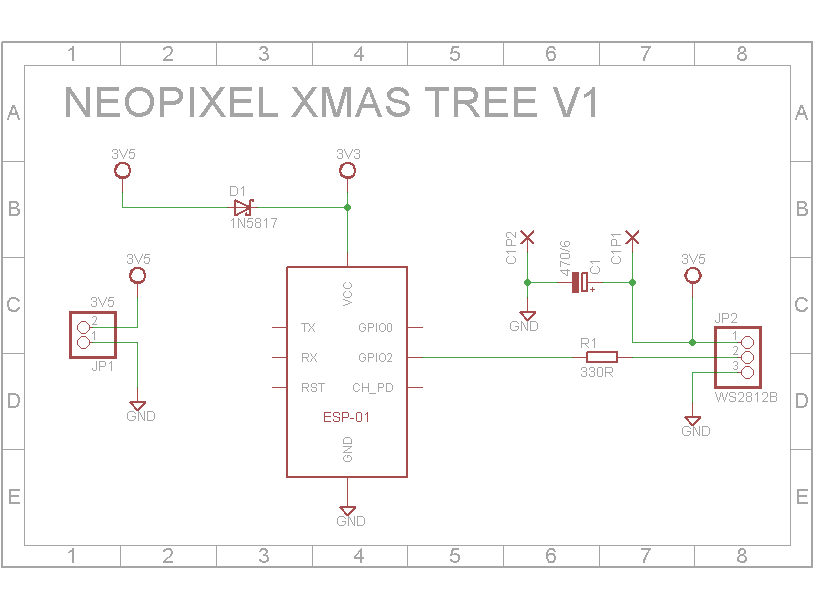
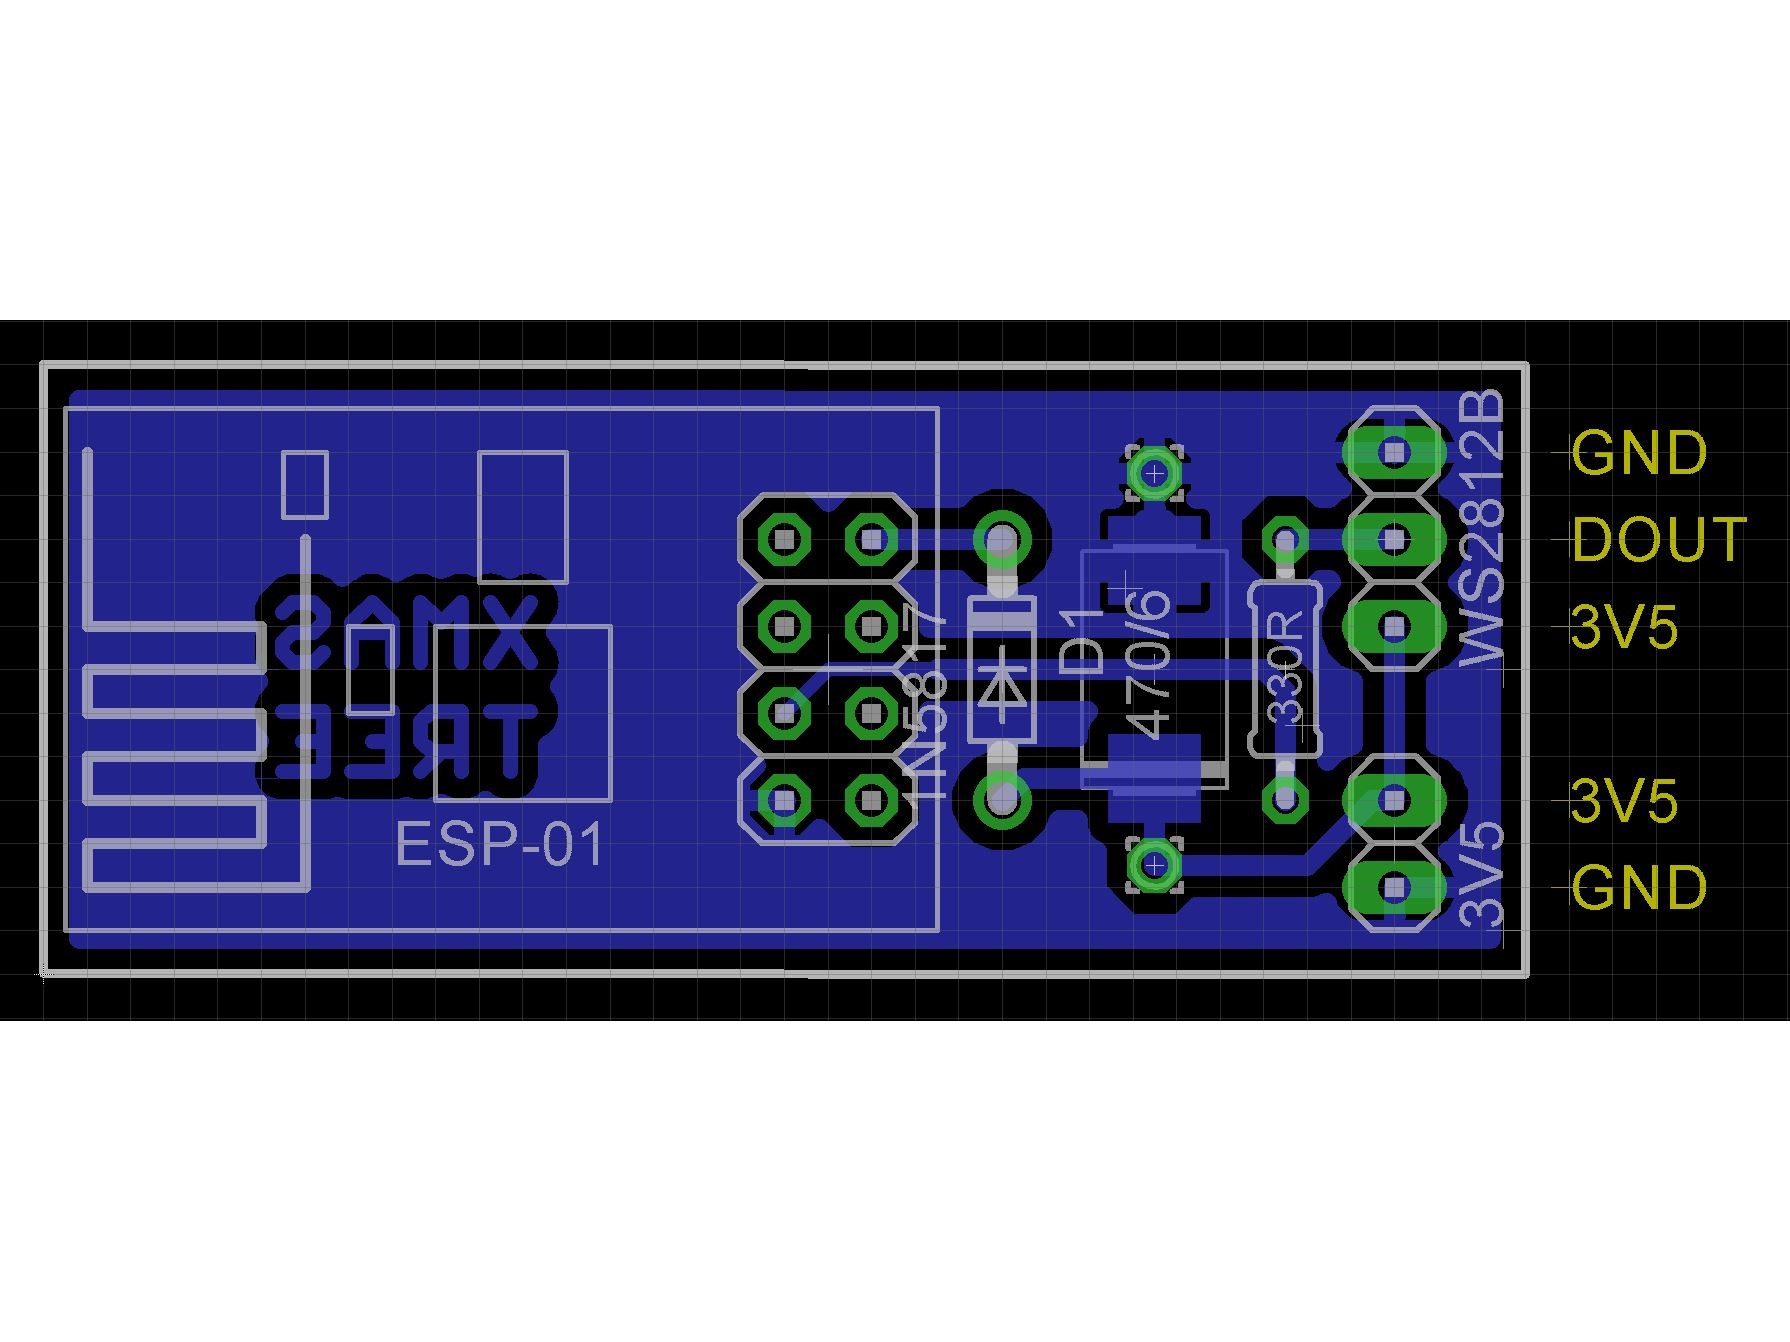
Eagle files have been included. I used a 470uF 6V tantalum SMD capacitor and soldered wires on it to make it into a through hole component because space is limited. You need to adjust the power supply so that 3.3V is provided to the ESP-01S. The WS2812B require a minimum of 3.5V according to the datasheet. The 1N5817 diode will have a voltage drop around 0.6V. This allows the NeoPixel supply to be above 3.5V minimum while ensuring the ESP-01 doesn't exceed 3.3V. I made my board using the toner method. You need to program and test your ESP-01 before soldering it to the board.
The only changes I have made to the original sketch is to change the IO pin and fix a couple of references to temporary variables that the compiler complained about.
ConnectingBefore you can remotely control the NeoPixel LED tree, you must first provide Wi-Fi credentials so the tree can connect to your local network. If the ESP8266 has not been connected to the Wi-Fi network previously, it will create a wireless access point called NeoPixelTreeAP that you must connect to with your computer. Once that is done, with a browser go to 192.168.4.1 and you will be presented with a page for assigning credentials. When you click on the SSID of your network and then specify the password, the ESP8266 should take down the access point and attempt to establish a connection to your Wi-Fi network. You can monitor the status of this process if you have the Arduino IDE’s serial monitor open.
Once you establish a connection to the Wi-Fi network, the ESP8266 will remember the credentials going forward. You should never have to go through this process again, unless you move the NeoPixel LED tree to another network or location. With Wi-Fi setup complete, change your computer back to your normal Wi-Fi network and navigate your browser to 192.168.0.3. If all is well, you should see the web page you will use to control the NeoPixel LED tree.


Comments
Please log in or sign up to comment.