Last year I realized that the safest way to display lights for the holidays would be to make a permanent installation using LEDs. After trying a few commercial LED controllers, I wasn't happy with the limited options for effects (no red, white and blue??), so I decided to create my own controller. I now have several of these controllers throughout my house for LED lighting effects. The first controller was mounted near my roof line to control a couple hundred WS2811 LEDs.
This project represents the third iteration of the controller. It is the first version to use a level shifter instead of a TTL NOT gate to convert the Nano's 3.3 volt output to 5V TTL for the LED strip. I had a lot of trouble getting the level shifting to work. I'm not sure using a level shifter is better than using a TTL NOT gate. The level shifter requires an additional 1K pull-down resistor to control inductive noise on the LED data line. The TTL NOT gates did not require this 1K resistor. Keep this in mind if you build this circuit. If you have any noise problems, then consider switching to a NOT gate. Just run the Nano output through two of the NOT gates to level shift and then un-invert the logic.
Accompanying video file showing the LED effects: https://photos.app.goo.gl/VuEwcWQFLXqoLUUF8
This project uses the Arduino Nano 33 IoT, the Arduino IoT Cloud, and optionally streaming ACN or Alexa to control 12 volt WS2811 LEDs. There are 4 connectors for 4 LED strips and each strip can chain together hundreds of LEDs. The default code sends the same effect to all four strips but this can be easily customized in the main TreeController_dec27a.ino file. The Arduino IoT Remote app can be used to control your lights from your mobile device. You can also link your IoT cloud account to Alexa and use it for voice control of your LEDs.
Here are some voice commands you can use (assuming you name your variables "tree_xxx" where xxx is the effect's name):
- Alexa, turn the tree color green
- Alexa, turn on tree fire 50%
- Alexa, turn on tree glitter
This project should also work with 5V WS2812 style LEDs. Just substitute a 5V power supply for the 12V supply in the schematic. Also change the call to FastLED.addLeds() and pass in WS2812 instead of WS2811.
Step 1 : InstallationHere is how to install this project.
- You will need an Arduino IoT cloud account. Go to www.arduino.cc->Cloud->IoT Cloud.
- Register your Nano 33 IoT with your account using the Devices tab of IoT Cloud. Click "Add Device" and follow the instructions.
- Create a "Thing". I named mine "TreeController" and that's why the main.ino file is named TreeController_dec27a.ino.
- You'll need to add the following Variables to your thing. There's no easy way to "import" these from my project so you will need to use the IoT Cloud Thing setup controls to add these one at a time. I used "tree_" prefix for the names because this is what Alexa will respond to when you use voice control. If you do not plan to link your Arduino account to Alexa, then you can simplify the names. I have several of these controller, however, so I use a different prefix for each controller "roof_", "counter_", etc. "Alexa, turn on counter color".
a. int bpm - beats per minute for the plasma effect
b. CloudColor color1 - color for effects that need multiple colors
c. CloudColor color2 - " "
d. CloudColor color3 - " "
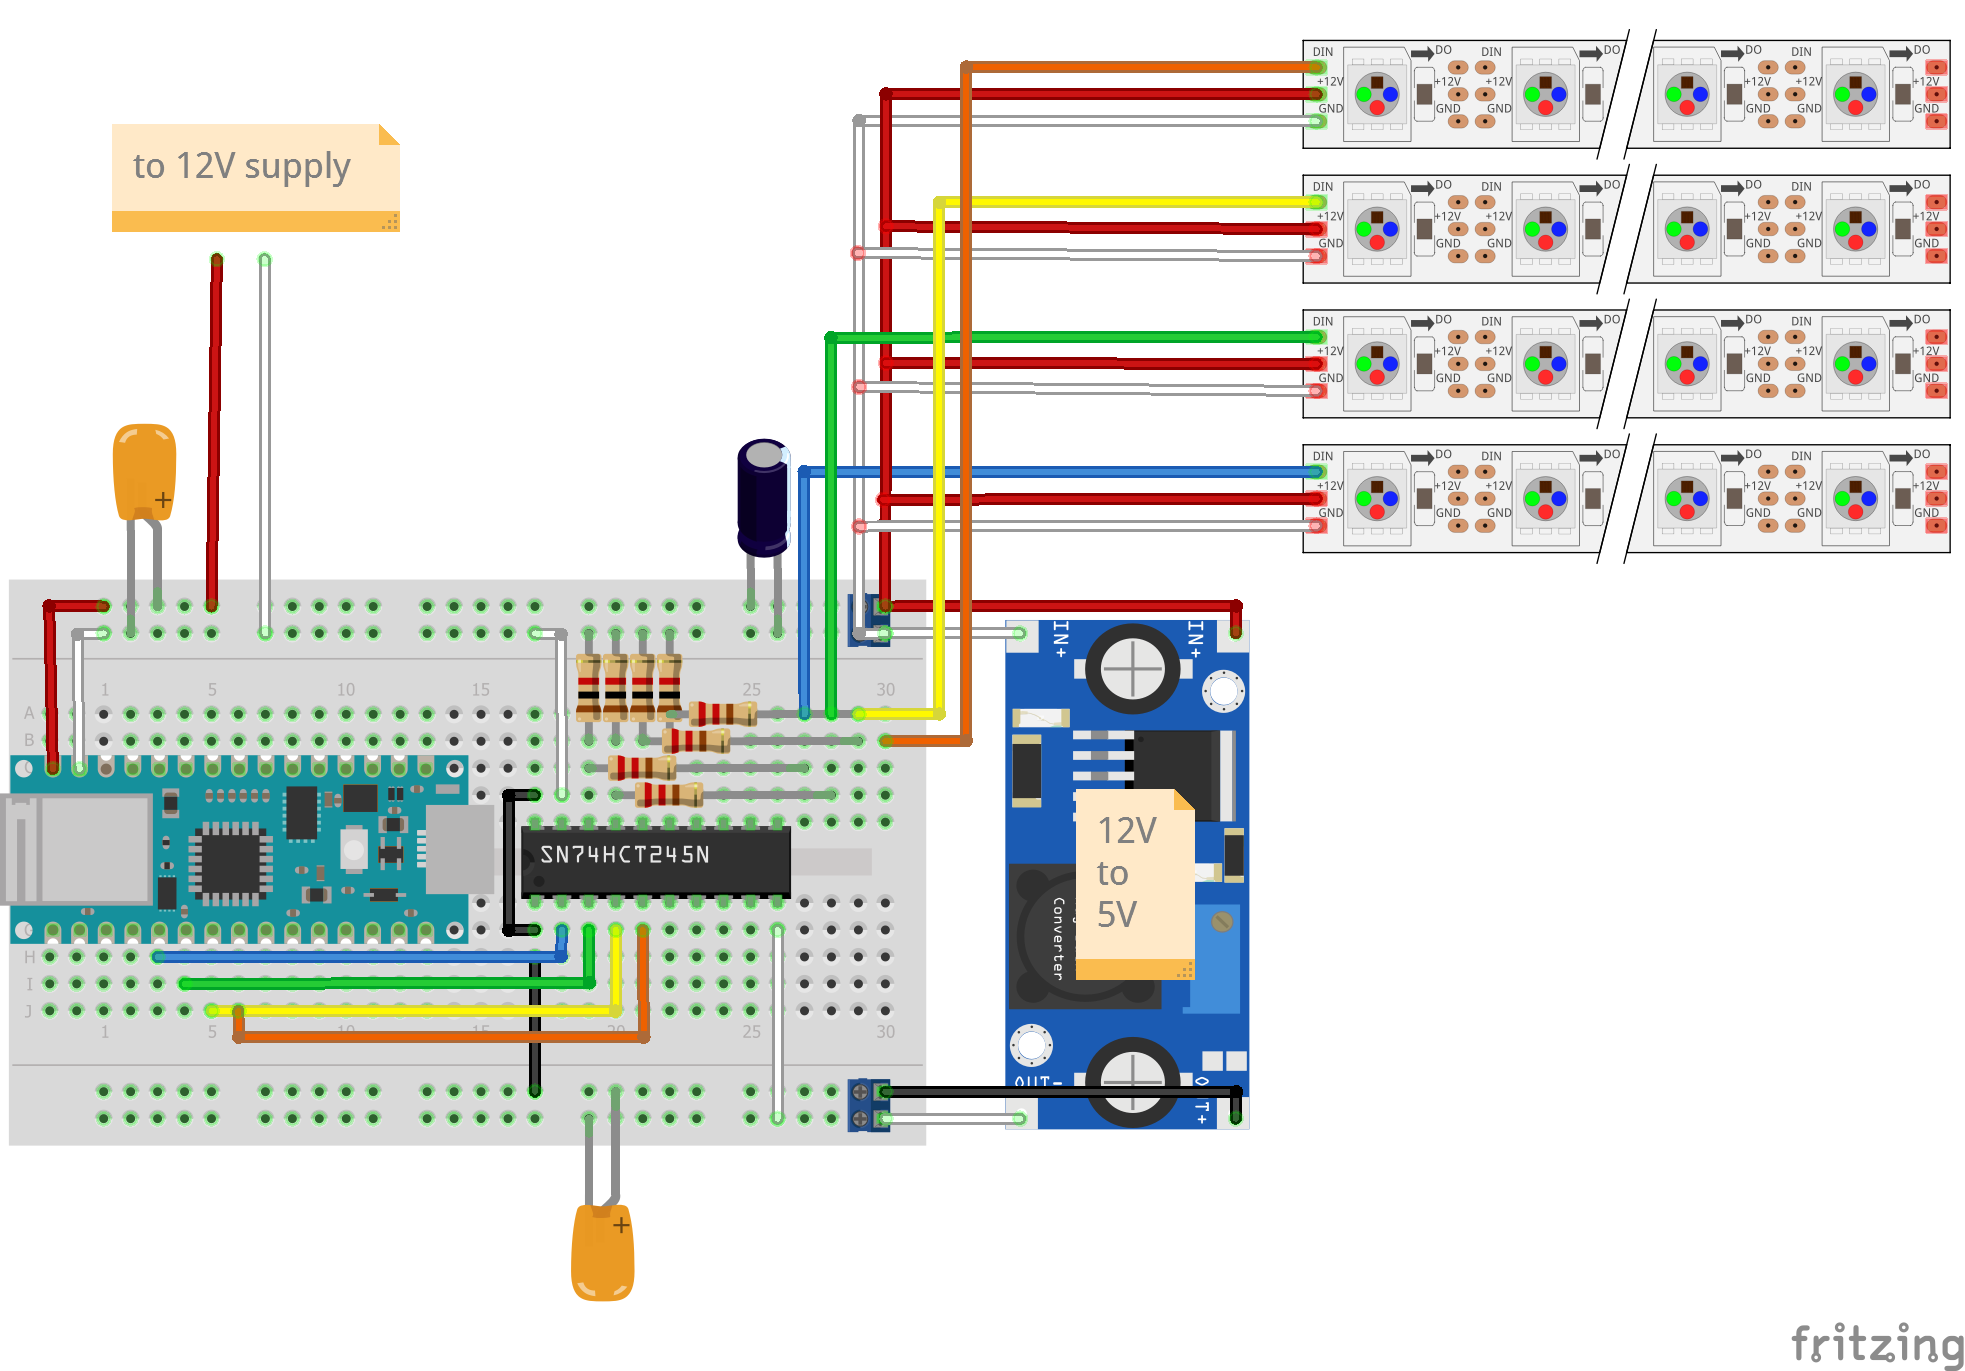
e. int numLedsOnPin2 - number of LEDS connected to pin 2 of Nano through the level shifter (blue wire)
f. int numLedsOnPin3 - " " 3 (green wire)
g. int numLedsOnPin4 - " " 4 (yellow wire)
h. int numLedsOnPin5 - " " 5 (red wire)
i. int rotateSpeed - changes per second (1 to 1, 000)
j. CloudTime runningTime - read - only - milliseconds since start up - used to determine "online" status
k. CloudDimmedLight tree_blend - controls blend effect
l. CloudColoredLight tree_color - controls the all - one - color effect
m. CloudDimmedLight tree_confetti - controls confetti effect
n. CloudLight tree_glitter - adds glitter effect
o. CloudDimmedLight tree_lightning - controls lightning effect
p. CloudDimmedLight tree_pattern - controls pattern effect
q. CloudColoredLight tree_plasma - controls plasma effect
r. CloudDimmedLight tree_rainbow - controls rainbow effect
s. CloudDimmedLight tree_sacn - controls stream ACN E13.1 effect
t. CloudDimmedLight tree_sweep - controls sweep effect
u. int universe - universe number for E13.1 streaming ACN
- Link your Thing to your Nano 33 IoT device. There is an "attach" button in the IoT cloud thing setup.
- Go to the Sketch tab and then "Open full edtor". The simple editor cannot import.
- Import the sketch using the import button. You'll need to copy paste the imported.ino file to the one provided by the IoT cloud.
Photo of assembled circuit: https://photos.app.goo.gl/EMdDA4vWgxhGjG2t7
The circuit assumes you will have a 12V DC power supply for your WS2811 LED strip(s). I connected ground, +12V and the data line through JST connectors. If installing outdoors, I suggest you use waterproof automotive connectors instead. Power injection will also be needed if you have more than a dozen or so LEDs or else the far away LEDs will be dimmer due to voltage drop across the LED strip. I've seen 12V WS2811 LEDs work with as little as 7V, though.
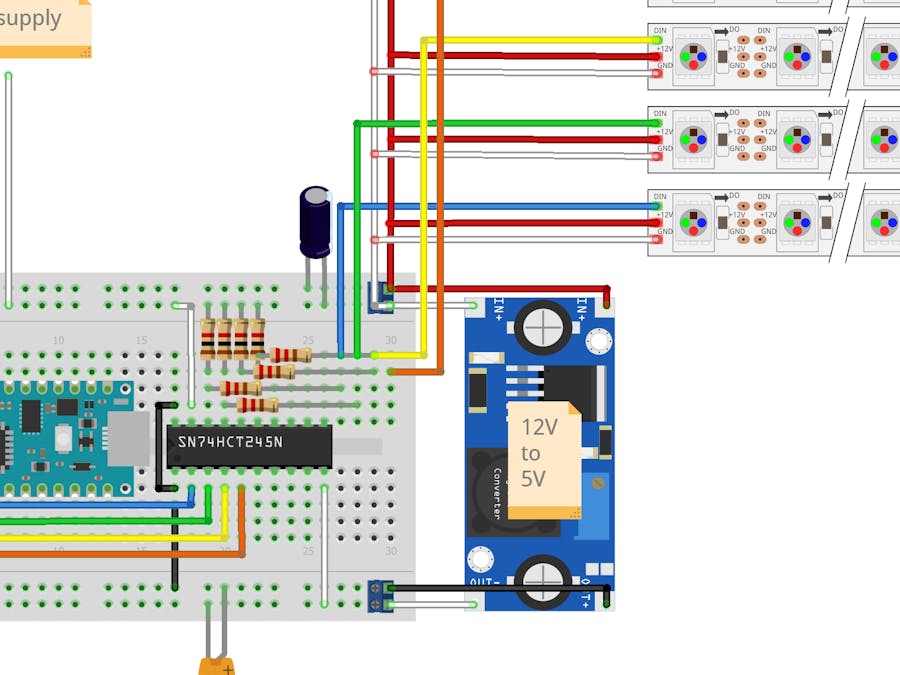
Assemble the circuit following the diagram schematic.png attached to the sketch. 1K Ohm pull - down resistors are used on the level shifter output. My oscilloscope tells me that's the best way to reduce inductive feedback on the data line going to the LEDs. 220 Ohm resistors are also placed in series withthe data line. This also reduces noise and prevents the LEDs from flickering, especially when turned off.
I used a LM2596 DC - to - DC voltage buck converter to step down 12V to 5V for use with the level shifter. These converters are probably overkill (3A output!) for running just one IC but my experimenting shows they work the best. You will need to adjust the potentiometer on the converters to get the 5V output required. Mine didn't come set to 5V.
Note that I left off the Cloud Connected status LED that goes to PIN 12 of the Nano. I plan on adding that later after I put this circuit board into an enclosure.
Step 3 : Load the codeUpload the code contained in this sketch on to your board using the upload button in your thing's code editor.
You'll need to copy/paste the code contained in TreeController_dec27a.ino to the.ino that is auto-created for your thing. You should then delete TreeController_dec27a.ino so there's only only main.ino file.
Folder structureTreeController_dec27a => Arduino sketch folder
├── TreeController_dec27a.ino => main Arduino file
├── schematics.png => an image of the wiring diagram
├── effect.h => Base class for all effects
├── E131.h => E13.1 Streaming ACN decoder, header
├── E131.cpp => E13.1 Streaming ACN decoder, code
├── effect.h => Base class for all effects, header
├── e131effect.h => E13.1 streaming ACN effect
├── effect.cpp => Base class for all effects, code
├── plasma.h => Plasma effect, subclass of Effect
├── rainbow.h => Rainbow effect
├── lightning.h => Lightning effect
├── sweep.h => Sweep effect
├── confetti.h => Confetti effect
├── pattern.h => Simple pattern effect
├── fire.h => Fire effect
├── blend.h => Blend effect
├── glitter.h => Adds twinkle effects to other effects
├── colored.h => All one color
└── ReadMe.adoc => this file
LicenseThis project is released under a public License.
ContributingTo contribute to this project please contact : john _at_ dillenburg.org


_3u05Tpwasz.png?auto=compress%2Cformat&w=40&h=40&fit=fillmax&bg=fff&dpr=2)

Comments
Please log in or sign up to comment.