


Hardware components | ||||||
_ztBMuBhMHo.jpg?auto=compress%2Cformat&w=48&h=48&fit=fill&bg=ffffff) |
| × | 1 | |||
 |
| × | 1 | |||
 |
| × | 2 | |||
 |
| × | 1 | |||
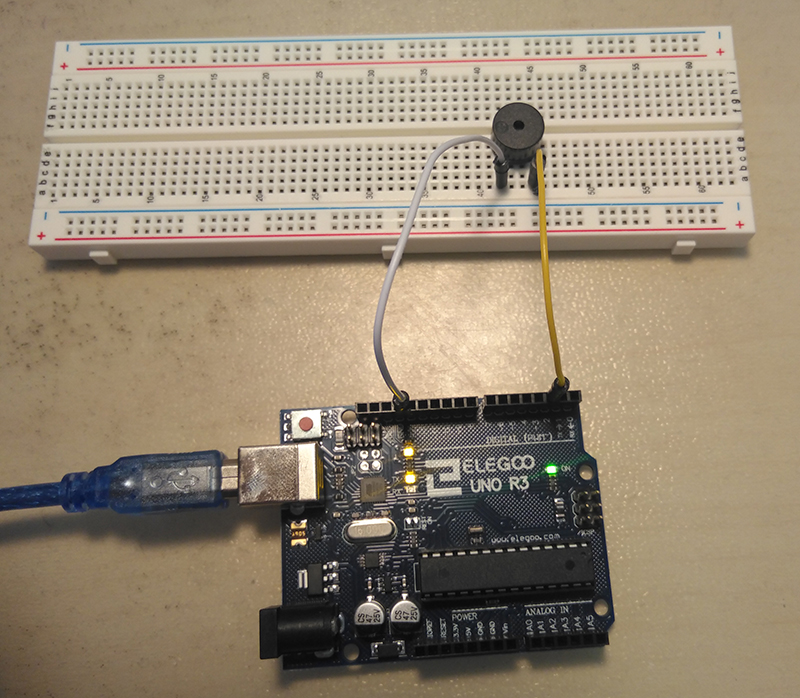
Originally, my task was to create an Arduino UNO alarm for a school project. The alarm consisted of a touch display displaying the time and menus, a buzzer playing a chosen ringtone when the alarm is supposed to ring, a power supply and a casing. Getting the alarm to properly play a ringtone was one of the main challenges of the project.
At first, I easily found some examples to play melodies on the internet. It's mostly slightly different versions of the same code floating around the internet, using delays to time when each note should be played. However, I quickly noticed that there are two problems when applying that code to my project:
- Since the code uses delays, the alarm cannot easily accept user input while playing a melody. However, input is required to stop the alarm from ringing, for example.
- The alarm offers various ringtones, stored in arrays. These use up a great amount of the available SRAM (variable memory). If there's not enough SRAM available, the Arduino will produce random behavior.
So I ended up writing my own code to adress these issues.
The SolutionI got my Arduino UNO to play audio while running other code at the same time and also reduce memory consumption. For the first part I used threads, and for the second part I stored the melodies in program memory (PROGMEM) instead of variable memory. Check the next chaptor for further explanations.
The resulting source code can be found on the following Github repository: https://github.com/jschneibel/tiny-tune. There, you can take a closer look at the source code and download it all if you want to use it in your project. In order to run the program, compile and upload the following files to your Arduino:
tiny-tune.ino
tunes.ino
pitches.h
libraries/ArduinoThread(library by Ivan Seidel)
Use playTune() to start playing the implemented sample tune in a loop. Use cancelTune() to stop it from playing. Edit getTuneData() in tunes.ino to change the sample tune or add your own tunes.
The code has been tested on an Arduino UNO.
How It WorksThis chapter shows only the most important parts of the code. Check the previous chapter to get the full source code and set it up correctly.
The audio is played on a thread from the ArduinoThread library by Ivan Seidel. The thread is set up in the file tiny-tune.ino and the code for it is straightforward:
// tiny-tune.ino

// ... additional setup code here (see Github repository for full code).

ThreadController threadController = ThreadController();
Thread tuneThread = Thread();    // Our thread playing audio.

// Callback function for tuneThread.
void tuneCallback() {
    playCurrentNote();    // See file tunes.ino.
}

void setup() {
    // Configure threads.
    tuneThread.onRun(tuneCallback);
    tuneThread.setInterval(100);
    tuneThread.enabled = false;
    threadController.add(&tuneThread);

    // Start playing the tune (see file tunes.ino).
    playTune();

    // Additional code can be run here.
}

void loop() {
    noInterrupts();

    // Run threads in threadController.
    threadController.run();

    interrupts();

    // Additional code can be run here.
}
playTune() is the command that actually starts playing the melody. It does this by running the thread, which in return calls playCurrentNote(). playCurrentNote() is defined in tunes.ino and plays one note or pause at a time:
// tunes.ino

// ... additional code here (see Github repository for full code).

// Play a single note or pause of the tune.
void playCurrentNote() {
    if(playPauseNext == false) {    // if a note should be played
        // Read note and note duration from program memory and
        // store them in global variables currentNote and
        // currentNoteDuration.
        getTuneData(currentNoteIndex);

        // There has to be a short pause between notes, otherwise
        // the tune will not play smoothly.
        // Feel free to experiment with this.
        pauseBetweenNotes = currentNoteDuration * 0.30;

        // Play note (the code will keep executing without delay).
        tone(BUZZER_PIN, currentNote, currentNoteDuration);

        // Repeat tune from the beginning after maxNoteIndex
        // (end of tune) has been reached.
        if (currentNoteIndex == maxNoteIndex) currentNoteIndex = 0;
        else  currentNoteIndex++;

        // Call tuneThread again when the current note has
        // finished playing.
        tuneThread.setInterval(currentNoteDuration);

        // After the current note, a pause will be played.
        playPauseNext = true;
    }
    else {	// if a pause should be played
        noTone(BUZZER_PIN);

        // Call tuneThread again when the current pause
        // has finished playing.
        tuneThread.setInterval(pauseBetweenNotes);

        // After this pause, a note will be played.
        playPauseNext = false;
    }
}
You can see here that the function plays only one note at a time. This is necessary in order to reduce the consumption of variable memory or SRAM. The global variables currentNote and currentNoteDuration are in fact buffer variables, holding only one note from the whole melody in variable memory.
The full melody itself is stored in program memory (PROGMEM), as you will see in a moment. The program memory is, as the name implies, where your program is stored, and it's separate from variable memory. The contents of the program memory cannot be changed at runtime. This means that the melodies have to be constants, they cannot be composed or calculated while the Arduino is running. They have to be defined when you upload the program to your Arduino.
The function getMelodyData(byte index) reads the note at the specified index in the melody array from program memory and stores it in the global buffer variables currentNote and currentNoteDuration:
// tunes.ino

// ... additional code here (see Github repository for full code).

// Edit getTuneData() to change the sample tune or add your own tunes.
void getTuneData(byte index)
{
    // The notes and their durations are stored in PROGMEM
    // (program memory aka flash memory):
    const static uint16_t sample_tune[] PROGMEM = {
        NOTE_C5, NOTE_D5, NOTE_E5, NOTE_F5, NOTE_G5, NOTE_A5,
        NOTE_B5, NOTE_C6, NOTE_B5, NOTE_A5, NOTE_G5, NOTE_F5,
        NOTE_E5, NOTE_D5, NOTE_C5};
    const static byte sample_tempo[] PROGMEM = {
        8, 8, 8, 8, 8, 8, 8, 8,
        8, 8, 8, 8, 8, 8, 8};

    // The currentNote and currentNoteDuration are global
    // buffer variables so that loading the notes and their
    // durations of the tune won't use up all our SRAM
    // (in case the tune is very long):

    // Read current note from program memory.
    currentNote = pgm_read_word_near(sample_tune + index);

    // Read current note duration from program memory and
    // convert to milliseconds.
    currentNoteDuration = 1500/pgm_read_byte_near(sample_tempo + index);

    // Read max index of array in program memory.
    maxNoteIndex = sizeof(sample_tune) / sizeof(sample_tune[0]) - 1;
}
Then, the buffered note will be played and the next note enters the buffer. And that's already it! You can modify the function getTuneData(byte index) if you want to change the melody or add more (you can find several on the internet).
Please let me know if you could use my code in your project, if you have any questions or if you find a bug! Thanks for reading.


Comments