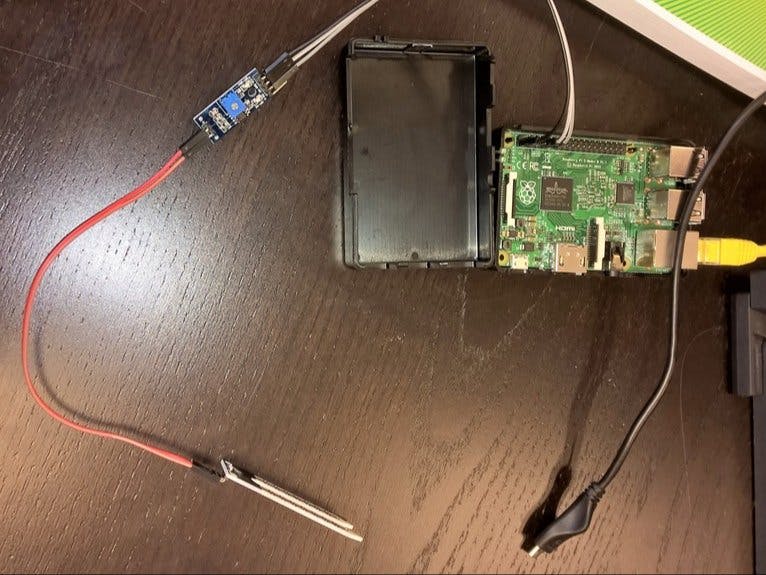
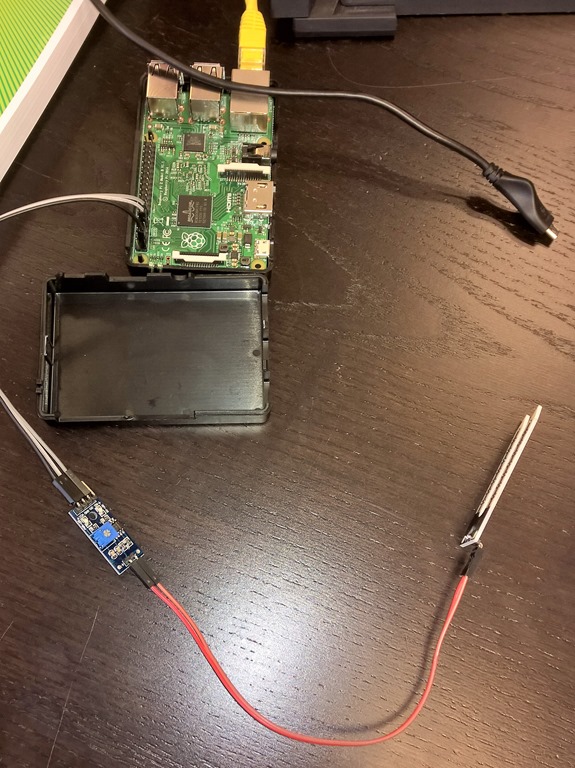
It all starts with installing Windows 10 IoT on a suitable device. I used a Raspberry Pi 2 (Model B) and installed the creators update of Windows 10 IoT. You should really get the dashboard from Microsoft: https://developer.microsoft.com/en-us/windows/iot/downloads.
It is really easy to get Windows 10 IoT on your device. Here is a small manual: https://developer.microsoft.com/en-us/windows/iot/docs/iotdashboard.
If you have your Visual Studio 2017 configured, you can easy deploy to it.
The hardwareI bought stuff from Aliexpress. I had no rush, so I saved a lot of money.
I was inspired by this article but that referenced to a moisture sensor for 4 gbp and shipping was also 4 gbp. So just the sensor could cost me 9,40 eur. Which makes it less fun, because the whole idea of a Raspberry Pi is that you can make an Internet of Things device with little costs.
I spent only 42 cents on the sensor and bought some male/female, male/male, female/female jumper cables, too, and even an HDMI to DVI connector so I could connect an external monitor, but I never used it.
- Moisture sensor € 0,42
- Jumper cables € 2,19
- HDMI to DVI adapter € 1,14 (optional)
So I had to spend € 2,61 euro, including shipping, to get the parts for my Pi 2.
Hardware wiringConnect the probe to the sensor with two wires. It doesn’t matter which goes where.
Connect the sensor to the GPIO.
- VCC --- 3v3 (Pin 1)
- GND --- GND (Pin 9)
- D0 --- GPIO 17 (Pin 11)
This is a good page for gpio pins: http://www.raspberrypi-spy.co.uk/2012/06/simple-guide-to-the-rpi-gpio-header-and-pins/.
I hit a strange bug with the UWP but fixed it, thanks to stack overflow, by manually creating a project.json file. As previously stated, I was inspired by this article but that is coded in Python. My preference language is still C# and I wanted to try Win 10 IoT. So I rewrote this Python code to C# and got this:
using System;
using System.Collections.Generic;
using System.Linq;
using System.Text;
using System.Net.Http;
using Windows.ApplicationModel.Background;
using Windows.Devices.Gpio;
using Windows.UI.Core;
using System.ServiceModel;
using LightBuzz.SMTP;
using Windows.ApplicationModel.Email;
namespace BackgroundApplication1
{
    public sealed class StartupTask : IBackgroundTask
    {
        private const int SENSOR_PIN = 17;
        private GpioPin pinSensor;
        private BackgroundTaskDeferral deferral;
        private const string SMTP_SERVER    = "smtp-mail.outlook.com";
        private const string STMP_USER      = "YOURPLANTSADDRESSHERE@hotmail.com";
        private const string SMTP_PASSWORD  = "YOURPASSWORDHERE";
        private const int    SMTP_PORT      = 587;
        private const bool   SMTP_SSL       = false;
        private const string MAIL_RECIPIENT = "iwillwatertheplants@hotmail.com";
        public void Run(IBackgroundTaskInstance taskInstance)
        {
            deferral = taskInstance.GetDeferral();
            taskInstance.Canceled += TaskInstance_Canceled;
            var gpio = GpioController.GetDefault();
            if (gpio != null)
            {
                pinSensor = gpio.OpenPin(SENSOR_PIN);
                var r = pinSensor.Read();
                pinSensor.SetDriveMode(GpioPinDriveMode.Input);
                var dm = pinSensor.GetDriveMode();
                pinSensor.DebounceTimeout = TimeSpan.FromMilliseconds(50);
                pinSensor.ValueChanged += PinIn_ValueChanged;
            }
        }
        private void PinIn_ValueChanged(GpioPin sender, GpioPinValueChangedEventArgs args)
        {
            if (pinSensor.Read() == GpioPinValue.High)
                SendMail("Thirsty", "Plant needs water");
            else
                SendMail("I am good", "Plant is fine again");
        }
        private async void SendMail(string subject, string body)
        {
            using (SmtpClient client = new SmtpClient(SMTP_SERVER, SMTP_PORT, SMTP_SSL, STMP_USER, SMTP_PASSWORD))
            {
                EmailMessage emailMessage = new EmailMessage();
                emailMessage.To.Add(new EmailRecipient(MAIL_RECIPIENT));
                emailMessage.Subject = subject;
                emailMessage.Body = body;
                await client.SendMailAsync(emailMessage);
            }
        }
        private void TaskInstance_Canceled(IBackgroundTaskInstance sender, BackgroundTaskCancellationReason reason)
        {
            pinSensor.Dispose();
        }
    }
}
I used the NuGet "lightbuzz-smtp" to send emails: https://github.com/LightBuzz/SMTP-WinRT.
Have fun with Windows 10 IoT, Raspberries, etc.


Comments
Please log in or sign up to comment.