Project goal
This project will show step by step how to build a kid friendly, Qi compatible wireless charging base, and attach the receiver to a USB charged device in order to eliminate the need to plug the device in with a cable.
Motivation
My wife and I have three boys, the older two are at an age where they’ve learned to appreciate the things they have, and try to take care of them. Our third boy, the youngest, is an overly curious five year old heathen with a knack for taking things apart.
Keeping ‘Mr. Destructo’, as he is affectionately known around our house, busy, and out of trouble is a full time job that is better left to educational programs and the infinite patience of the android operating system. We have been challenged over the last couple of years with the task of keeping this young man occupied long enough to free up other family members from the task of repeatedly telling him NO, and explaining that the terms ‘Child Proof’ and ‘Indestructible’ were not intended to be challenges.
Our success can be measured by the small pile of broken electronics on my workbench, Waiting for the right time to be disassembled and be re-purposed for some project or another.
While many companies have developed OS shells and educational software designed to teach and occupy the little tykes curiosity, beyond protective cases nobody has really adapted their hardware to be more kid friendly. The universal Micro USB connector is a great idea in that it’s a dual purpose connector, useful for communications and supplying power to an ever increasing number of electronic devices, it has all but eliminated (Hey Apple!) expensive proprietary connectors that were designed for the same purpose (and to increase sales for the manufacturers) but were not interchangeable. On the other hand they are a total and complete engineering failure when placed in the hands of a small manimal. The small size and slightly off-rectangular shape easily confuses the inexperienced user, the thin wires and tiny crossbeam are flimsy and are easily broken or bent when the plug is inserted in the wrong direction or not pulled out straight, making this the single most ‘unfriendly’ point of failure for ‘kid friendly’ devices.
The successive purchases of Android devices designed for kids, to replace deceased devices designed for kids has motivated me to find a less destructible solution. The purchase of an Amazon Fire Kids Edition as a Christmas present seemed like a bargain, Amazon offers a 2 year no questions asked replacement plan and a "kid-proof" case,(I’ve already had to request a replacement early in February) until I noticed in the small print that it only covers a maximum of 3 devices, which means that Mr. Destructo, at his current rate of destruction, will have exhausted the 2 year replacement plan in 6 months.. So I decided to use the IDT Inductive power developer kit to create a wireless charging base and receiver in the hope of lengthening the life of his current device.
The Project
All your Bases are belong to me.
The first step is to make the charging base. Solder the negative sides of the green and red LEDs together and connect them to GND1 on the board, Connect the 1K resistors to the positive leads and connect the red to IO6 and the green to IO3. I added some heat shrink tubing to cover the resistors and connected the resistors so they are around 1" apart.
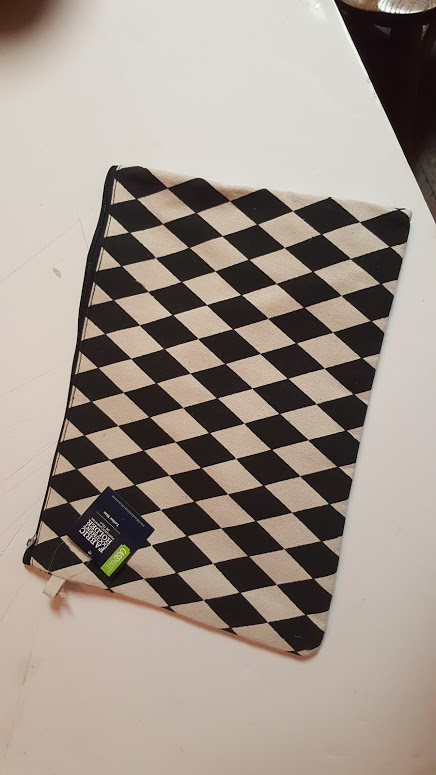
I wanted an enclosure that was flexible, durable, and easy to put together. After several aborted attempts with different types of containers and materials I found this cloth document holder at Walmart that is flexible, and has a plastic liner that will help protect the electronics from chocolate milk mishaps.
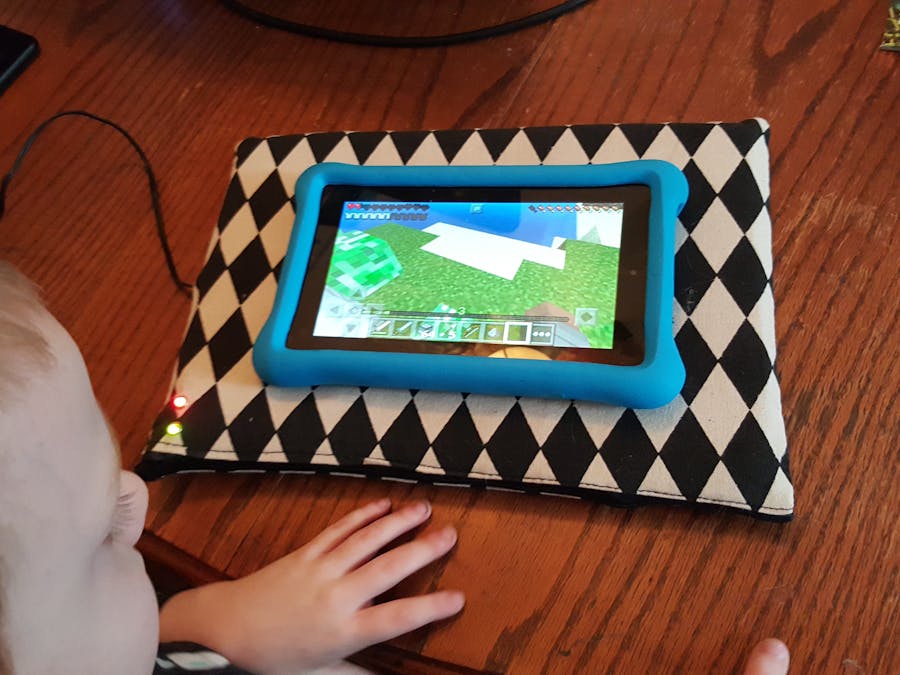
A 1" thick Poly Foam pad was cut to size to fill out the document holder and a 1/2" deep hole was cut in the center to keep the transmitter from sliding around inside the case. I punched 2 holes in the corner of the cloth and inserted two eyelets for the LEDs to fit into. I then split the seam on the side to fit the power cord through, tied a knot so it would not slip back through, and soldered the power leads to the board. A piece of tape was used to keep the LEDs in place and once it was all assembled I used a zip tie to secure the zipper to keep the case from being opened inadvertently.
The Receiver
The power receiver from the IDT kit is not very big, so I was able to conceal it easily inside the kid-proof case. The case fits the Fire tablet snugly so I cut a slot in the center for the receiver.
To connect the power receiver to the table I tried to find a small USB plug to keep the external profile low, I found a USB Desktop phone charging stand at Dollar Tree that fit the bill, I removed the charging plug and cord, cut the cord to the correct length, and soldered the power wires to the out and ground pads on the receiver.
Just plug the USB cord into the charging port on the tablet and slip the cover on The final project can be used flat on the table, or it's comfortable enough to hold in your lap so you can use the tablet while it's charging.


Comments
Please log in or sign up to comment.