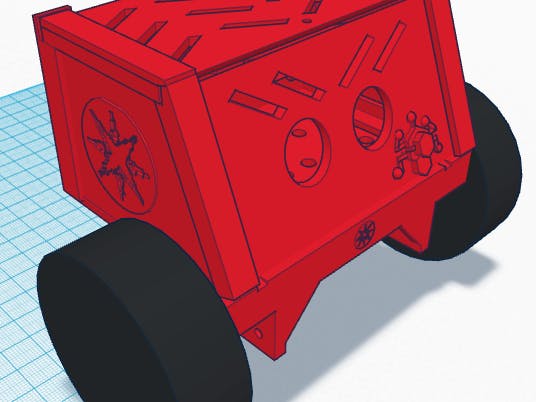
All little kids love to pretend that they are something or someone else. As they play out in their little fantasy worlds, they use toys, props and the imagination! The Dustbunny rover is one such prop for your pretend or real games. Built for kids or the kid at heart!
It is a small web controlled rover built around the Particle.io Photon controller board. Dustbunny is a small rover, and only needs modest motors to move around so the little yellow gear motors that are so plentiful in robot web stores or on eBay are used. To drive them, the inexpensive and easy to use L9110 h-bridge has been chosen.
In this article, a 3d printed chassis is used, but any small rover could be used in place of it. Examples of replacement chassis are the Runt rover series or the Dagu Magician.
To start, you will need to get the parts needed to build the robot. See the component list below, but here are details about the items needed:
- 1x Particle Photon board
- 1x L9110 h-bridge
- 2x right-angle 1:48 gear motors (usually yellow)
- 2x Rubber tire wheels with hubs.
- Hot glue gun and glue sticks
- Double sided sticky tape (AKA Robot builders duck tape :))
- Female to Female jumper wires (10cm in length)
- 4x 20mm M2 screws with nuts
- 4 slot AA holder. One that is 2x2 would be the best. A flat one could lay flat on the top though if that's what you have.
- Velcro stick on strips
- A Small bread board like this.
Note about the wheels - Make sure they are rubber tires and NOT nylon. The nylons are shiny black and the rubber a dull black. The rubber ones have a lot better traction.
Batteries:
You can power the bot with 4x AA rechargeable NiMH or 1x small 7.4v lipo. For mine, I took the AA rechargeable path. You could power it with 4 AA alkalines, but I do not recommend them for long term use. Modern rechargeable batteries are far superior to throw-aways batteries and a lot cheaper in the long run.
3D Printing the Rover
To print the rover you will need to print all the .stl files listed below, with the exception of the rear flair and it's cover. They are optional, but add to the look of the bot. (Note: I did not print a final flair on mine due to printer issues) If you do print it, the batteries will have to be mounted on the top-rear or another place of your choosing. A small 7.4v lipo should fit in the flair box, if you want to go the lipo route instead of 4 AA rechargeables.
All parts should be printed laying flat on the print bed. I printed mine in PLA on an unheated bed using 60% infill, but you probably could get away with 35% or so. The Flair, you can print vertical or horizontal (facing up or down with supports). Shells or outer layer thickness is your choice as well, but I printed them with 1.2mm thick (I think 3 shells) -- Use the settings best for your printer, you know it better than I would!
A note on assembling the cover: You may want to use small 3-4mm pieces of double sided sticky tape to hold the parts in-place as you glue them together. This will give you a chance to make sure it's all lined up. A dry run with a tape together may even be a good idea. If you do mess-up, the glue should be able to come off with some work though and not hurt the parts.
Painting (optional):
Note: Follow any and all instructions on your paint and primer containers!!
You can optionally paint the bot cover and chassis if you like. I suggest doing this before placing the motors and other components on the bot. You will need a primer that can be applied to plastic. Prime both cover and or chassis (let dry) and then paint them with your choice of color(s). Make it your own!
After you have the cover assembled, solder wires to your motors and place them on the chassis with the 4 M2 screws and nuts.
Now carefully cut velcro strips for the left and right side bottom angle braces on the cover bottom. The strips should be no wider than the braces. After cutting, take one velcro side and stick it to the chassis on the left and right side where the cover will site. It may be easier to that the cut top and bottom strips and stick one side to the cover brace and then unpeel the other side of the strip and place the cover into proper alignment on the chassis, leaving the second strip on the chassis. Do this for both the left and right sides.
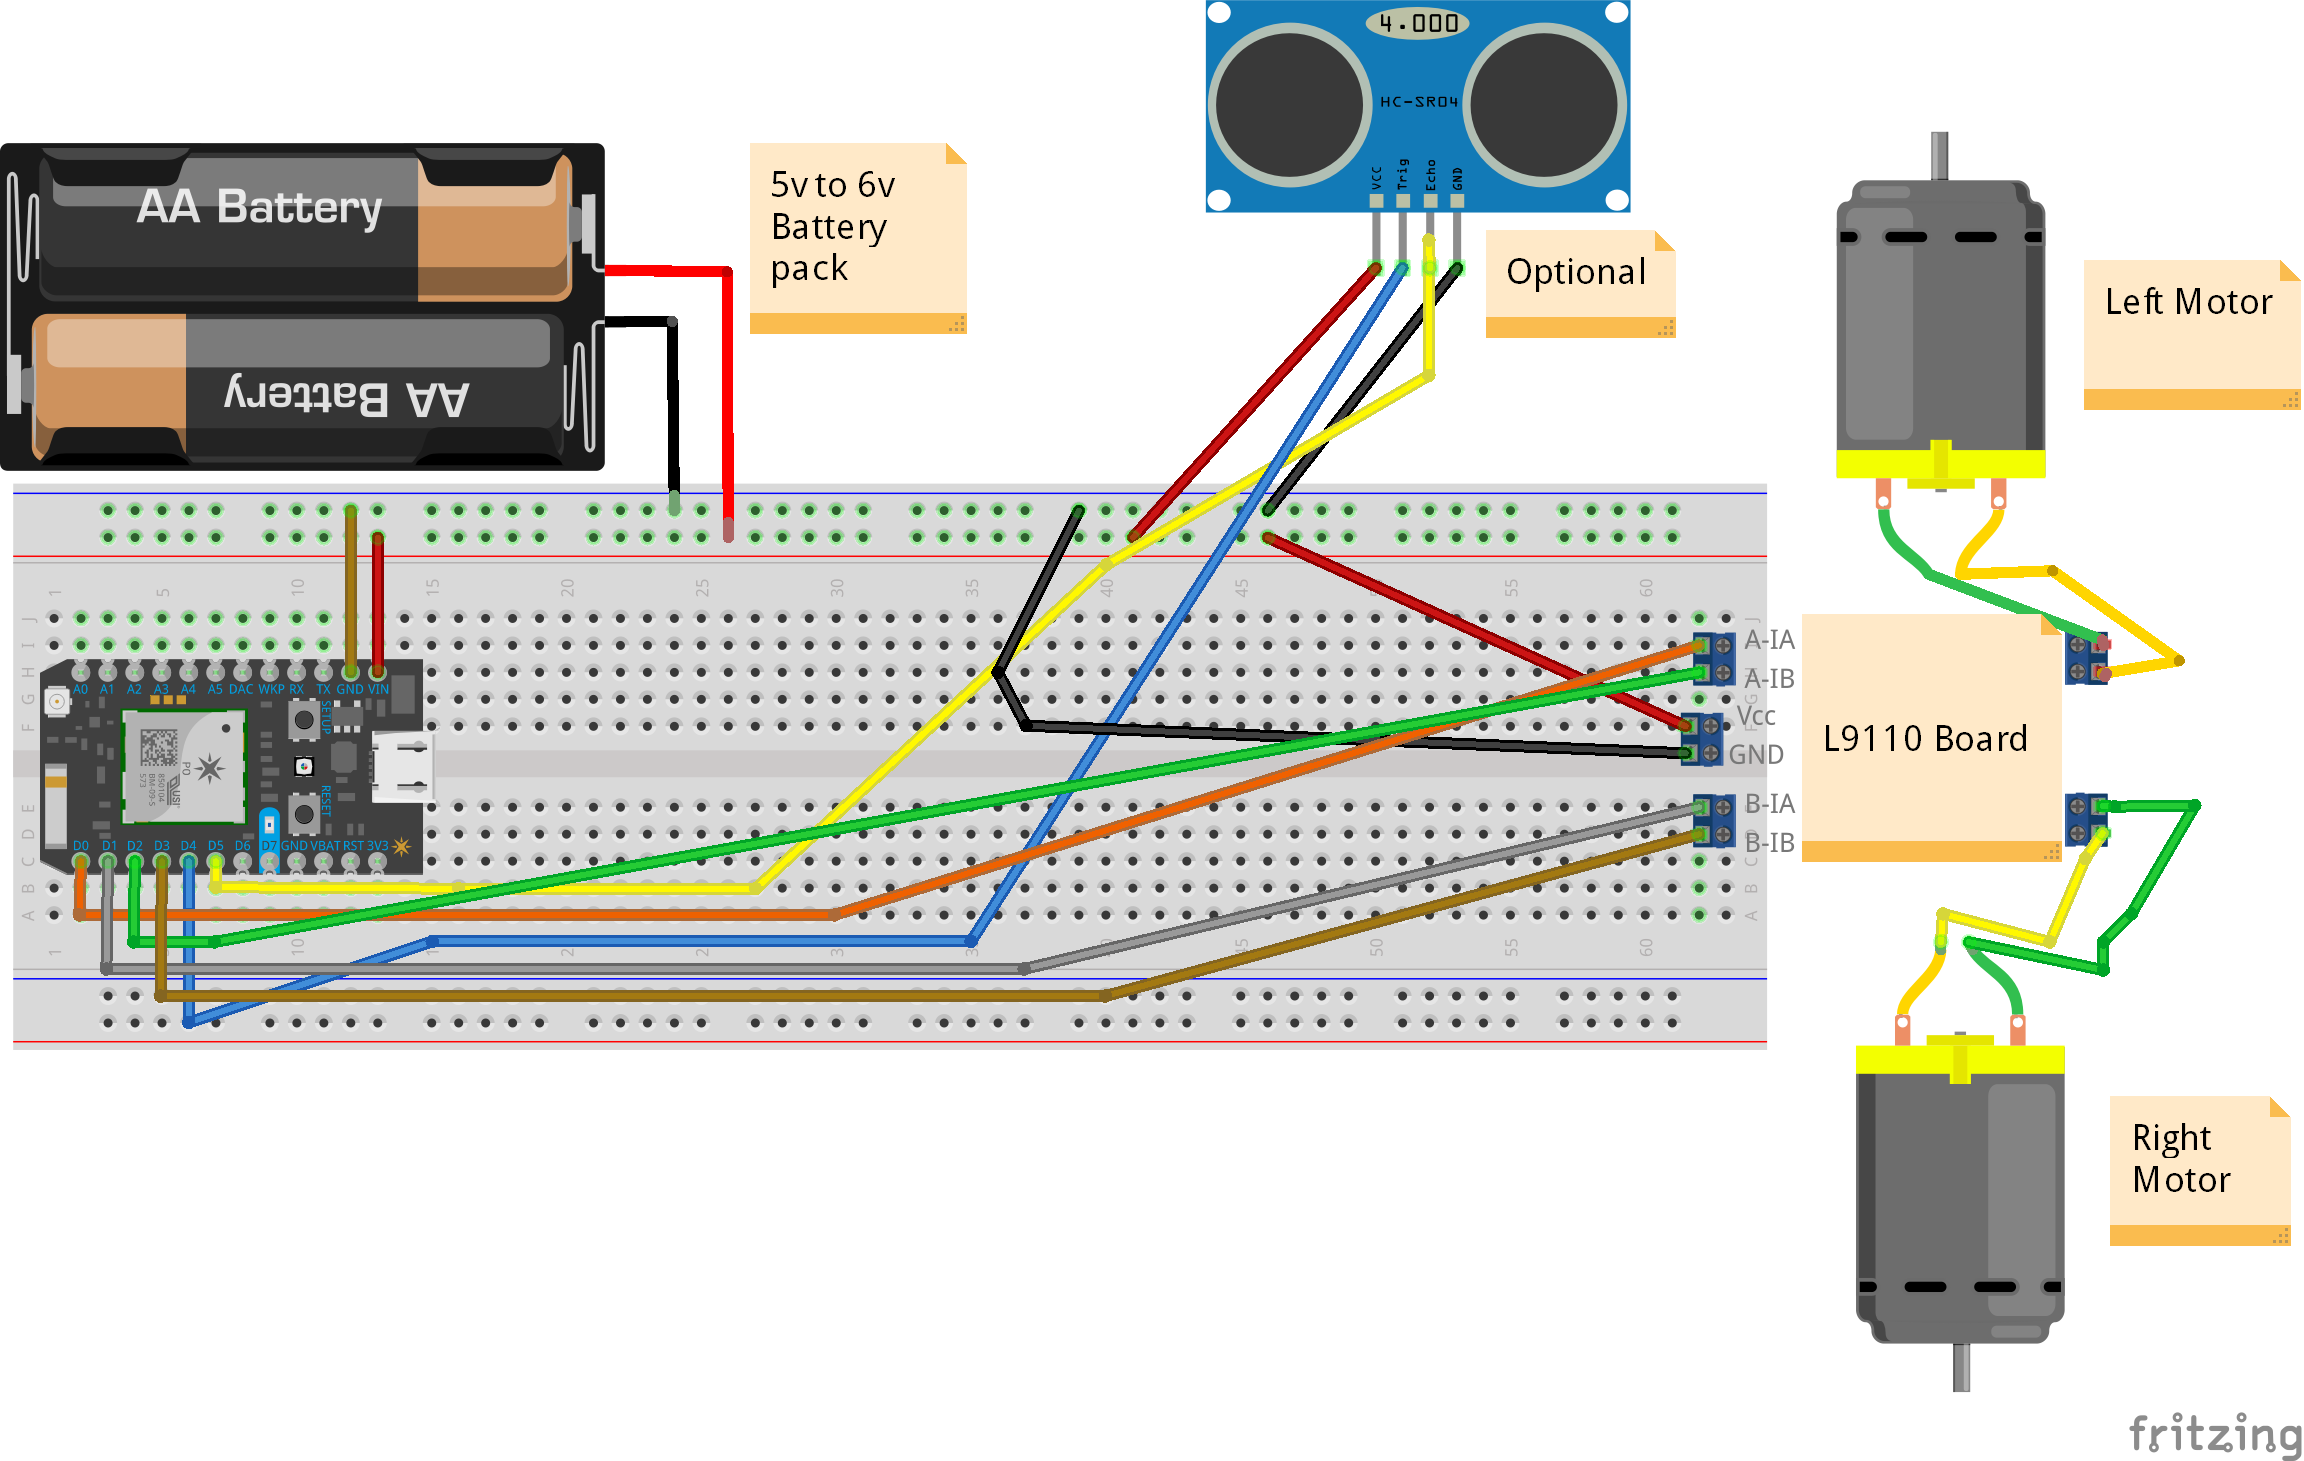
Place all the components as pictured with double sided tape onto the chassis:
- Photon D0 -> L9110 A-IA
- Photon D1 -> L9110 B-IA
- Photon D2 -> L9110 A-IB
- Photon D3 -> L9110 B-IB
- L9110 Vcc to Vcc row on little bread board
- Photon Vcc to Vcc row on little bread board
- Photon GND to GND row on little bread board
- L9110 GND to GND row on little bread board
- Battery pack GND (Neg) to GND row on little bread board
- Battery pack Vcc (Pos) Vcc row on little bread board
You will need to familiarize yourself with setting up and loading code to the Particle.io boards. If you do not have a board or an account, head over to the Particle.io site to get going. You can go here for general development and device info.
Once you have your device setup and are ready to load the code, download the dustbunny code from github. Clone or download the zip and navigate to or note the the directory you unpacked or cloned to. Go to the Particle.io Build site and log in to start.
Click on the "Create new app" button and call the app "dustbunny" -- Now click on "Libraries" icon (A ribbon bookmark) and find the libary "L9110Driver" and add it to your app. Next, load the file "dustbunny.ino" from inside your local dustbunny directory (on your computer hard drive), into a text editor. Select all the text and copy it, then paste it to the dustbunny.ino in your web IDE project. Do the same for the "dustbunny.h" file.
After you have the project setup and all the code loaded, find the "Device" icon (a gun scope target) and select the device you want to flash to. Then click on the "Flash" icon (a lightning bolt) to compile and load the code to your device.
Once you have the code loaded, you are ready for a test.
Navigate to the dustbunny directory on your computer and open up the file "dustbunnylocal.html" in your favorite text editor. Find the section that has:
var deviceID    = "<YOUR DEVICE ID>";
var accessToken = "<YOUR ACCESS TOKEN>";
- Change the "deviceID" line to equal your devices id (see the Build page devices)
- Change the "accessToken" line to your access token (see the Build page settings)
Save the file. Now load it into a Web browser (you can probably just double click the file) and once loaded you will see:
From this page you can use the mouse or keyboard to drive the rover. You can control the speed, direction and distance traveled from this interface.
Note: To use the keyboard to drive the rover, there has to be no button selected on the page. If there is, just click on a blank area of the page.
The keys used to control the bot are:
- w - forward
- z - reverse/backward
- a - long left turn
- s - long right turn
- q - short left turn
- e - short right turn
- h - halt/stop robot
If all went well, you can send commands to the robot! If not, open up the javascript console in the browser (Shift + Ctrl + I on Chrome), if there are any errors, correct them and try again.
Once you can talk to your device from the browser, click on the "Forward" button and see if the bot responds in kind. If not, reverse the wires on one motor and try again. Then do the same for the "Left" and "Right" directions.
After that you are all ready to play with your little Dustbunny!
Moving forward with the ProjectThe "dustbunnylocal.html" is only for local use as it states in the file. You do not want to place this file on a web server for in-the-wild internet consumption!!! Your device ID and Access Token are included and could (will be) seen by anyone who loads the page up. If you want to use the bot remotely from the internet, have a look at the Python code included. There is a flask project for you to start with and it uses the same page look and feel as the "dustbunnylocal.html" version does. You will have to open up a port to get to the flask server or other www server you may setup to get at the bot. I will leave that to you! I only include the code as a starter. You could of course write your own in another language or system like nodejs or even make it autonomous. Again, make it your own!
The boards mounted on the chassis:
The rover ready for action!
Runt-Rover Dustbunny!


Comments
Please log in or sign up to comment.