


Hardware components | ||||||
 |
| × | 1 | |||
| × | 1 | ||||
| × | 1 | ||||
| × | 1 | ||||
| × | 1 | ||||
Hand tools and fabrication machines | ||||||
 |
| |||||
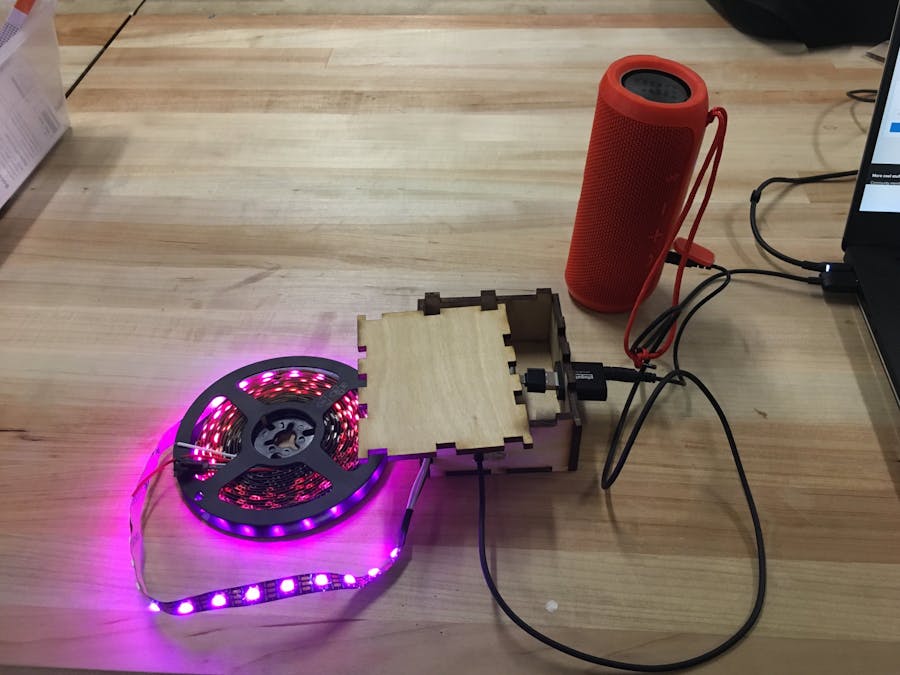
My dorm suite common room has several LED strips around the perimeter of the walls, and we turn them on whenever we host gatherings and parties. They can transition from one color to another, but that's about all they can do. I thought that, to add to the quality of future parties, I would code an LED strip to react to music! After I move out, I would also love to put this reactive LED strip on the back of my desktop monitor to add a light show in my room!
SoftwareThis project broke down into four parts: recording/playing the audio, analyzing the audio to get usable data, connecting the Pocketbeagle to the LED light strip, and having the Pocketbeagle trigger the LED strip in response to the audio data. All software instructions are in a GitHub, with further descriptions about each part.
BuildInstructions
PocketbeagleSoldering
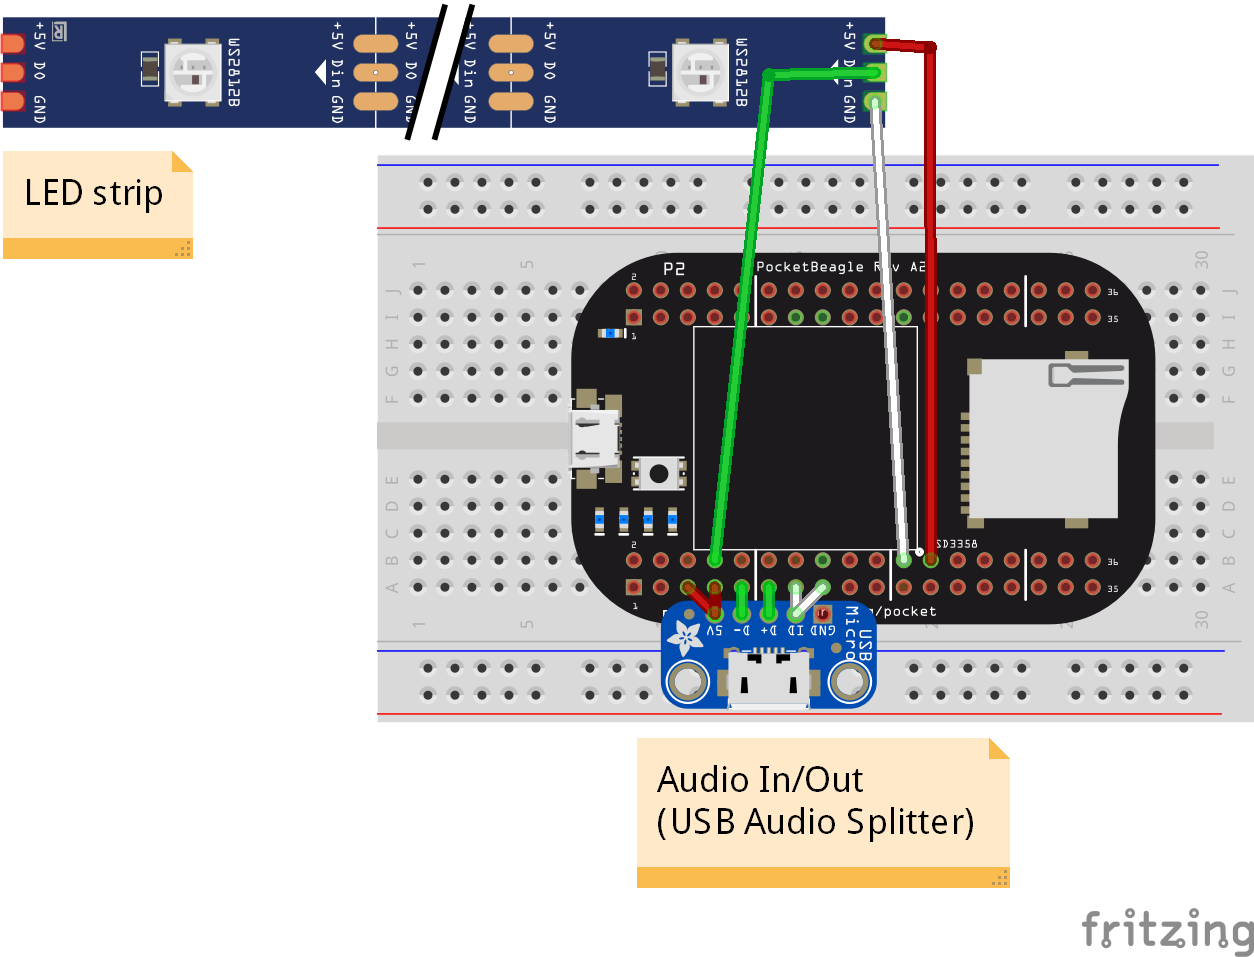
To use the microUSB breakout board, I needed to solder some pins together first (P1.05 and P1.07, P.13 and P.15).
WoodenBox
To construct the box around the Pocketbeagle, I laser cut a piece of 1/4" inch plywood with the.ai file attached to this page.
Putting the box together is simple following the notes in the image above. I would put in the pieces with outlets (Long Side 1, Long Side 2, and Short Side 2) in place first before the others. This ensures that the outlets fit (or don't, see note below) before the other pieces.
When fitting the pieces in, I realized that the microUSB outlet I cut in Short Side 2 was way too small - I only accounted for the small circular part of the hub, but not the large rectangular hub that would be the actual size constraint. To fix this error, I used a power drill and a 6mm drill bit to make the circle more of an oblong shape. This allowed the rectangular hub to fit through.
There was a similar problem with the outlet for the LED wires. I made the original laser cut opening way too narrow, as I forgot to account for two extra wires. I increased the size of the opening with a rasp and file.
OperationInstructions
To create the visualizer, first solder the necessary pins of the Pocketbeagle together for the microUSB breakout board. Wire the components following the fritzing diagram, and plug the Pocketbeagle into the computer through microUSB. Follow the software instructions on the GitHub to record a WAV file, then play that WAV file in time with the LED light show!
FutureImprovements
My original goal was to stream music and have the music react to the stream. Recording the WAV file and reading that is a temporary solution; because I was afraid of overwhelming the Pocketbeagle with information, I went with the record and playback method rather than a live playback of music with light response. Ultimately, I would like to realize my original goal to have music playing into the AUX cord and the lights reacting directly to the input audio concurrently. Also, for the wooden box, I would change the size and shape of the microUSB and LED wire outlets to accomodate for the size of the components.
Wiring of LEDs and Audio Input/Output


Comments
Please log in or sign up to comment.