I showed you in my last project how to stream voice data to your computer. This time I will show you how to stream data in the ESP32 and play it. Let's get started.
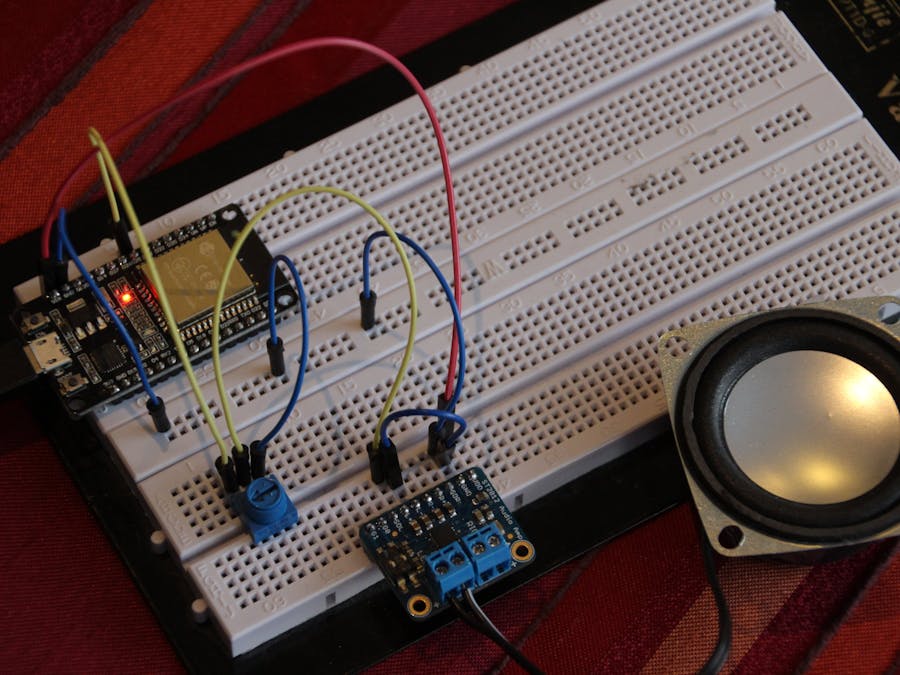
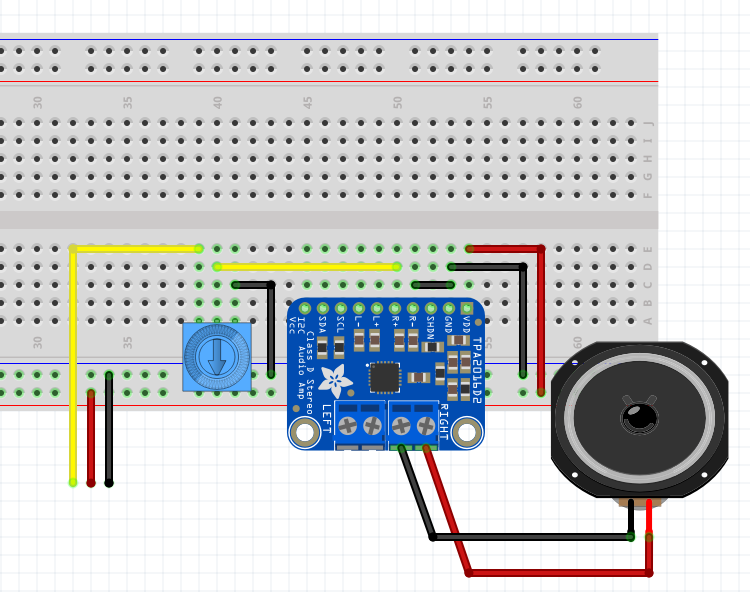
1. Build the circuitConnect the Amplifier like shown in the picture below. Now you just have to connect the red wire to 5V, black to GND and the yellow to the DAC_1 (GPIO25) of your ESP32 developer board. With the potentiometer, you can control the volume of the sound. You don't need it but it's very practical because otherwise it' very loud.
Open the Arduino software on your computer. Paste the Arduino code from the CODE section below in the editor. (Don't forget to remove the standard code before!) Now change your WiFi credentials in the following path of the code:
const char* ssid     = "YOUR SSID";
const char* password = "YOUR PASSWORD";
Furthermore, you have to set the IP Address of your Raspberry Pi.
const char* host = "YOUR SERVER IP ADDRESS";
Now you can upload the code to your ESP32 board. To Tools → Board and select your ESP32 board. Now select the Port at Tools → Port. Now you click "upload" to upload your Sectch.
3. How does it work?I used a so-called "circular buffer", which is an array which end is connected to the beginning. Therefore the name "circular buffer". You can see a demonstration picture below or visit https://en.wikipedia.org/wiki/Circular_buffer for more information. The main loop checks if 800 bytes are free in the buffer. When this applies, the ESP32 sends a request to the server, consisting of 0xFF(11111111binary). The server responses the next 800 bytes and the ESP32 store them in the buffer.
Open Audacity. Open your file by dragging your file into the window.
- Set the "Project Rate(Hz)" in the left corner to 8000.
- Select your audio track and go to "Tracks" → "Mix" → "Mix Stereo down to Mono". After processing you should have one channel audio.
- Now click "Tracks" → "Resample". A box should pop up. Set the "New sample rate: " to 8000 and click OK.
- Now you export the audio by clicking "File" - > "Export" → "Export Audio". Select the directory where the file should be saved. Besides set "File type" to "Other uncompressed files", "Header" to "Raw(Header-less)" and "Encoding" to "Unsigned 8-bit PCM". When you are sure that you have chosen the right options, you click Export. The following information can be ignored and accepted.
Download the "Voice_Server.jar" file and the "demo.raw" file form the code section below. You need Java to be installed! Copy the Voice_Server.jar, demo.raw and your raw file in a new directory named "Voice-Server".
Mac:
Open the Terminal Application.
Type in "cd ". Drag and drop the directory icon in the Terminal window. And it should look something like this:
cd /Users/julian/Desktop/Voice-Server
Now hit enter. Now you are in your directory. Now you type in
java -jar "Voice_Server.jar" "YourFileName.raw"
or just try the demo file:
java -jar "Voice_Server.jar" "demo.raw"
After hitting enter the program reads the file. This can take a few seconds, depending on your file size.
Plug in the ESP32 and now you should hear your audio data.


Comments
Please log in or sign up to comment.