The xChip CC03 is a low-power microcontroller using the 32-bit ARM Cortex -M0+ processor (which has up to 256KB Flash and 32KB of SRAM). It can be coded in a lot of different ways: in this tutorial we’ll use block-coding in maker.Makecode.
The IP03 is an interface chip - we’ll use that to connect the CC03 to your laptop. This will provide power to the circuit as well as allowing us to flash code from maker.makeCode to the CC03. In addition, we will use the console view in Makecode to view data from our weather station, and the IP03 will communicate that data to your laptop / PC.
The xChip SW01 is a Weather sensor that can measure temperature, relative humidity and pressure.
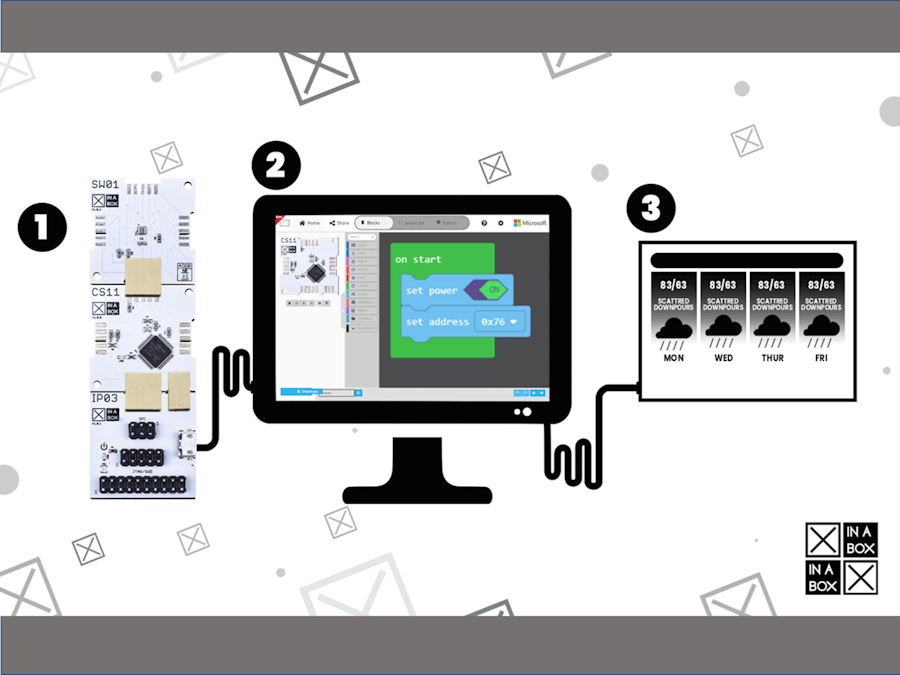
This guide will show you how to build and code a weather station using simple drag-and-drop block coding using maker.makecode. The result will be displayed on a console with the weather measures displayed on a real-time graph.
Hardware Requirements- 1x CC03 Cortex M0+ Core (ATSAMD21G18)... alternately you can use a CS11 - Core with SD Card Interface (ATSAMD21G18)
- 1x IP03 - SWD/JTAG/SPI/USB Interface (AP2114)... alternately you could use an IP02 - USB Programming Interface (FT232R)
- 1x SW01 - Advanced Weather Sensor (BME280)
- 1x XS02 - 2-Pack xPDI Connectors. We just need 1 of these.
- 1x XC10 - 10-Pack xBUS Connectors. We’ll need at least 2 of these.
- Hardware Setup
- Setup maker.makecode
- Coding the CC03 / CS11
- Result
- Summary
- Connect the CC03 (or CS11) and IP03 (or IP02) together using 1 XC10 xBUS connector and 1 XS02 xPDI connector. The xBUS connectors are the square ones and the xPDI connectors are the narrow ones
- Next add the SW01 using one of the xBUS connectors.
You may connect it as shown in the diagram below. Please see this guide on how to assemble xChips generally.
Connect this to your laptop / PC using the IP02 / IP03.
2. Setup maker.makecode1. Open https://maker.makecode.com/:
Notes:
- we recommend you use Chrome for this - at the time of writing we noted that the Pair Device option that is essential to the process was available in Chrome but not in Edge.
- Bear in mind that maker.Makecode is in beta. It has some rough edges, but it is pretty awesome - as it grows young coders, or people who are not so adept / interested in coding, will be able to use block-coding to code increasingly more complex applications directly onto a large range of microprocessors and boards. With XinaBox, building complex circuits and instruments is very simple, and with maker.Makecode programming them will be equally simple!
2. Create a New project and select adafruit-feather-m0-express:
3. Connect the CC03 or CS11 to maker.makecode
To connect your CC03 or CS11 to maker.Makecode follow the steps below, shown in the video that follows:
- Click the toolbox in the right hand corner
- Select Pair Device
- Select your CC03 or CS11 from the options presented.
if the the CC03 or CS11 do not show up as options (or if you get the message No compatible devices found) then it means your laptop / device is not recognising the CC03 / CS11 as a drive. Double-click the reset button on the CC03 / CS11 (if they have them) and they should show up.
- The Pair Device option was not showing up in the Edge browser when we tested this blog. Try using Chrome if you cannot find the Pair Device option.
- if the the CC03 or CS11 do not show up as options (or if you get the message “No compatible devices found”) then it means your laptop PC e is not recognising the CC03 / CS11 as a drive. Double-click the reset button on the CC03 / CS11 (if they have them) and they should show up.
4. Add bme280 extension:
The SW01 XinaBox weather station has the Bosch BME280 chip mounted on it, and maker.Makecode has a built-in library for the BME280 that works with the SW01.
To load this library:
- Click on the Advanced block then on Extensions
- Scroll through the options till you find the bme280 library. Click on it to load it.
The process is shown in the video below:
Find the blocks shown below (in the bme280 and console libraries) and connect them as shown:
- With the blocks as shown, click on Download.
- As long as the CC03 or CS11 is paired with maker.Makecode the compiled code will download directly on to your CC03 / CS11.
- When the code has downloaded successfully onto your CC03 / CS11 you will see an option to Show Console device just above the Download button.
- If you do not see this option go back to Pair Device then try to Download when the CC03 / CS11 is paired.
We are going to run our code on the CC03 / CS11, which will send the temperature, humidity and pressure data via serial. We will view this data on a console that is available within maker.Makecode. You could use any terminal / console app to view the output.
4. ResultTo view our weather data via the maker.Makecode console:
- Click on Show console Device
The data is charted in real time, which looks pretty cool.
Bear in mind that the console log function could be replaced with other output modes.
In this tutorial we have shown how to build a simple Weather station using XinaBox xChips and maker.makecode. The weather station was coded completely using block coding, so very limited coding knowledge was necessary.
By extending what you’ve seen in this tutorial you can begin to use XinaBox xChips and maker.makecode to create increasingly complex projects very quickly, all using block coding!
Find out more about XinaBox (pronounced “ex in a box”) here: https://xinabox.cc/


Comments
Please log in or sign up to comment.