High-level design enables a design to be captured in a concise and succinct manner, resulting in fewer errors and easier debugging. However, the oft-repeated concern is performance trade-off. Achieving high performance in a highly complex FPGA design requires manual optimization of register transfer level (RTL) code, which is not possible for generated RTL code from a C-to-RTL development environment. However, solutions exist that can minimize trade-off by optimizing the design itself using the FPGA tool settings.
Find the Right FPGA Tool Settings EfficientlyAlthough designers are aware of the existence of FPGA tool settings, the settings are often underutilized. Usually, tool settings are used only when they are having a timing problem. However, for designs that have met its performance targets, there is massive potential for additional 10 to 50% performance improvements.
The challenge is in selecting the right tool settings since different FPGA tool presents between 30 to 70 settings for synthesis and place & route. The possible combinations are too many. You can write scripts to create different runs and try the recommended standard directives/strategies. There also are tools which exist that can manage and run design exploration in an automated and disciplined way.
The last challenge issue is insufficient compute power. Typical embedded applications are designed on a single computer. Running multiple compilations requires more compute power. It is a trade-off with time. If you can run more concurrently (using the cloud), the turnaround time will be shorter.
How to Optimize a High-Level Design - Sobel FilterHere is a reference design commonly used in video processing that does a Sobel Filter Implementation. This reference design targets an FPGA with a Dual ARM® Cortex®-A9 MPCore™.
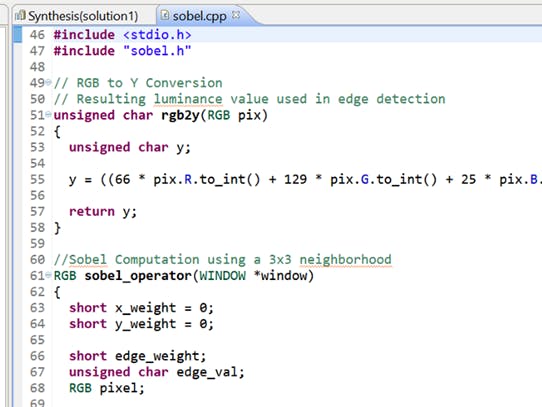
We use the Xilinx HLS tool to open this design.
It has a clock period of 5.00 ns which is 200 MHz. From the timing estimates (see below), it still missing timing by 506 ps, which translate to 181 MHz, 10% short of its target speed.
Without changing the C++ code, export the design into a Vivado project in RTL. Under "Solution", select "Export RTL".
It will execute Vivado in the background and generate a project file (XPR). It should also compile the design and you should see the actual timing details in the console. Once it is done, locate the project file in the /solution/impl/verilog/ folder.
You will find a XPR file. You can verify it by opening it with Vivado and you can see the generated RTL source.
The next step is to use a design exploration tool called InTime. (Again, you are free to write a script yourself to try the standard directives or strategies available in the Vivado tools) You can run InTime either on-premise with a free evaluation license. Alternatively, register a Plunify cloud account with some free credits and pre-installed FPGA tools.
After starting InTime, open the project file. When prompted for the Vivado version to use, please use the "same" Vivado version. For example, if you are using 2017.3 HLS, please use 2017.3 Vivado.
Select the "Hot Start" recipe. The "Hot Start" recipe is a recommended list of strategies based on the previous experience with other designs.
Click "Start Recipe" to start the optimization. If you are running on the cloud, you should run multiple compilations concurrently to reduce turnaround time.
Optimization Process and ResultsAfter the first round ("Hot Start" recipe), the best result is the "hotstart_1" strategy. However, it is still missing timing by -90ps.
We applied a 2nd recipe called "Extra Opt Exploration" on the result from "HotStart_1". This focuses on optimizing the critical paths. This is an iterative optimization and will continuously repeat itself as long as each iteration shows improvements. It will eventually stop automatically if it meets the timing target or fail to show improvements.
After 2 rounds of optimizations with a total of 15 compilations, the design was able to meet its performance target of 200Mhz. This is achieved without any changes in the RTLsourcecode.
Next Level of PerformanceGetting to the next level of performance requires optimization on all fronts — the architecture design, code and tools. Tools settings exploration can overcome performance trade-offs with higher-level design without losing the benefits of productivity it brings in the first place. It is a win-win for the high-level designer.


Comments
Please log in or sign up to comment.