After making the Intel Curie Pattern Matching dress, I used Intel Curie module again to make this dress. This time, I used tinyTILE for its small form factor. It is designed for Helen for a special event, so I name the piece Helena.
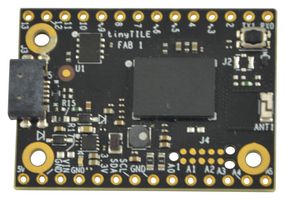
TinyTILE is attached on the wearer's right arm. As they move their arm, for example when they are dancing, the accelerometer in Curie will sense the movements and control the colors and patterns of the optical fibers flowing from the shoulder.
InstructionsFashion DesignBelow is my design sketch of the dress. The optical fibers will be under the tulle extended from the shoulder. Tulle is used along the neckline and around the waist as decorations. I also wanted to used iridescent dies from wafers as diamonds to decorate the tulle but didn't get them this time. Maybe next time. I'm using gemstones instead (see later).
I asked Helen to provide a basic skin-tight dress as the base layer. We also decided together to use gold/silver color.
Gather the tulle and sew the skirt. Before sewing it onto the dress (that involves taking the original dress apart and sew with the tulle back on together), have fun with the pieces first by taking some artistic photos, haha:
I prepared two NeoPixel LED strips from Adafruit, each having four LEDs, and eight strands of optical fibers. Each strand of optical fibers needs to be aligned with a LED and be placed perpendicular to the LED strip so that maximum amount of light gets into the fibers.
Stabilizing them could be challenging. I used hot glue to hold the fibers and strip together. However, this is only temporary. The glue functions as a base. Only apply it around the fiber strands but not underneath them. Otherwise the glue will block the light. It doesn't stick on the water-proof coat of the LED strip very well. I don't want to take of the coat and stick the fibers directly onto the LEDs as the glue blocks the light. I could search for a more appropriate glue which has the correct molecular structure to stick with both the coat and the fibers. OR, rather I used a more crafty method, which I'll describe later (jump to "More Handcrafts" if you want and come back).
You can also sandwich the LED strip and the hot glue bases of the fibers with thick fabrics, such as felt. This is not as nice as the method I'm describing later.
Find a connector that accepts the JST plug on the 3.7 V LiPo battery (or other kinds of connectors depending on your battery choice). Solder it across the ground and the Vin on tinyTILE. The NeoPixel says input 5 V but tinyTILE from factory configuration only supplies 3 V. Don't worry, 3 V is enough to drive the LEDs here.
Solder the LED strips onto the tinyTILE. I use pin 6 as the control pin. I also joint respectively the ground line, 3 V line and signal line cables between the two LED strips before they reach the tinyTILE so that there are only three cables coming out of the thee pins on tinyTILE. Now test that the circuit works and the fibers light up!
Note: tinyTILE works exactly the same as an Arduino101 from the script uploading perspective. You may need to update the firmware as an initialization step. Follow this Getting Started with tinyTILE guide first and you are good to go.
The code is from this Infinity Mirror project.
It is of course ugly to have the electronic cables showing. In order to hide them, I braided thin golden ribbons all around the cables until no cable is visible. This might be the most time-consuming step. Do it when you can multi-task.
This also provides a method to strongly stabilize the fibers onto the LED strips perpendicularly. See below that the golden ribbons are also braided around the bottom of optical fibers.
Now that you have ribbons around the LED strips, you can sew them onto the dress.
A sneak peak to show the working technology:
Final touchThis is a fashion design piece with technology. Some perfection is necessary. As I mentioned, (I wish I was using wafer dies) I used gemstones to decorate locations that are aesthetically pleasing. The quickest way to glue the gemstones to the tulle is to place them up-side-down under the outer side of the tulle and glue from the inner side of the tulle. I did not omit the tinyTILE and the ribbon-wrapped cables.
Make a little pocket for holding the battery. Sew the pocket to the cables and gemstone the pocket, too.
Use a ribbon to tie the tinyTILE around your arm. Done!
For more photos of this project (and cosplay), visit my website: www.kittyyeung.com. There are other techfashions, too.


Comments
Please log in or sign up to comment.