Hi there!
How often have you felt tired of typing in the password to unlock your PC/laptop every time it got locked? I'm used to locking it down quite a number of times, everyday, and nothing is more annoying than typing the password/pin over and over again, every-time I want to unlock it. When the need for something becomes essential, you are forced to find ways of getting it. As the saying goes, "necessity is the mother of invention", the lazy mind in me started to think of an easy and a cheap way to unlock my personal Computer/Laptop every time I had to lock it. As I went through my stuff I found a RC522 RFID module. That's when I decided to make an RFID system.
RFID: Radio-frequency identification (RFID) is one of the oldest wireless technology. RFID chips are used to store information digitally, which can then be shared between objects through electromagnetic fields and radio waves. It may not be super-advanced, but many makers see real potential in the technology, no matter how old.
In this project I'll be explaining how to make a simple RFID system that can lock/unlock your windows computer with just a flick of an RFID card/tag. With this system in place no more hassles of unlocking your Laptop/PC every-time you lock it down.
The heart of this project is the Arduino Pro Micro (or you can use Arduino Leonardo) with the ATmega32U4 chip. It is very important for this project to choose a development board with the ATmega32U4 chip. We can't use development boards like Arduino Uno, Mega 2560, Pro Mini or Arduino Nano for this application. The details are in the following steps.
Building the Prototype.
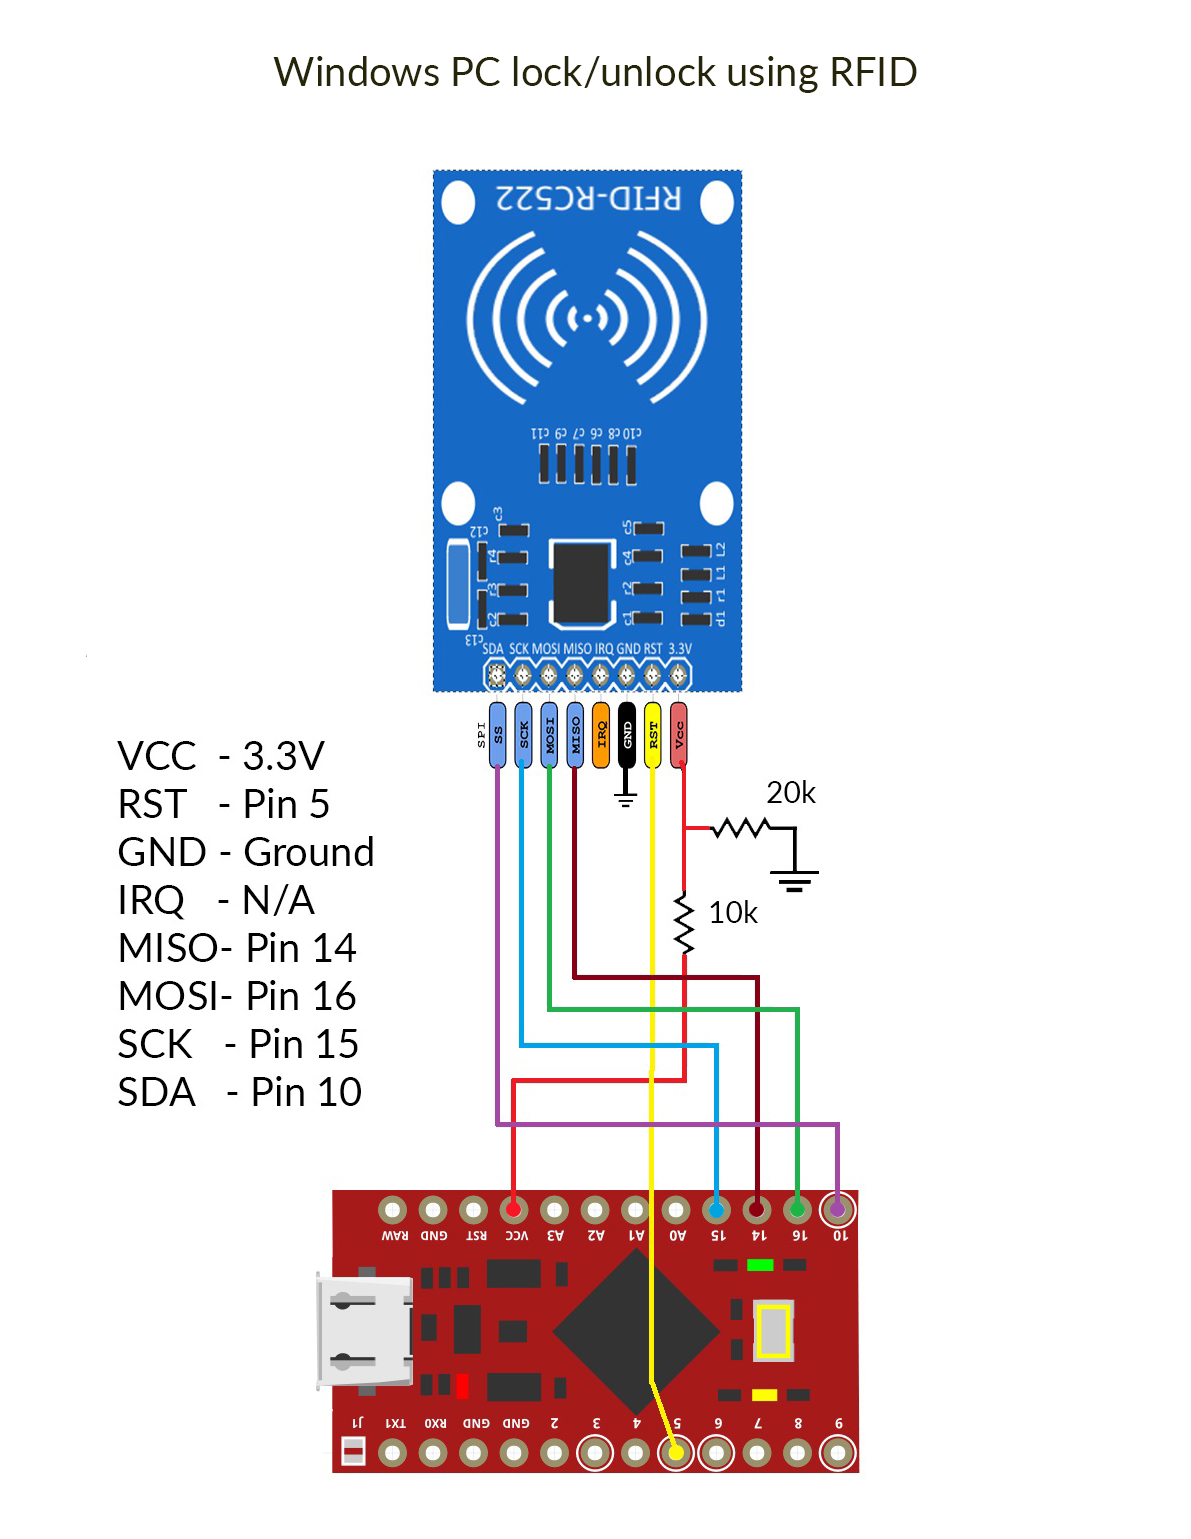
I recommend you to build a prototype on the breadboard before soldering the circuit to a PCB. This will help you to get a better understanding of the connections and will allow you to fix any of the errors that occurs while linking connections. Building the prototype is not a hefty task considering this project. We've to only make a few connections and we're ready to upload the code. The connections are described below. On the Arduino many of the pins are not changeable. As this device uses the SPI bus, it does not allow switching pins, pins 14, 15 and 16 must remain as shown. RST and SDA are user specified.
- The RC-522 RFID module is designed for an input voltage of just 3.3 volts. It is a very sensitive device, so any higher values may overheat and damage the module. The VCC out of Arduino Pro Micro will give you a 5 volts supply. Make a voltage divider as shown in the circuit diagram (or use a 5 V to 3.3 V step down module) to make a 3.3 volts supply voltage. Connect the 3.3 V supply to the VCC of RFID module.
- RST to pin 5 of Arduino. (You can change this pin in the code.)
- Connect the GND pin to the ground.
- IRQ pin - Not Connected.
- MISO to pin 14 of Arduino.
- MOSI to pin 16 of Arduino.
- SCK to pin 15 of Arduino.
- SDA to pin 10 of Arduino. (This is also a user defined pin.)
That's all it is!, Simple and easy. Just plug the cable and we're ready to upload the code and test the device.
The Code.
The Arduino Leonardo/Micro with the ATmega32u4 chip has a built-in USB communication. This allows the Leonardo/Micro to appear to a connected computer as a mouse or a keyboard.
We use the keyboard.h core library to make the arduino send the keystrokes to a connected computer.
The working of the code is very simple.
- The UID of your RFID card/tag and your windows password/PIN is stored in the code.
- When the right card is shown to the RFID reader, the arduino will send keystrokes for locking the windows and your password for unlocking the windows simultaneously.
- If the windows is in a locked state, the keystrokes for locking it won't have any effect and the command will unlock the locked computer.
- Or else if the windows is already unlocked, the commands will lock it. (The unlock code is also coming simultaneously, but as there is only a pinch of a delay between the lock and unlock keystrokes, Windows goes into executing the lock command and will not read the unlock code command coming at that time.)
You have to make some small changes in the code I've provided to explore and use it for yourself.
- Connect the prototype to the computer.
- Launch the Arduino IDE and open the code I've given here.
- From the toolbar go to tools -> Board and Select Arduino Leonardo for both Arduino Pro micro and Arduino Leonardo.
- Check whether the COM port is selected.
- Upload the code to the arduino.
- Open the Serial Monitor ( Ctrl+Shift+M).
- Scan your Card/tag.
- The first line of the output shown in the serial monitor is the UID of your card/tag. Note down this value.
- Now go back to the code editor and change the value of string "card1" to the UID you've just noted (In my code, you can find it in line 41).
- Go to the last part of the code and you'll find a line which says "Keyboard.print("PASSWORD");" (Line number 80 in the code.). Change this value to your windows unlock code.
- Now upload the modified code into the arduino.
- Scan the card/tag to test the prototype.
This is a basic code for typing passwords in your computer using RFID tags. You can modify the code to add more cards/tags and set different passwords for each card for various applications.
Soldering.
This is a very small and simple circuit. It's better to solder this in to a prototyping PCB board than spend a lot of time to make a custom PCB.
Always use headers to connect the arduino and the RFID module, otherwise prolonged exposure to heat while soldering may damage these boards permanently.
Solder all the connections as shown in the circuit diagram and connect the arduino and RFID module to the PCB board. I've connected the RFID module horizontally to the PCB board using a right angled female header for my convenience of making a case for it.
Always make sure to test the device for any possible loose connections or malfunctions after soldering.
Making an Enclosure.
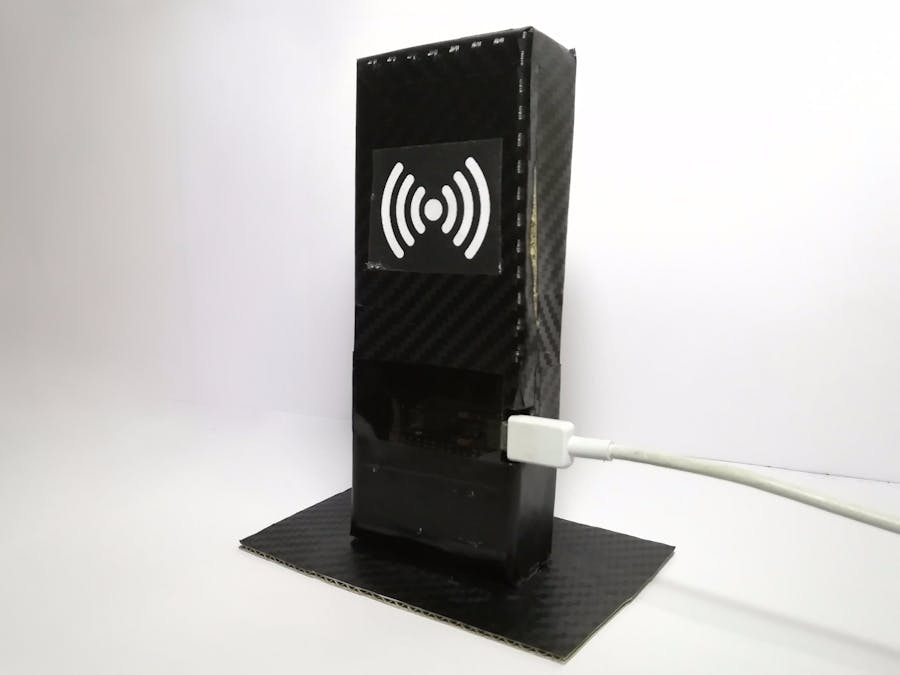
I made a simple enclosure using cardboard boxes that i found in my garage. I made a stand for it using the same cardboard and cut out holes in the case for connecting the cable and for the LEDs in the arduino. Then i wrapped the whole setup with carbon-fiber textured sticker and put a semi-transparent dark sticker for the hole where the LEDs in the board is situated.
Making the case is completely up to your imagination. Share your thoughts in the comments section below.!
The Result.Watch the video to see the device in action.
Remember, this is just a simple hobby project and does the work perfectly for a home user. Consider the potential security vulnerabilities before implementing this for your personal use. I can't guarantee any security.
There are numerous possibilities for applying RFID + keyboard.h in our daily life. I made it for locking/unlocking my computer. What're you going to do? Let me know it in the comments below!
Thank you!


_PnKPri8a6q.jpg?auto=compress%2Cformat&w=48&h=48&fit=fill&bg=ffffff)


Comments
Please log in or sign up to comment.