Unfortunately I am pretty absent minded and I sometimes forget to close my pipette tip box when I have finished pipetting. This is annoying and costly. In this past I have had to re-autoclave a pipette tip box that I left open over night.
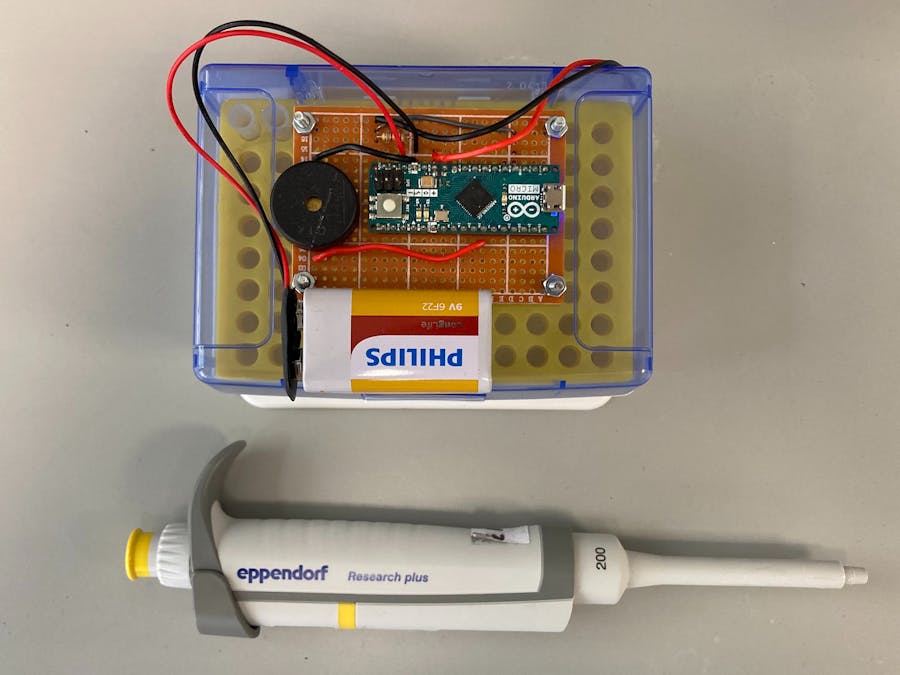
I wanted a cost effective solution to my problem. How do I stop myself forgetting to close the pipette tip box? As an Arduino enthusiast, I knew that microcontroller programming was the solution. In this project I have created a modular (i.e. detachable) circuit that can be mounted on a pipette tip box. The circuit senses if the pipette tip box is open using a force sensitive resistor (fsr) located at the back of the box. If the box is left open for over a minute the Arduino sounds an alarm until the box is closed again.
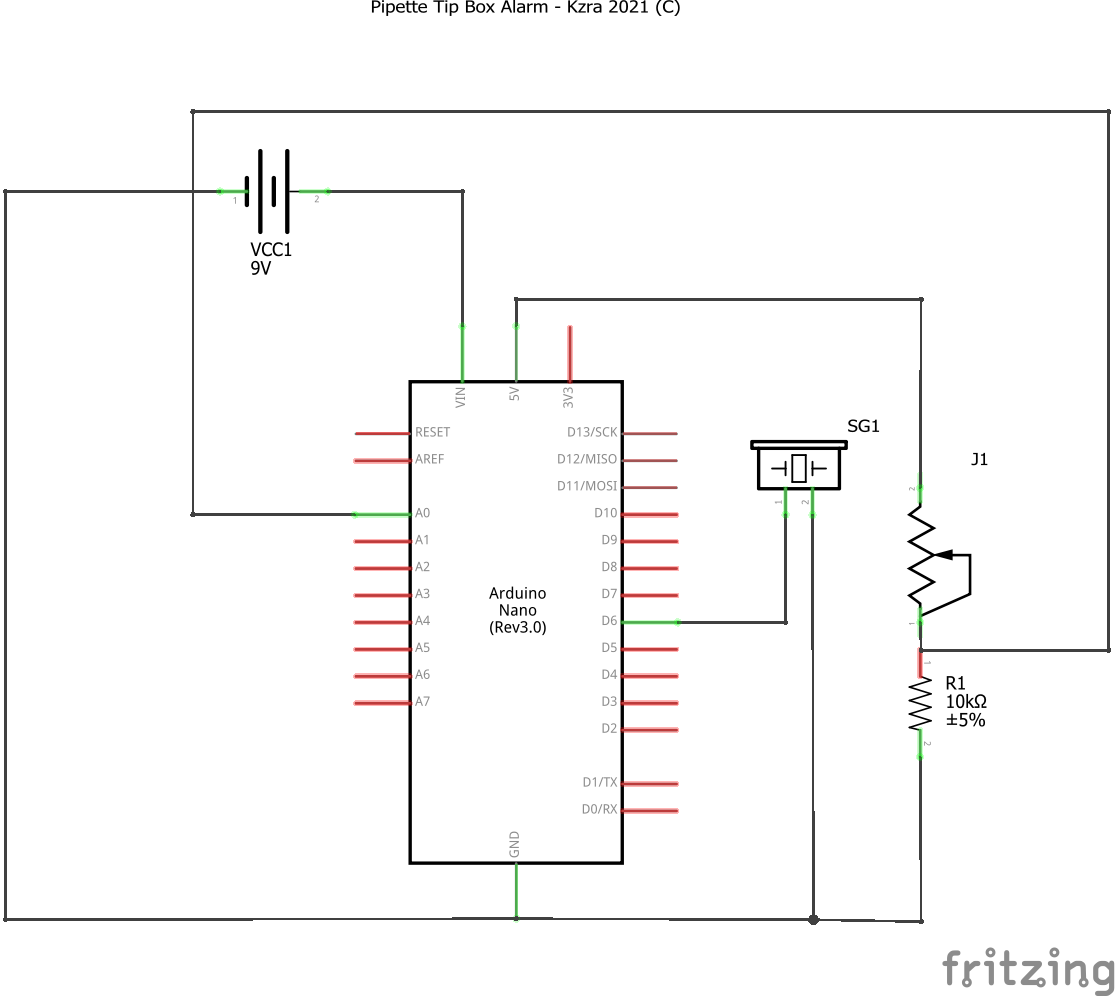
Assembling the circuit1. Assemble the circuit as shown in the circuit diagram. I recommend first using a breadboard not mounted on the pipette tip box to check everything is working. You can squeeze the fsr with your hand and monitor the output using the serial connection. Upload the code (given below) onto the Arduino. It does not require any non standard libraries.
2. If your breadboard circuit is working as it should proceed to solder the components on a perf board. I recommend using a perf board with no default connectivity, like these bakelite boards. You will need two perf boards, see photos below. Board A will house the arduino micro, the buzzer, 10k resistor and jumper wires. Board B will house the fsr and fsr connecting wires. To create board B cut a perfboard into quarters (or eighths) using scissors and solder onto one of the quarters. Solder both boards (but do not connect them yet).
3. Now experiment with mounting your boards on the pipette tip box (see photos for guidance). Board B needs to sit at or near the base at the back of the box with the fsr head flush with the upper lip of the box body. Secure the fsr head in place with blue tack. It needs to be positioned in such a way that when the pipette tip box lid is fully opened, part of the lid presses into the fsr. This is the only time the lid should be in contact with the fsr. Board A needs to sit directly on top of the lid. A 9v battery should be placed at the front of the lid (i.e. as far away from board B as possible). This battery will provide the weight that forces the lid into the fsr when the lid is fully open.
4. Confirm that the fsr reacts to the opening of the lid using the serial monitor (this need only involve Board B, a resistor and an external Arduino). If, when fully open, the lid presses into the fsr, but the fsr does not change its resistance, you can add more blue tack to elevate the fsr and increase the force exerted on it by the lid. Again, make sure the fsr is only in contact with the lid when the lid is fully open.
5. Once you are happy with this arrangement use a 3 mm drill and nuts and bolts to mount board A onto the lid (take care when drilling the lid, if you press too hard it will crack). You could use glue but drilling ensures you can easily remove the board if you need to autoclave your pipette tips. Board B is trickier. I mounted it directly to the base of the box using a 3 mm drill. For the 200 ul pipette tip box I was using, board B did not need to be elevated to put the fsr in the right position. If you have had to elevate board B with a platform, secure the platform in place using glue (autoclave safe) or a screw and then mount board B to the platform using a 3 mm drill and nuts and bolts.
6. Once you have successfully mounted the boards, remove them and solder the fsr connecting wires from board B into the correct place on board A. Remount the perf boards and rejoice, your pipette tip box is now alarmed.


_PnKPri8a6q.jpg?auto=compress%2Cformat&w=48&h=48&fit=fill&bg=ffffff)


Comments
Please log in or sign up to comment.