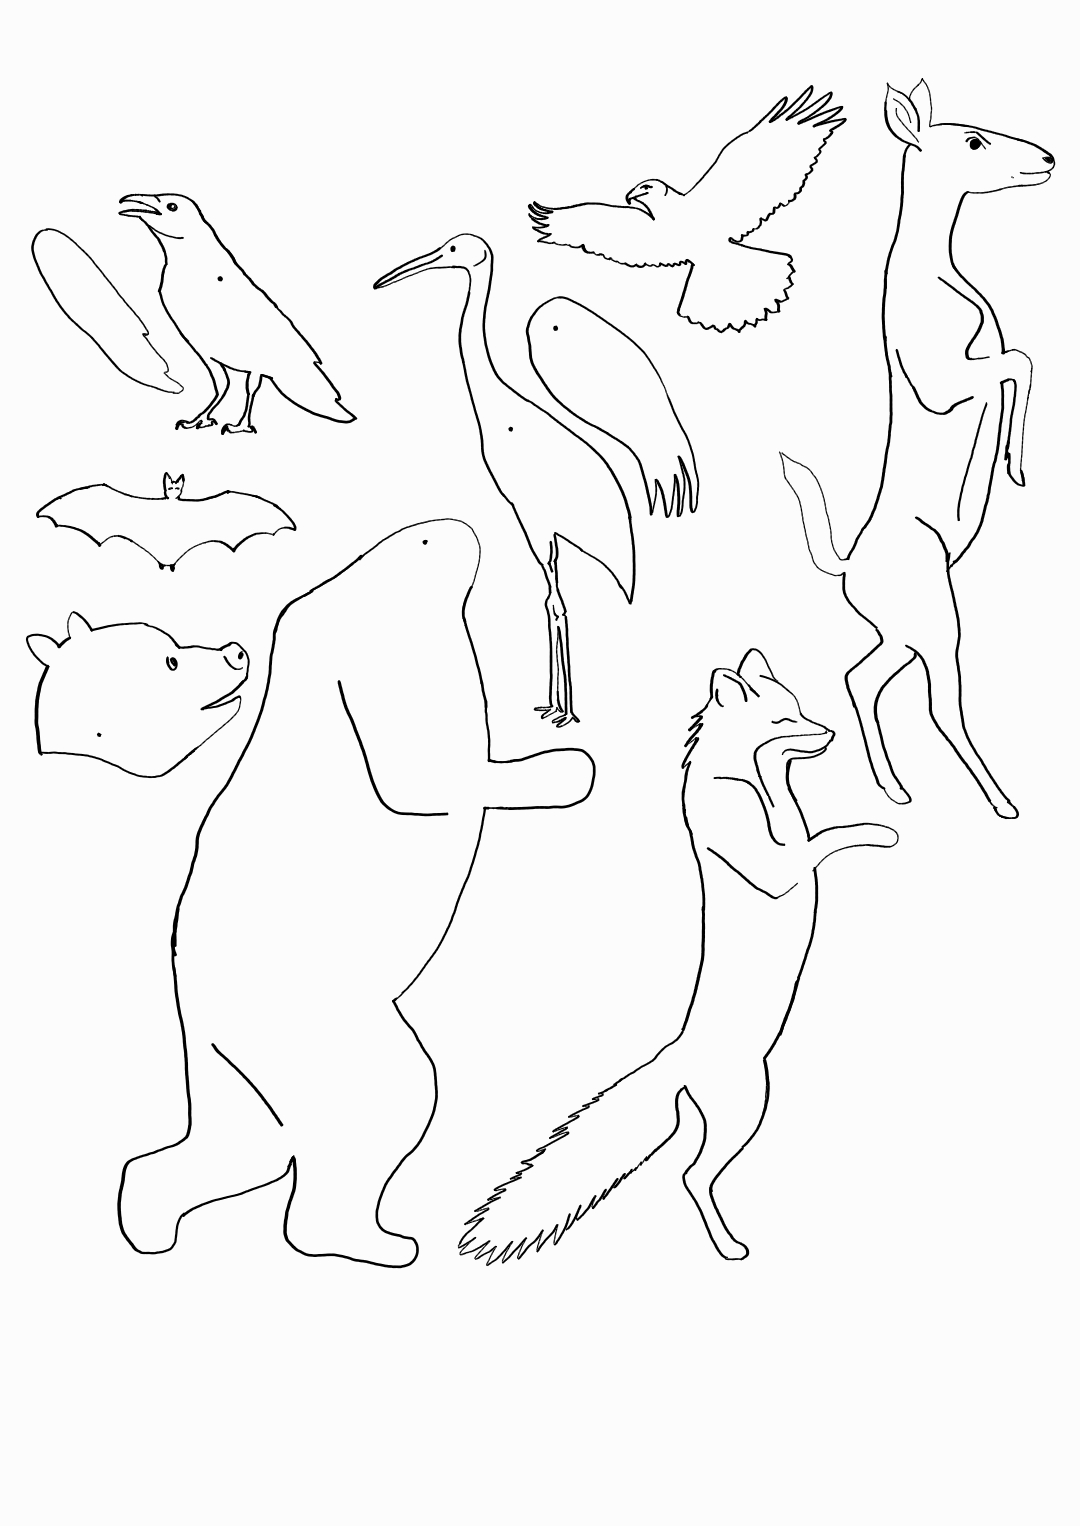
This semester, I undertook an independent study project for my Spanish major that involved creating a shadow puppet theater production. I very quickly created a wonderfully ambitious storyline with 7 shadow puppets, three of which have moving parts. Alas, I only have two hands, so some engineering was in order. I decided to create a system in which the three puppets with moving parts were controlled by button activated servos, and a fourth puppet’s movements pre-programmed to be controlled by two stepper motors. I incorporated a speaker to add sound effects to my production, bringing my characters to life.
The Process:Mechanical:
The stepper motor system involves two steppers, two 3D printed movement arms, two pulley wheels, and a timing belt. Find the files for the movement arms in my GitHub. These arms were printed on 40% infill, and took about 5 hours. The bottom section is designed to fit snugly on the stepper motor on the left. The top arm has a long rod which serves as the pivot joint between the two arms, as well as the attachment point for the belt. The joint is held snug using a gear which has a shaft collar. The belt goes from the gear on the second stepper motor to the gear on the rod. When the stepper motor on the right turns, the belt will move the top arm. Together, the two stepper motors can create movement in a 2D plane. The top arm has a small hole at the top for the shadow puppet to attach to. The belt was measured such that it could just barely be pulled into place between the two gears once glued together.
For the servo-animated puppets, I modified my existing laser cut designs to fit a servo. In a future iteration of this project, I would modify my drawn designs to allow the servo holes to be laser cut rather than adding this in using a drill press. My puppets were relatively small, and the process of drilling out holes big enough for the servos chipped out some of the wood. This possibly could have been avoided with different wood or through the use of a small hand saw. The body of the puppets were cut so that the servo fits snuggly, with the rotating portion hanging out for the moving portion (such as the wing or head) of the puppet to attach to. For prototyping, I attached the moving pieces to the plastic servo attachments that they came with, but in the final design, the pieces were directly attached to the servo.
Electrical:
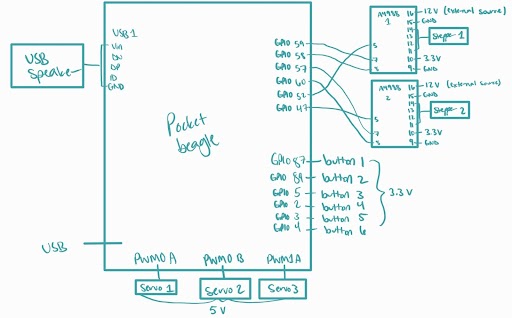
The steppers needed to be driven using A4988 stepper drivers, and required an additional 12V power source in addition to 3.3V and 5V from the PocketBeagle. The 12V was connected to the power rails on one side of my main board.
All other components used a 5V source from the PocketBeagle, which was connected to the power rails on the other side of my main board. A separate board was used for the 6 buttons involved, which use 3.3V. Note that in the image of the button board, 3.3V is wired to the blue negative rail, and ground is wired to the red positive rail.
The speaker is connected to the board via USB to microUSB adapter to a USB pin connector. This connector is wired to the PocketBeagle, and this communicates with and powers the speaker.
Limitations:
The servo portion of this project worked exactly as planned. The puppets move nicely, and I was able to adjust the degree to which the parts rotated.
The speaker functions as expected, with the exception of a delay between pressing the button and the sound file being played. This changes how the operator has to time their own hitting of the buttons during the puppet show, but can be adjusted to as the delay is roughly the same every time. Additionally, there is no button command to stop the speaker due to the use of os.system to play sound. If the operator wants to play their entire sound file, this is not an issue. However, if the operator would like to stop the sound prematurely, this requires the keyboard command “ctrl+c”. This does not stop the entire program from running, only the speakers.
The biggest limitation of the current design is that the stepper motors are not strong enough for this application. The weight of the arms and gears does not prevent the steppers from rotating, but when either arm moves too far from vertical, the entire system will pull itself down as the weight of the arms turns the steppers. The steppers are not able to pick up either arm from the ground once this happens. When used sideways so that the arms are parallel rather than perpendicular to the ground, this system works with greater success. The arm connected directly to a stepper turns as expected when parallel to the ground, but the arm controlled by the belt has more difficulty. When the bottom arm is held steady and the starting position of the top arm is upright, the belt works well. Once the top arm is turned downward enough, the belt has a harder time moving the arm. A visual demonstration of this is shown in two attached videos below. Using stronger steppers or lighter, less flexible material for the arms may improve the ability of my current design to execute movement.
Operator Instructions:
The program will start upon bootup of the PocketBeagle. Upon starting, the servos will turn themselves to the “0” position, which is in their rest state. Pressing buttons 1-3 will switch the state that the puppets are in. They may be pressed in any order and any combination may be pressed simultaneously. If the button is held for longer than half a second, the state will switch again. If the button is pressed and held, the servo will continuously switch states every half second until the button is released. This can be used to approximate wings flapping (flying) and head nodding in the case of these puppets. There is a half second sleep time between button presses to prevent accidental duplicate presses while maintaining the flapping functionality.
Pressing buttons 4 or 5 will initiate the stepper motion sequences. Each has its own combination of turning both of the steppers.
Pressing button 6 will initiate a bat flying sound effect. There is a several second delay between hitting this button and the sound effect playing through the speaker, however you will be able to see that it is loading on your computer screen upon pressing the button.
To prematurely stop the sound effect, use the keyboard control “ctrl + c”. To fully exit the program, use “ctrl + c” three times. When the program is exited, all components will “clean up”. However, you will most likely only notice the servos doing so. Some or all of the servos will turn back to a specified position upon exiting the program.
Project demonstration:


_3u05Tpwasz.png?auto=compress%2Cformat&w=40&h=40&fit=fillmax&bg=fff&dpr=2)
Comments
Please log in or sign up to comment.