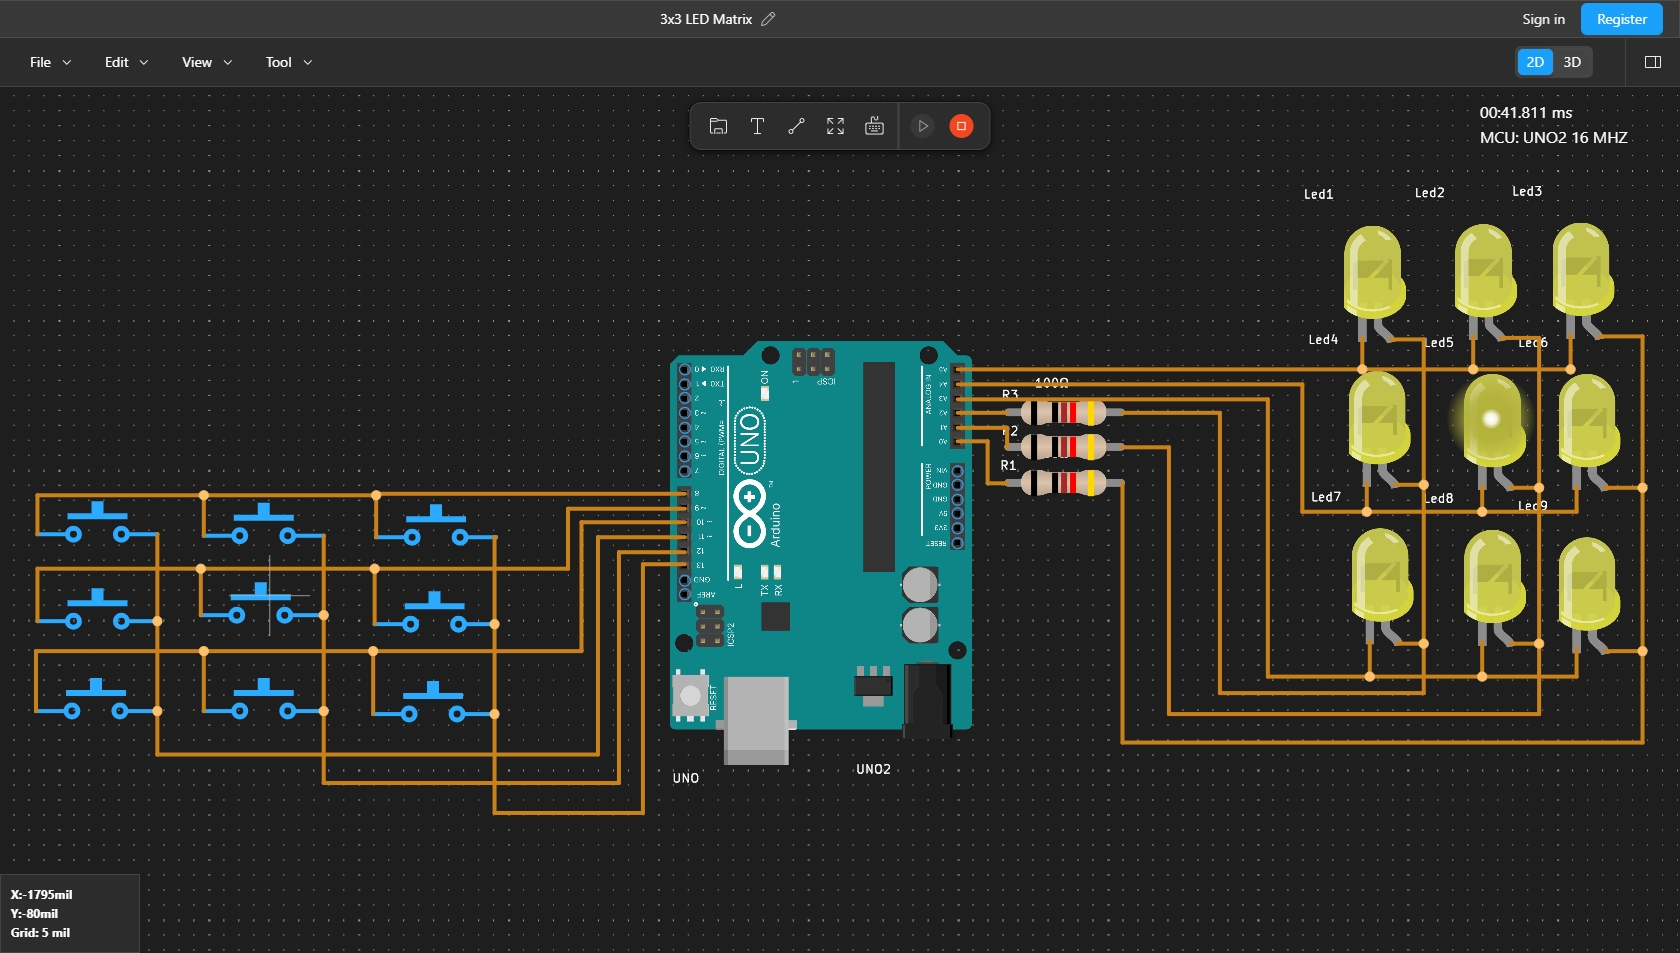
This project involves creating an interactive keypad-controlled LED matrix using an Arduino UNO development board. The goal is to design a system where pressing any button in a 3x3 matrix keypad will light up the corresponding LED in a 3x3 LED matrix.
Components RequiredArduino UNO Development Board: The brain of the project that will read inputs from the keypad and control the LEDs.
LEDs (9): To form a 3x3 LED matrix for visual feedback.
Push Buttons (9): To form a 3x3 keypad matrix for user input.
Resistors: To limit the current and prevent damage for LEDs.
Code AnalysisThe code provided is a straightforward implementation of the project requirements. Let's break down the key parts of the code:
1.Pins Definition:
led_row and led_col arrays define the pins connected to the rows and columns of the LED matrix.
btn_row and btn_col arrays define the pins connected to the rows and columns of the keypad matrix.
2.Setup Function:
Initializes all the keypad row pins as outputs and column pins as inputs.
Initializes all the LED row pins as outputs and column pins as outputs.
3. Loop Function:
The loop() function contains the main logic of the project.
It performs row scanning by setting the current row's keypad buttons to high.
It then performs column scanning within each row. If a button is pressed (detected as high), the corresponding LED is lit up for 500 milliseconds.
After the delay, the LED is turned off, and the row is reset for the next scan.
How It WorksWhen the circuit is powered and the code is uploaded to the Arduino UNO, the device will continuously scan each row of the keypad matrix. When a button is pressed, the corresponding LED in the LED matrix will light up for a brief period, providing immediate visual feedback to the user.
Additional NotesDebounce Handling: The current implementation does not include debounce logic, which might be necessary in a real-world application to handle the mechanical bounce of buttons.
Enhancements: Additional features like multiple LED lighting patterns or interactive effects could be added to enhance user experience.
Scalability: The code structure allows for easy scaling up to larger matrices by adjusting the pin arrays and loop logic accordingly.

_ztBMuBhMHo.jpg?auto=compress%2Cformat&w=48&h=48&fit=fill&bg=ffffff)


Comments
Please log in or sign up to comment.