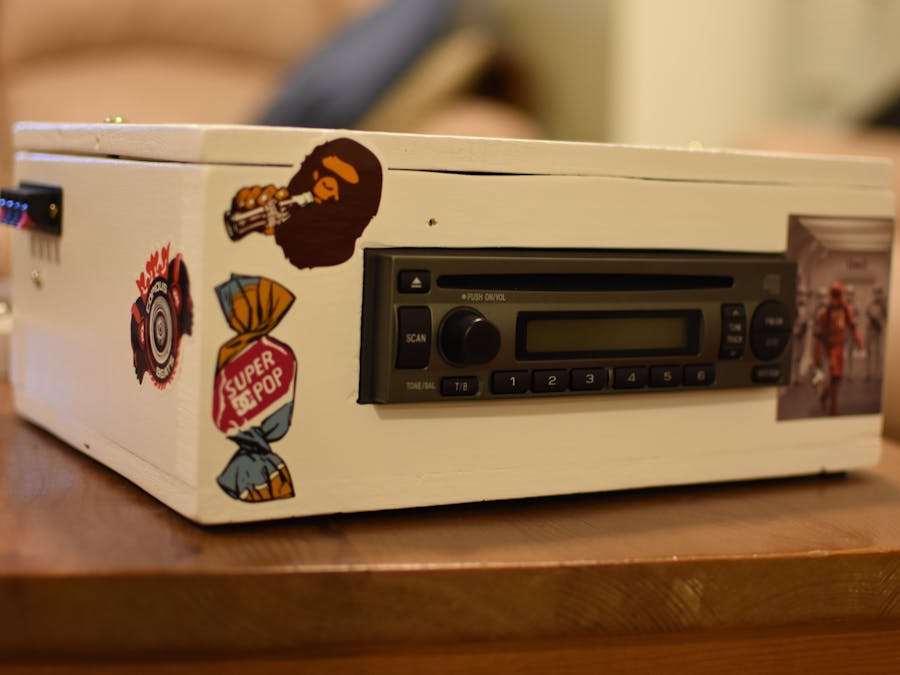
A few years ago, we installed recessed lighting and in-ceiling speakers into our kitchen. I ran the speaker wire to our pantry so that I could stash away the amp that I'd obviously need to drive the speakers. On a temporary which-would-become-semi-permanent basis, I put a Yamaha HDMI-switching home audio receiver into the pantry and connected it with the speakers. Obviously this was overkill since I didn't need a receiver of such quality (and bulk) for this purpose.
A couple of weeks ago while binge-watching one of my favorite YouTubers - The Post Apocalyptic Inventor (https://www.youtube.com/channel/UCDbWmfrwmzn1ZsGgrYRUxoA) - I came across a video where he modifies an old car stereo. As part of the build, he added a 3.5mm aux input and built an enclosure for it so that he could use it as a home stereo. At this moment I realized what my next project would be - to build an enclosure for and add a 3.5mm aux jack to my old Clarion car stereo that was sitting in the basement.
As the endless tinkerer, I have piles of scrap everything - wood, wire, metal, buttons, knobs, salvaged electronics, etc. As part of this build, I wanted to re-purpose as much salvage that I had lying around as I could. I have plenty of scrap wood to build the enclosure, so no issues there. I also have a box of old laptop power supplies of various DC voltage and amperage, so surely I would find something in that box to power this project. The only components I wound up buying were 1) a pack of speaker terminals (only because I couldn't find the salvaged one I know I have somewhere), 2) a pack of LM2596 voltage converters, 3) a factory Subaru wiring harness, and 4) a pack of 3.5mm jacks (only because AGAIN I couldn't find the salvaged stash I have!!). The cost breakdown was:
- $8 for a 20-pack of speaker terminals ($.40 per unit)
- $11 for a 6-pack of LM2596s ($1.83 per unit)
- $6.50 for the wire harness
- $6 for a 5-pack of 3.5mm jacks ($1.20 per unit)
I obviously did not need all of those components for this particular build, but will certainly use the extras in other projects (especially the LM2596), so I have no issue with the investments I made. I could have saved the expense of the wire harness, however, without it, soldering would have been much more difficult.
The BuildEnclosure
Since I wasn't terribly worried about having crisp, clean cuts for the enclosure, I used my bandsaw instead of my mitre saw. The top and bottom of it are made out of 3/4" plywood that I had left over from some garage shelving I made last year. The front, back, and sides are made from scrap 3/4" pine that I have left over from something. I've used 3/4" pine for hundreds of projects over the past 15 years, so it is impossible to know from where these particular scraps came.
All primed and painted:
AUX input
The radio I used here is a factory Subaru stereo/CD player from a 2005 Impreza - pretty bare bones by today's standards. No aux input, no bluetooth, no MP3 capability, etc. From watching The Post Apocalyptic Inventor, I knew it was possible to add an aux input, but the problem was I just didn't know how for my specific radio. After only a minute or two of digging online, I came across this post - http://efeion.blogspot.com/2010/06/adding-aux-to-clarion-pf-2597a-b.html. That is exactly what I wanted to do on the exact same radio!
Still shot of the bottom of the stereo:
External Connections
The enclosure needed some holes drilled for the 3.5mm jack and speaker terminal. I drilled 4 holes for the terminals and 1 for the jack. Since the 3/4" pine was too think to use the mounting nut provided with the aux jack, I just use pressure to keep the jack snug in the case.
Power
I needed 12v DC to power the radio and something north of around 1 or 2 amps. I couldn't find an exact spec on the required current, but during my prototyping, I tried a 12v 0.5 amp DC plug. The radio power would cut out when pressing the CD eject button, so I figured 0.5 amps was too small. I bumped that up to a 2 amp plug and it stopped cutting out, so I went with that sizing.
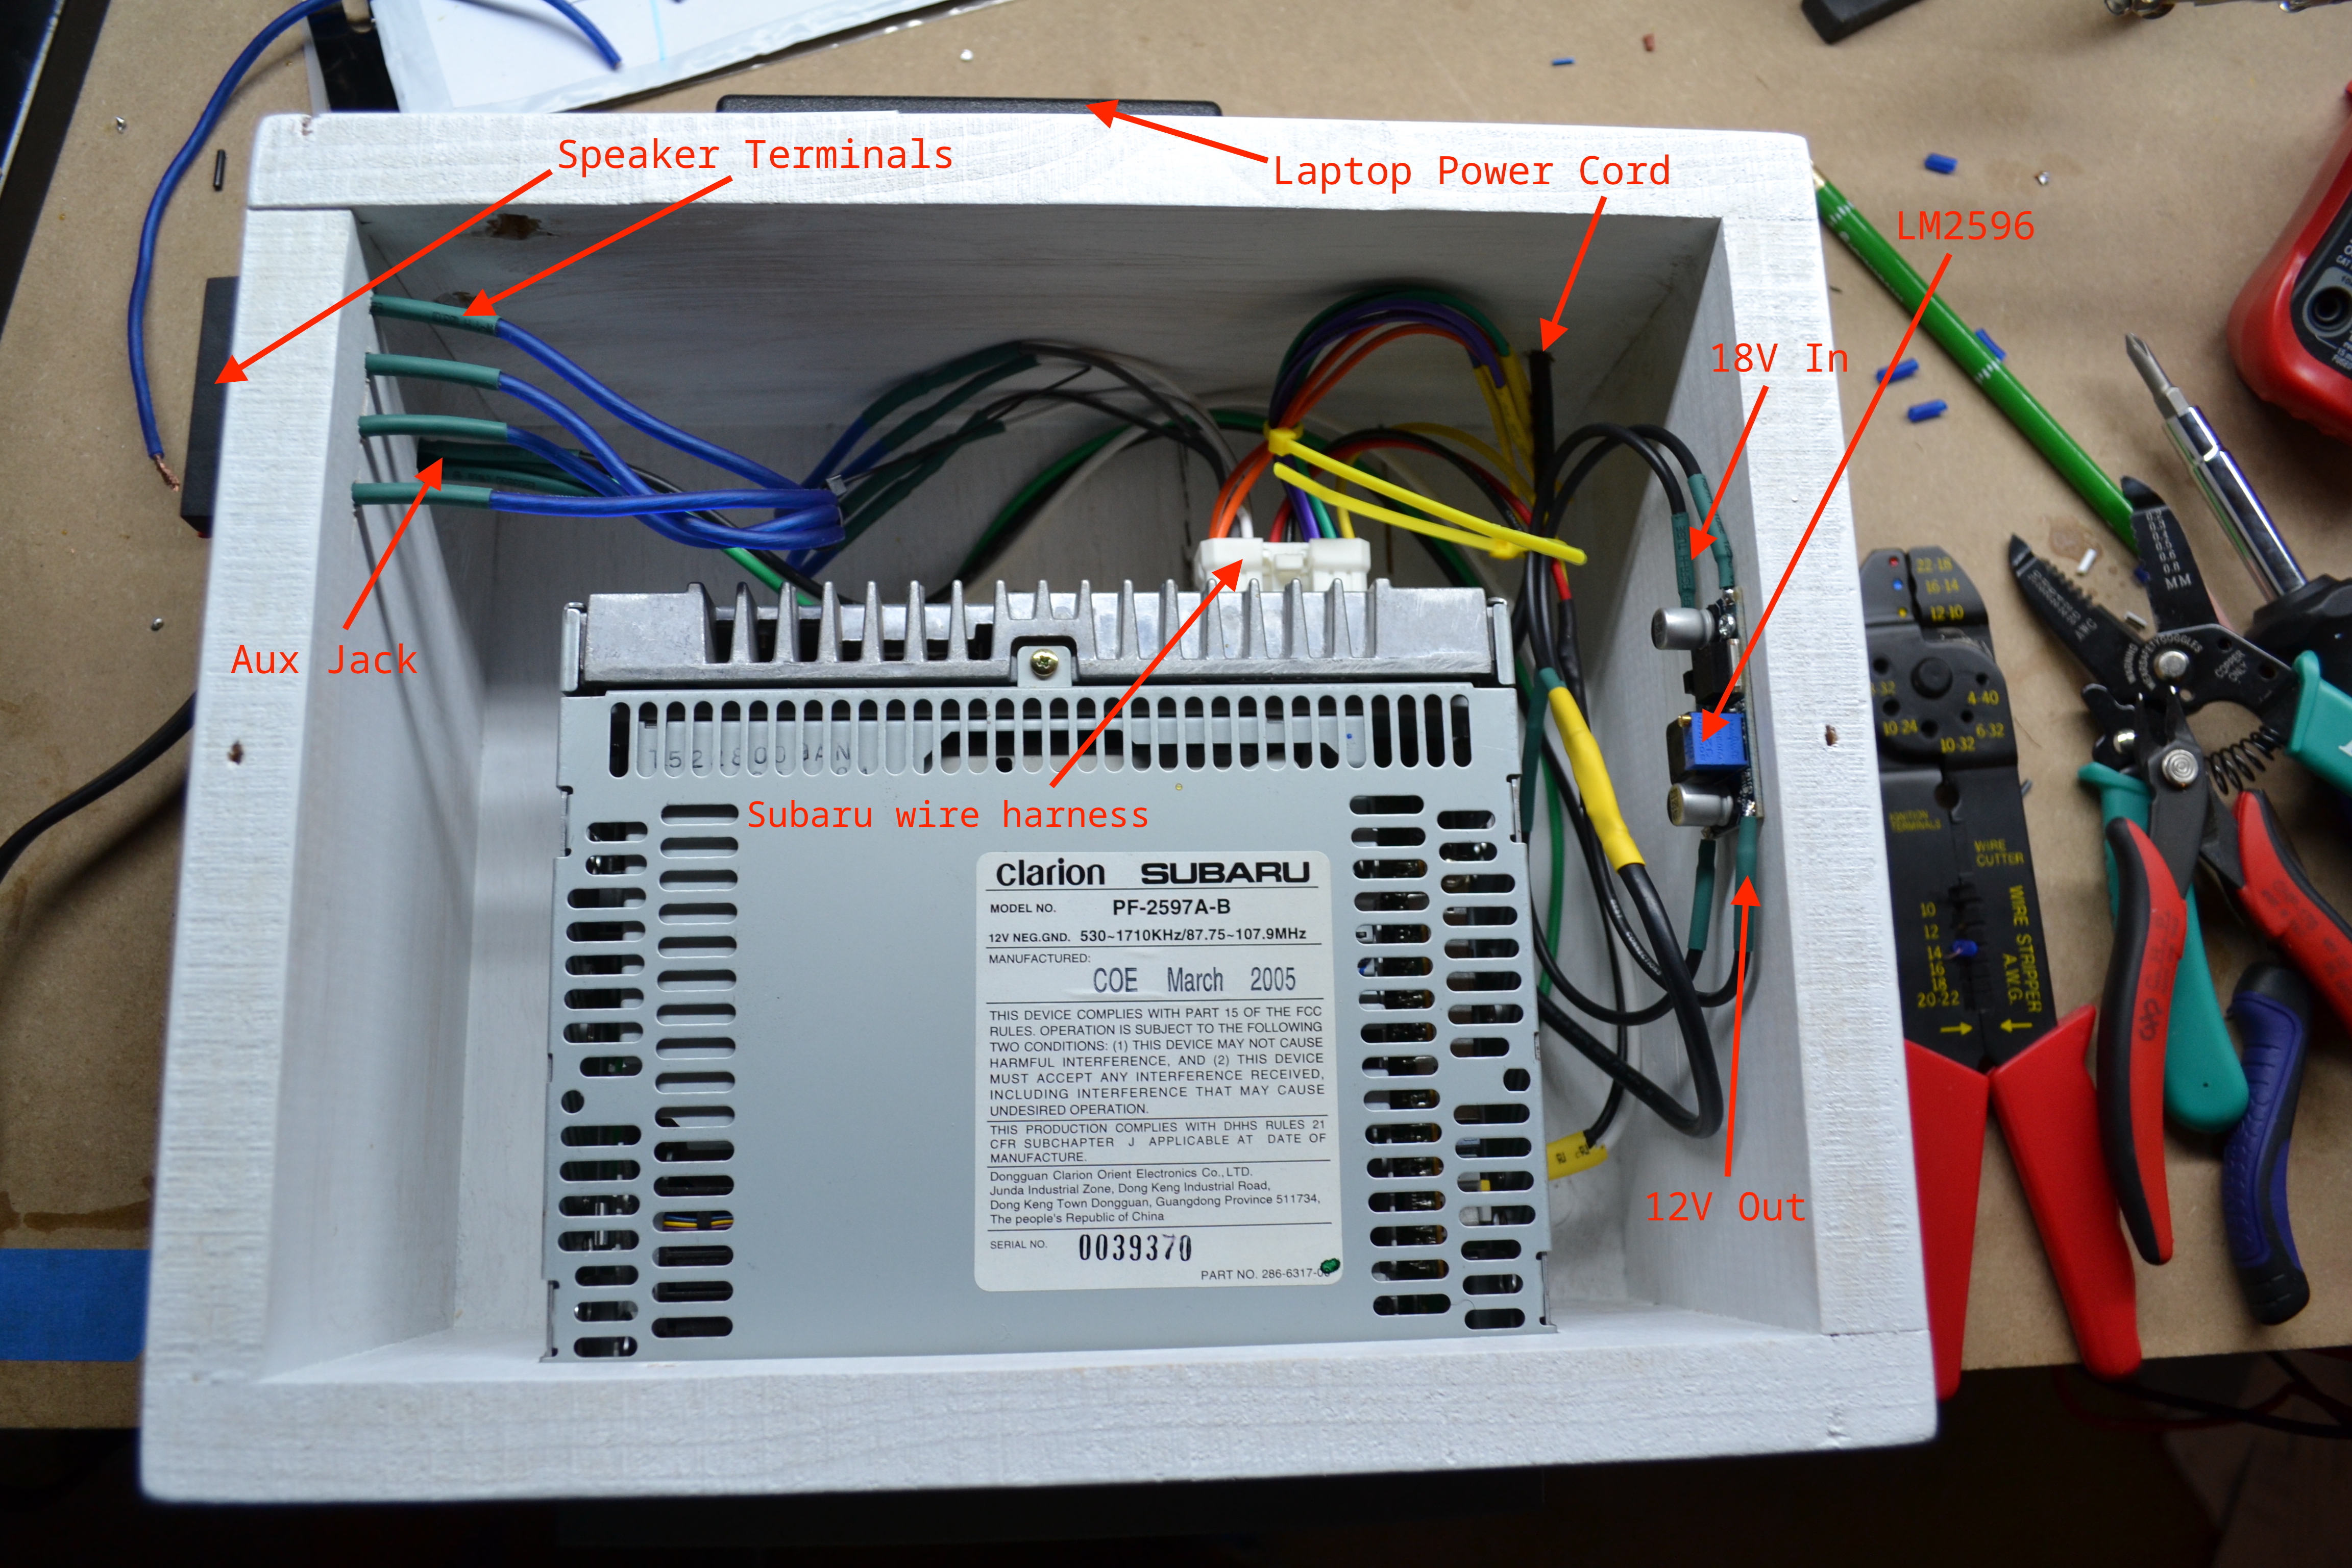
Being that I have lots of old laptop power cords stashed in a box, I decided to put one of them to use - an old HP plug. Since it outputs 18v DC, which is higher than I needed, I used the LM2596 to step it down to 12v. Splicing into the cord threw me for a loop because there were 3 wires and not the expected 2. I used my multimeter to figure out which 2 I needed, but I still wasn't sure about the purpose of the 3rd one. It turns out it is a "sense" wire that is used for a few different purposes, but nothing I needed here.
Final Assembly - Lots of Soldering
During the final stage of assembly, there was lots and lots of soldering that I had to do. It is not one of my strengths to be sure, but I appreciate the practice. I begin by soldering pins 6 and 12 from the wire harness together and then onto the positive 12v wire coming from the output side of the LM2596. After fitting the radio into place in its final destination, I permanently mount the LM2596 onto the side of the enclosure and then connect it with the power source. Next, I solder the speaker wires onto the terminal posts. Then the final step consists of wire management with zip ties.
Final WordsI know this build isn't the prototypical Hackster project because there's no Arduino, RPi, sensors, code, automation, etc. However, I feel that the underlying spirit of what I tried to create matches that of all the other projects showcased on this forum. I hope you all agree.


Comments
Please log in or sign up to comment.