#include <IRremote.h>
#include <LiquidCrystal.h>
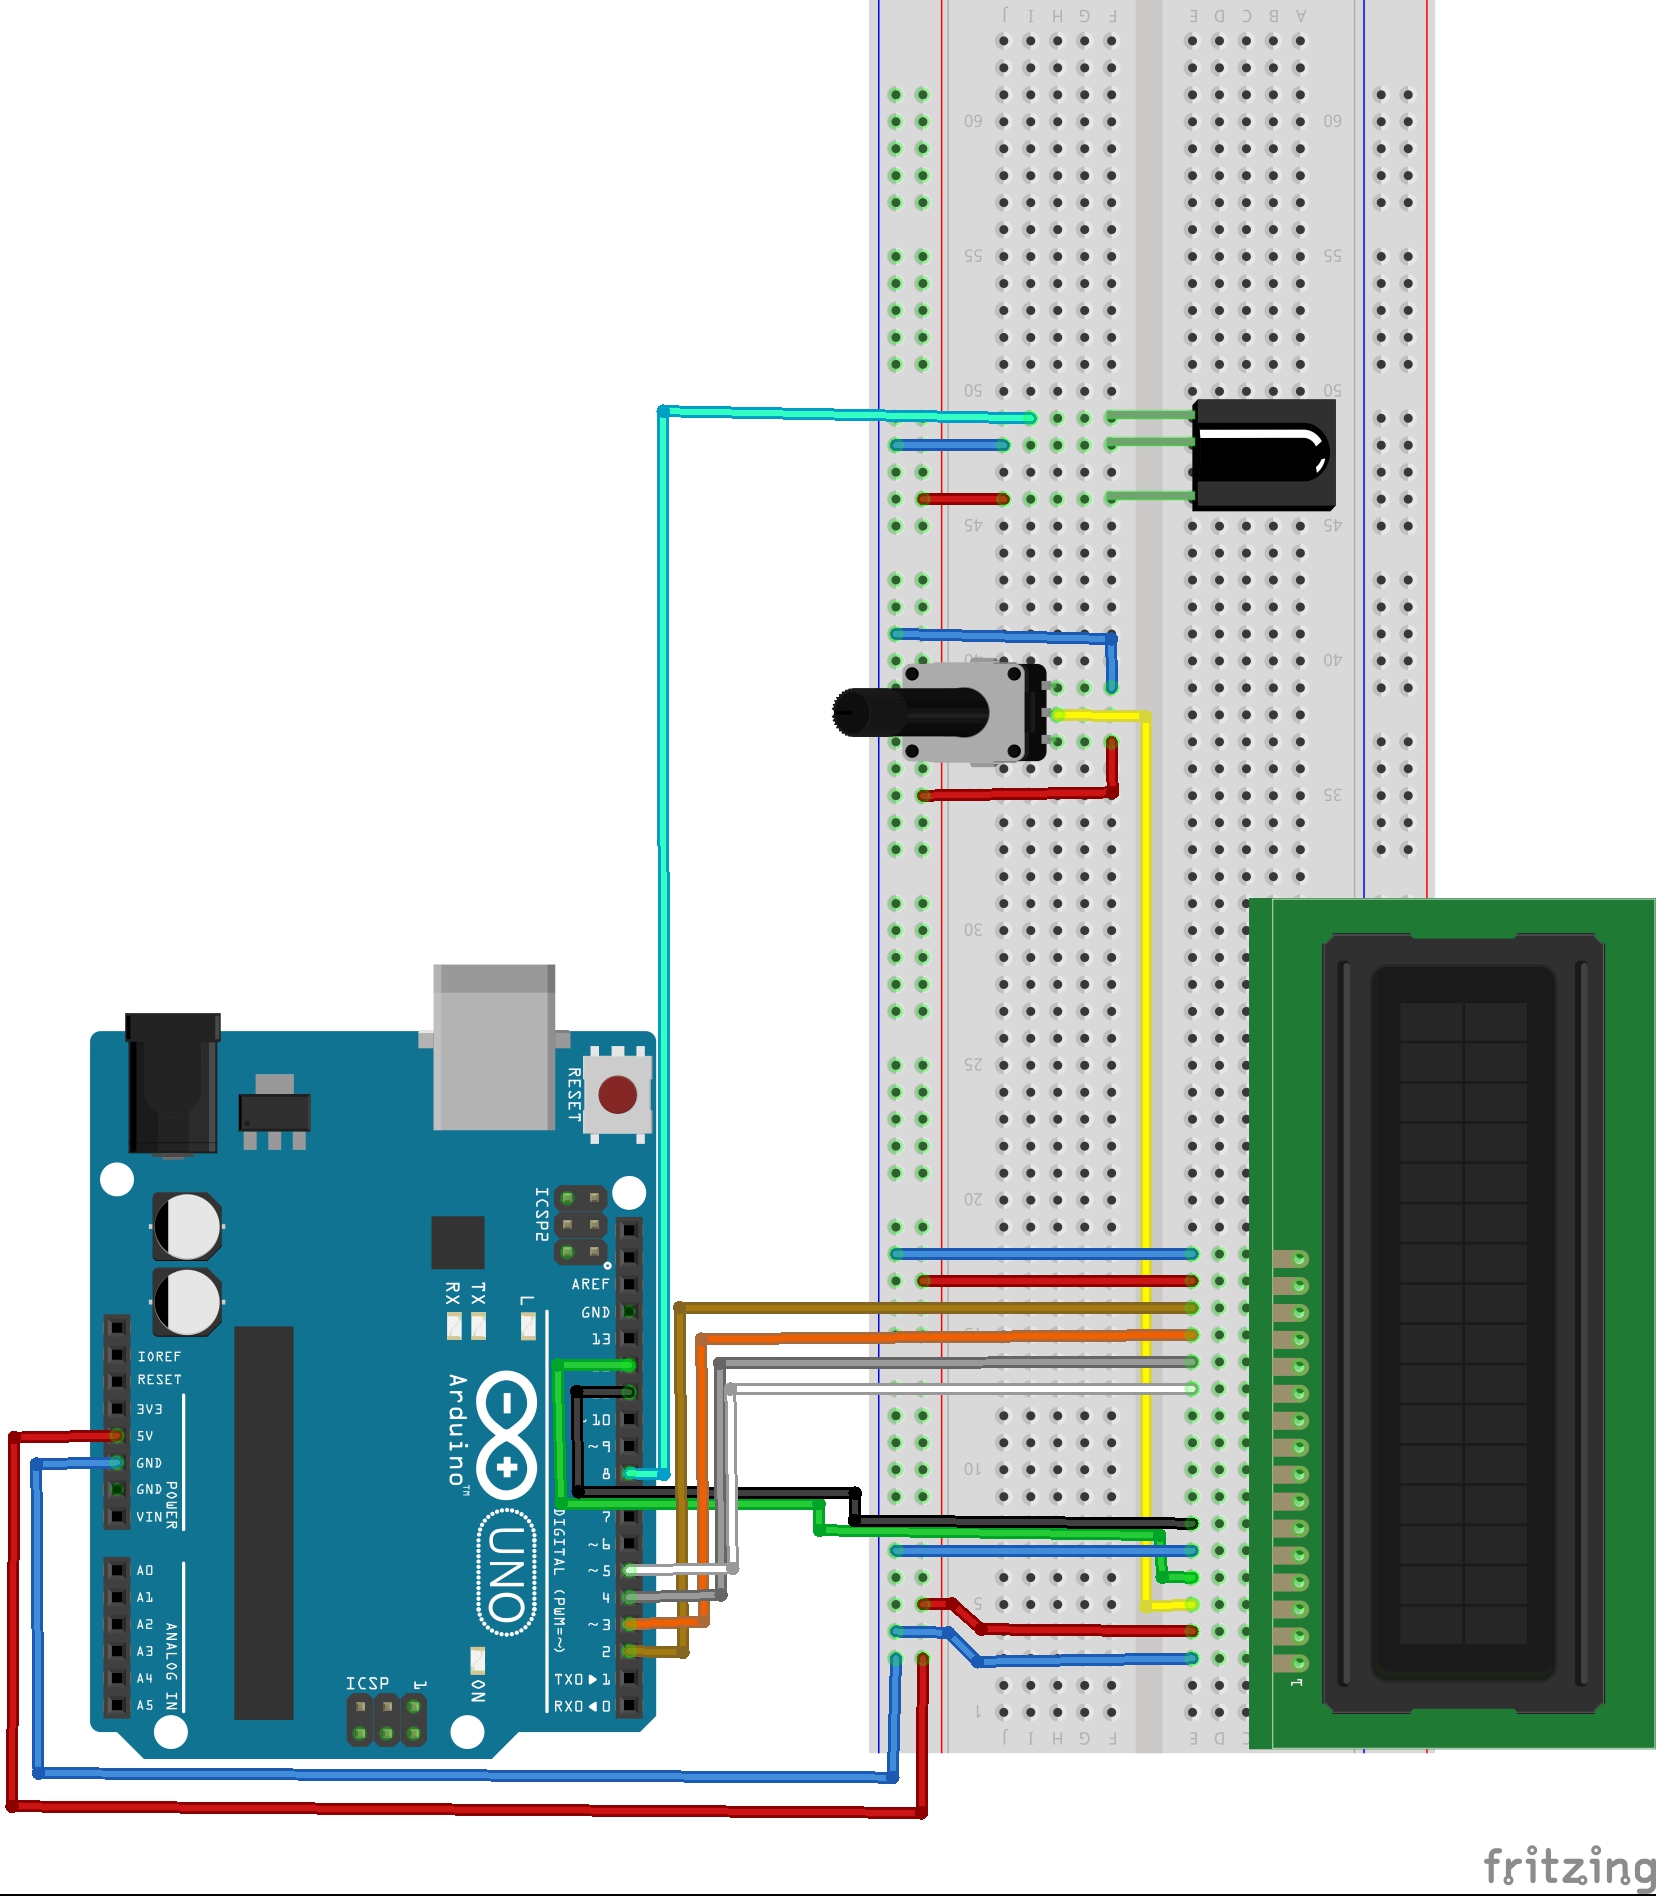
const int rs = 12, en = 11, d4 = 5, d5 = 4, d6 = 3, d7 = 2;
LiquidCrystal lcd(rs, en, d4, d5, d6, d7);
int RECV_PIN = 8;
IRrecv irrecv(RECV_PIN);
decode_results results;
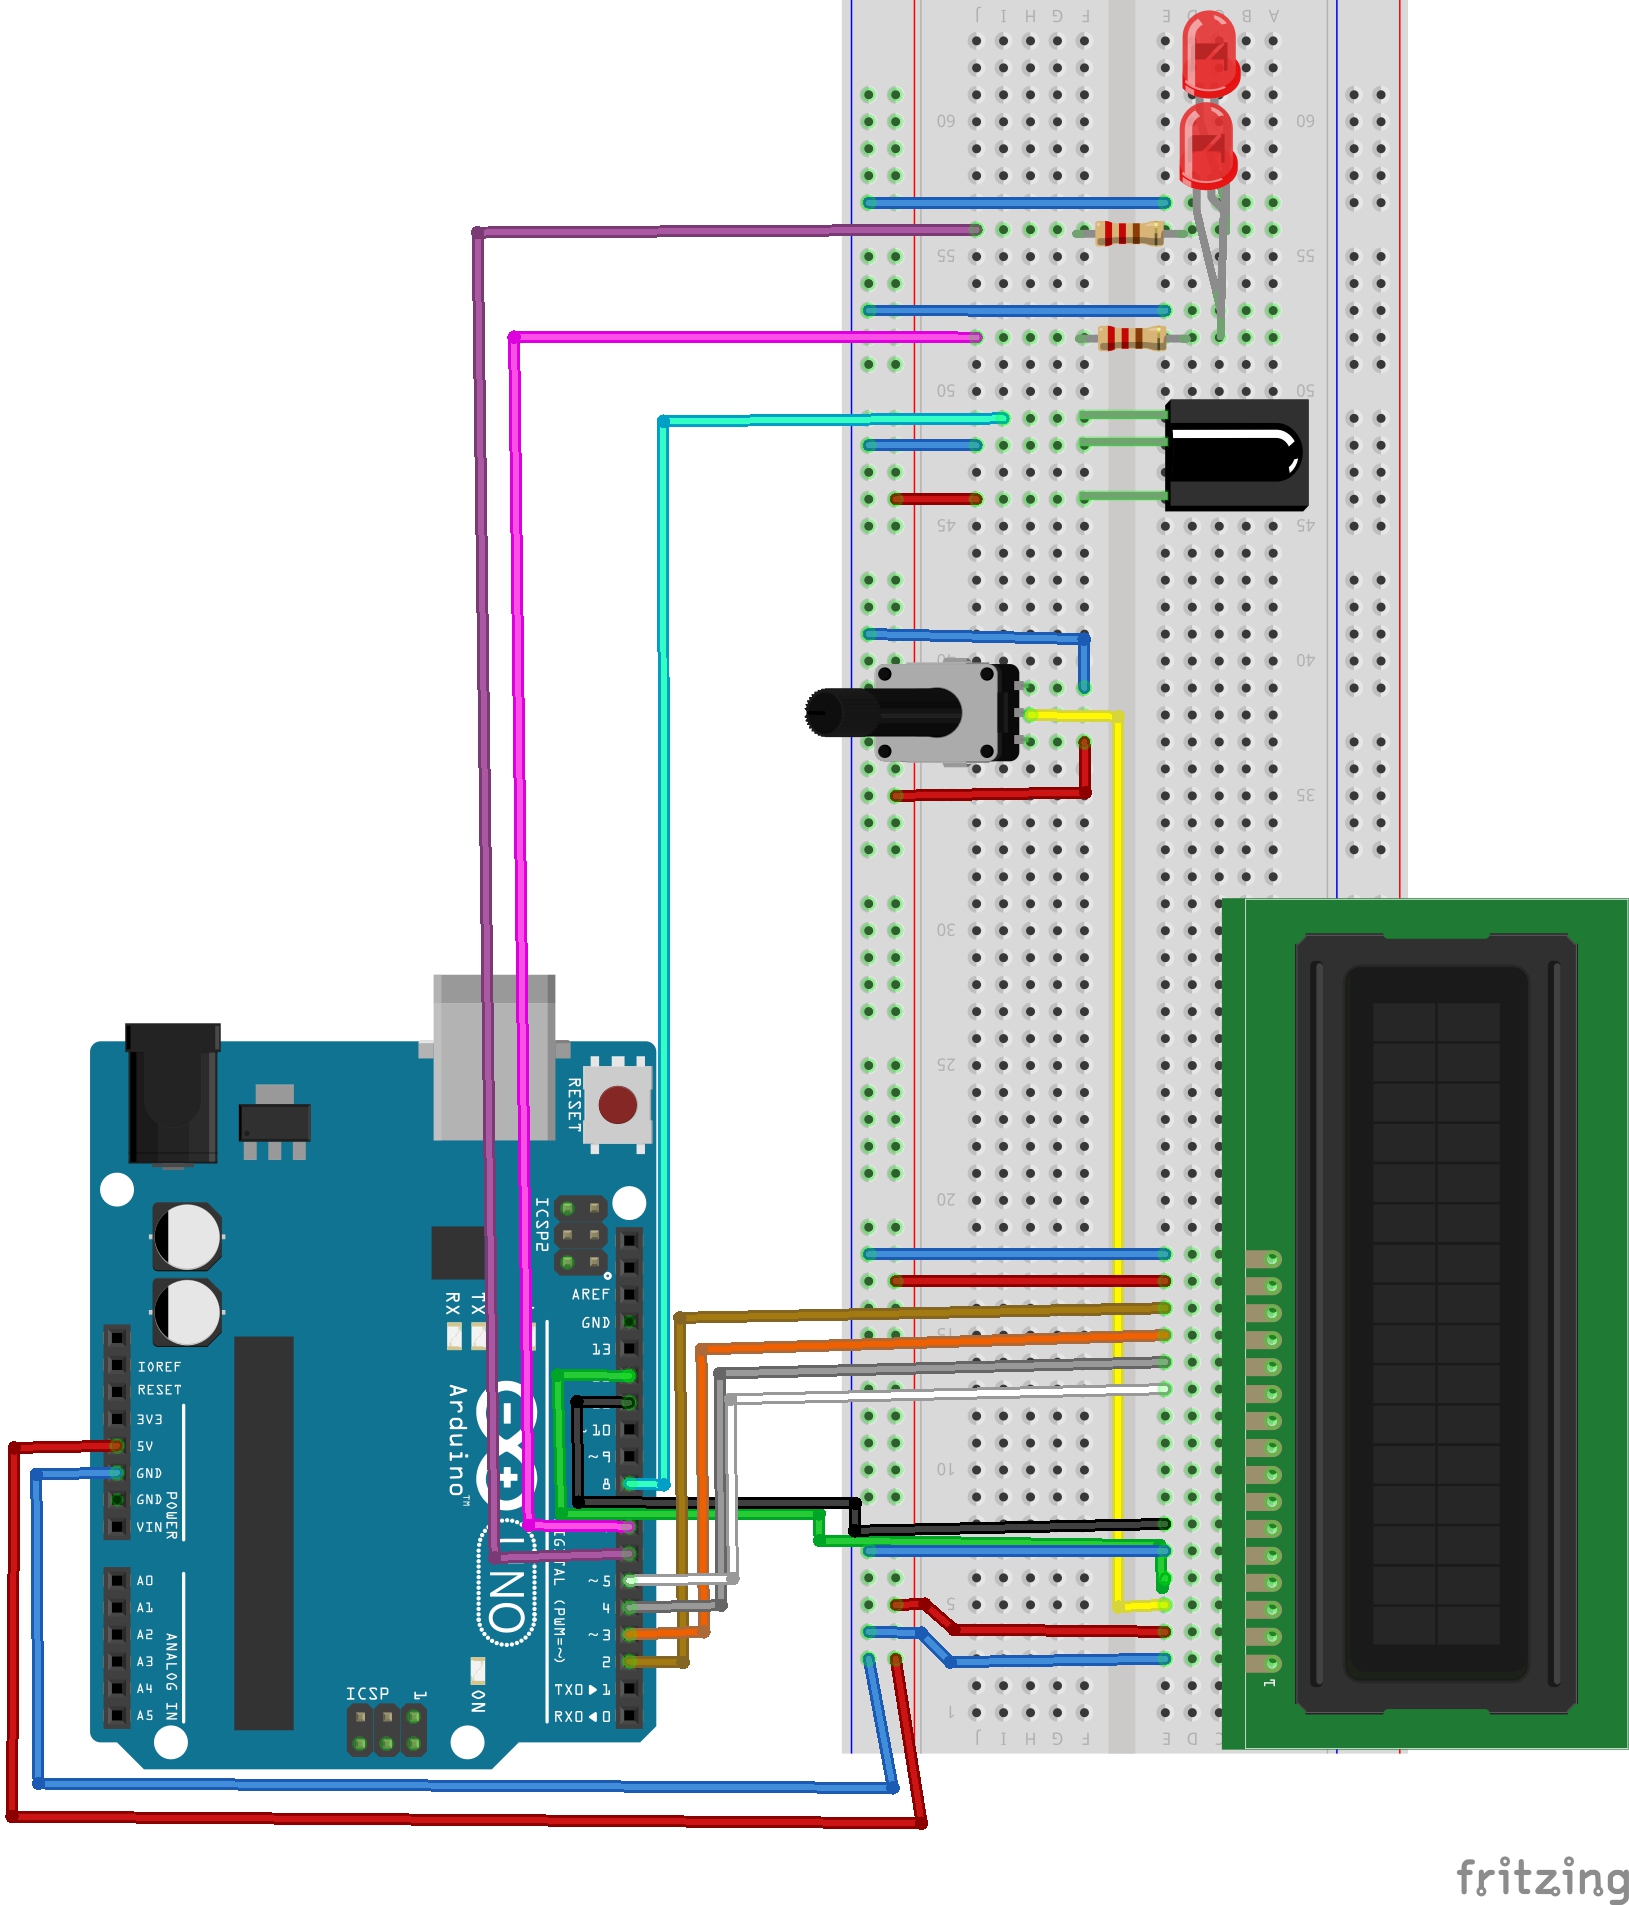
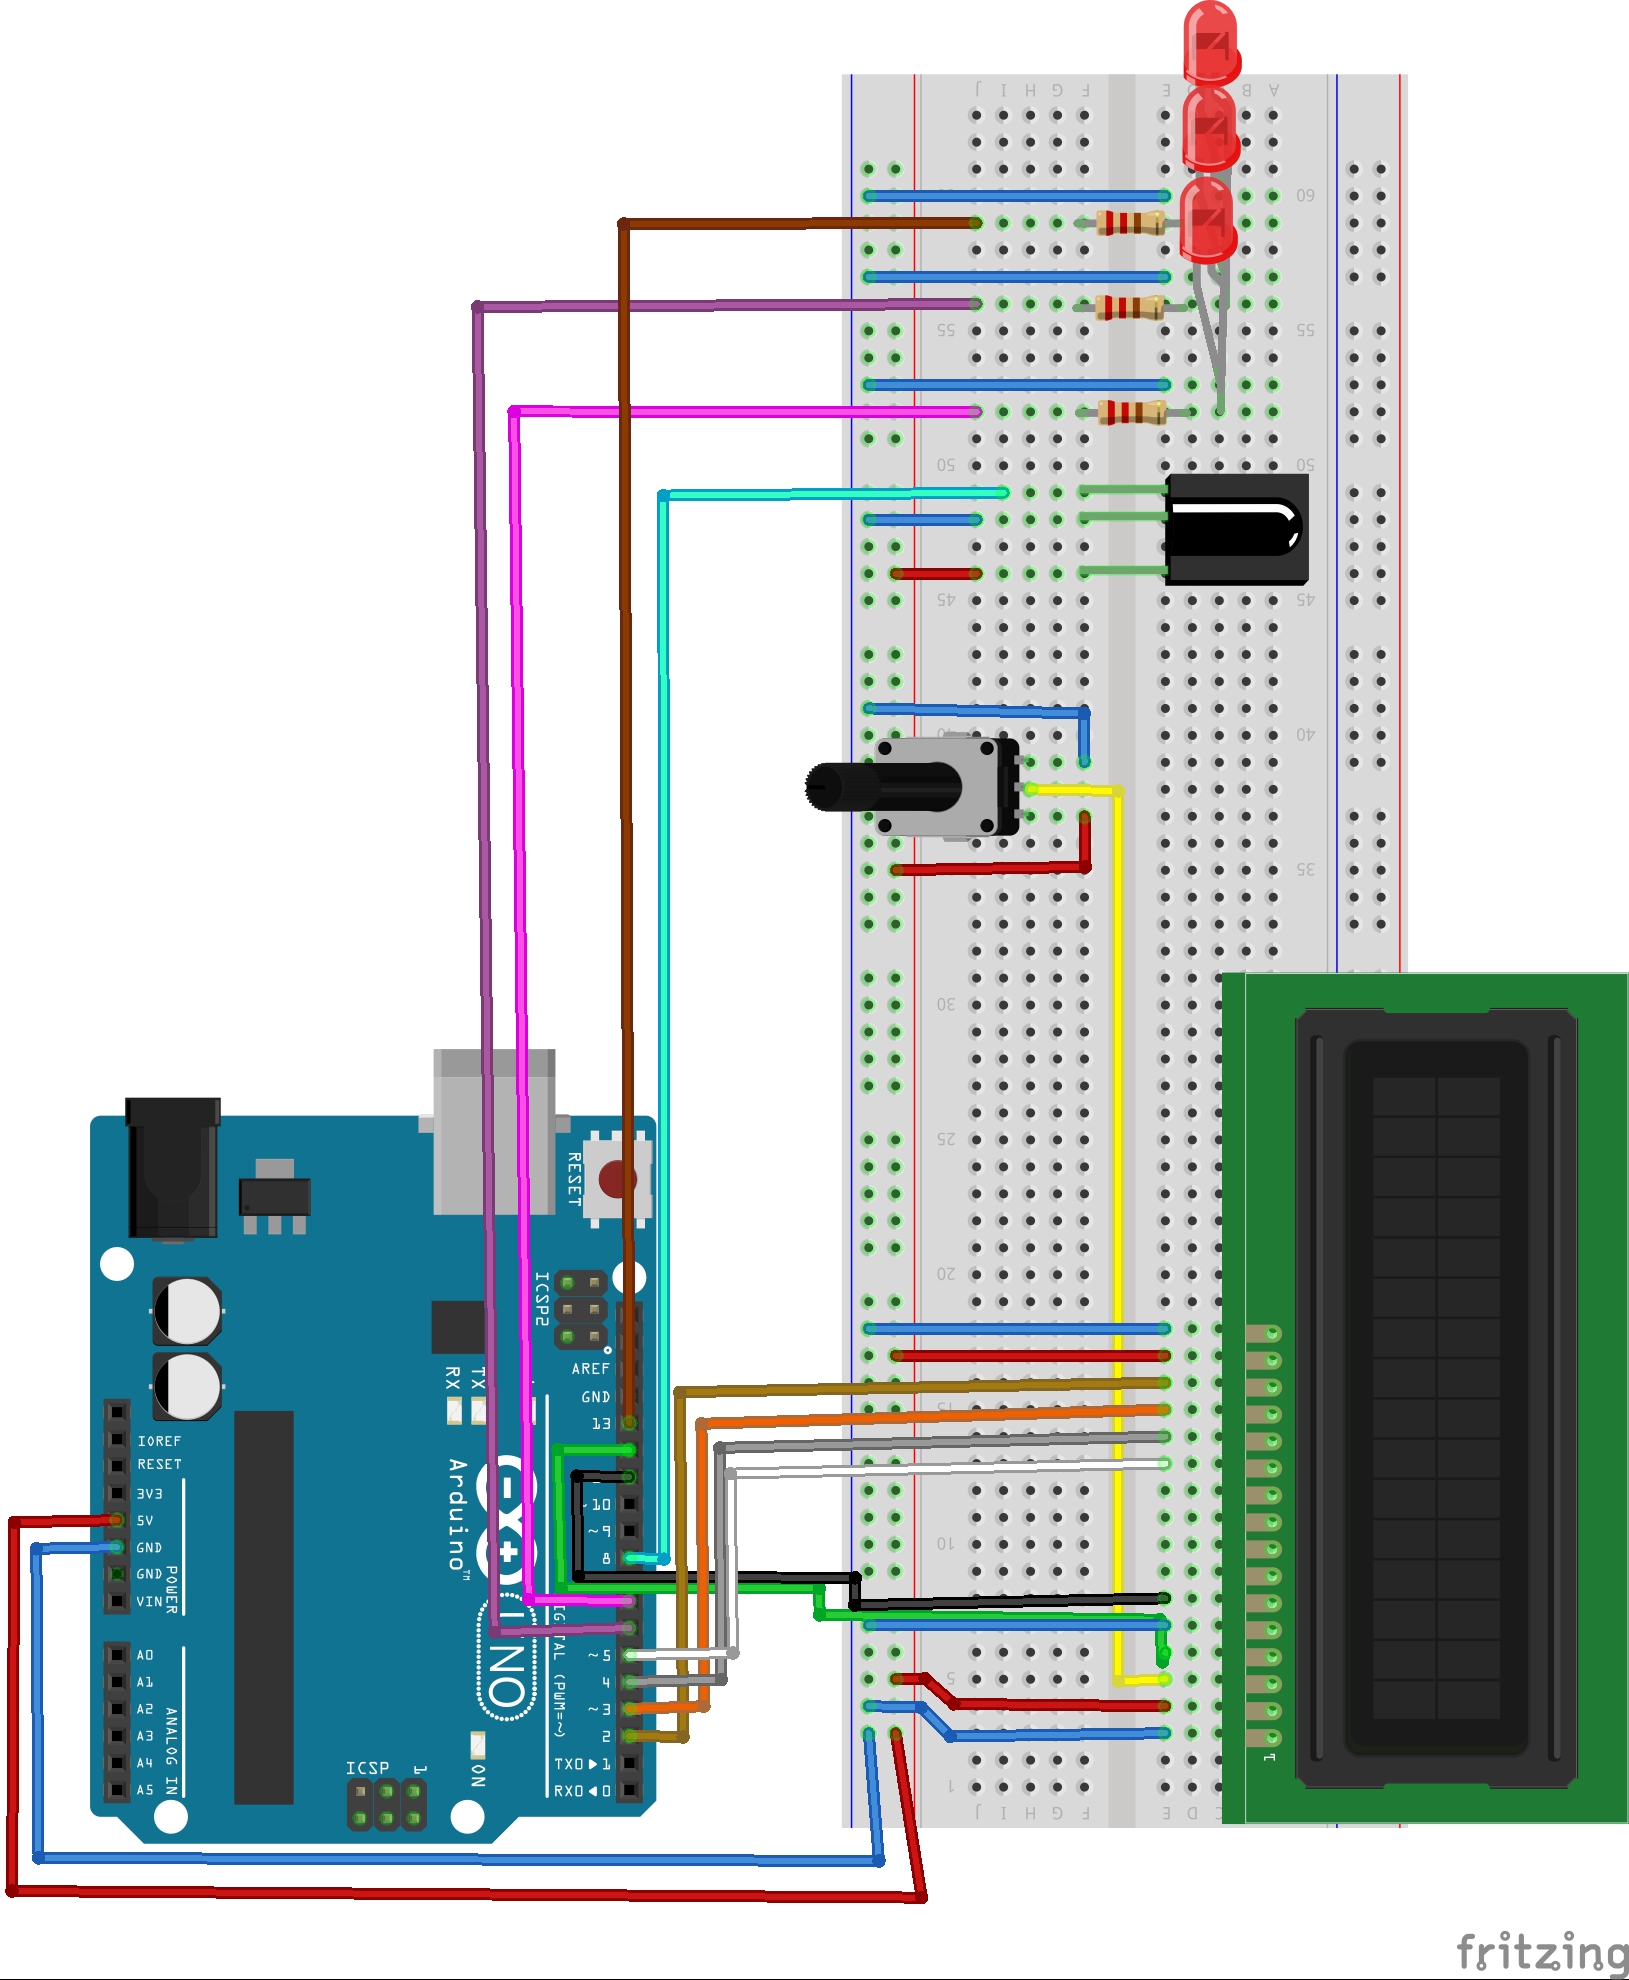
int led_pin1 = 6;
int led_pin2 = 7;
int led_pin3 = 13;
int led_state1 = 0;
int led_state2 = 0;
int led_state3 = 0;
#define code1 16724175
#define code2 16718055
#define code3 16743045
void setup()
{
irrecv.enableIRIn();
lcd.begin(16, 2);
pinMode(led_pin1, OUTPUT);
pinMode(led_pin2, OUTPUT);
pinMode(led_pin3, OUTPUT);
lcd.setCursor(0,0);
lcd.print("1 ON/OFF");
lcd.setCursor(0,1);
lcd.print("2 ON/OFF");
lcd.setCursor(8,0);
lcd.print("3 ON/OFF");
delay(1500);
lcd.clear();
lcd.setCursor(0,0);
lcd.print("1 : OFF");
lcd.setCursor(0,1);
lcd.print("2 : OFF");
lcd.setCursor(8,0);
lcd.print("3 : OFF");
lcd.clear();
}
void loop() {
if (irrecv.decode(&results)) {
unsigned int value = results.value;
switch (value) {
case code1 :
lcd.setCursor(0,0);
if(led_state1 == 1){
digitalWrite(led_pin1, LOW);
lcd.print("1 : OFF");
led_state1 = 0;
}
else{
digitalWrite(led_pin1, HIGH);
lcd.print("1 : ON ");
led_state1 = 1;
}
break;
case code2 :
lcd.setCursor(0,1);
if(led_state2 == 1){
digitalWrite(led_pin2, LOW);
lcd.print("2 : OFF");
led_state2=0;
}
else{
digitalWrite(led_pin2, HIGH);
lcd.print("2 : ON ");
led_state2=1;
}
break;
case code3 :
lcd.setCursor(8,0);
if(led_state3 == 1){
digitalWrite(led_pin3, LOW);
lcd.print("3 : OFF");
led_state3=0;
}
else{
digitalWrite(led_pin3, HIGH);
lcd.print("3 : ON ");
led_state3=1;
}
break;
}
irrecv.resume();
}
}


_ztBMuBhMHo.jpg?auto=compress%2Cformat&w=48&h=48&fit=fill&bg=ffffff)


Comments
Please log in or sign up to comment.