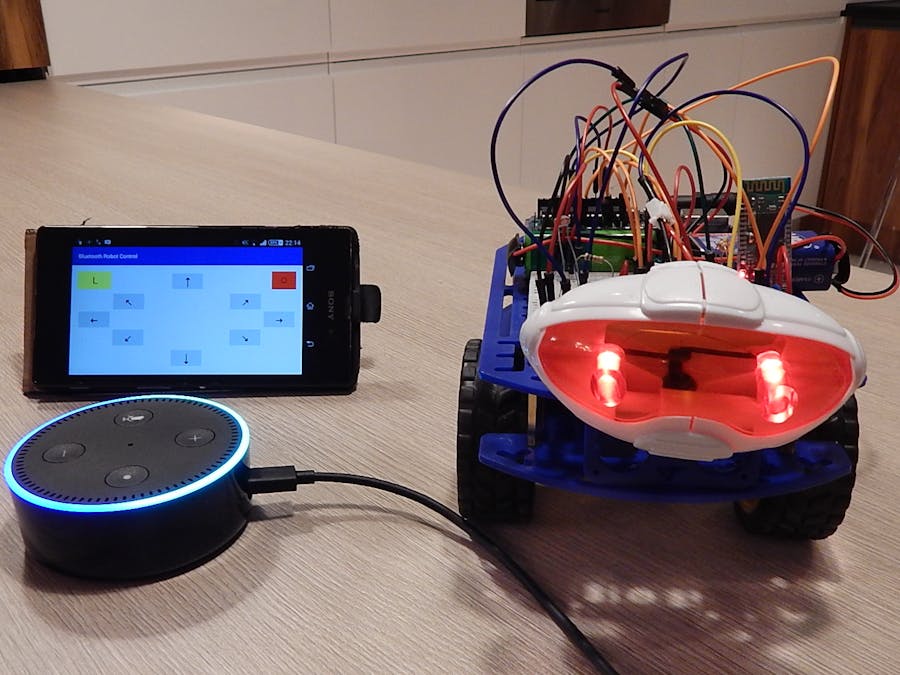
Voice-controlled robot is both hardware and cloud solution in one piece. The main components are:
1. Alexa Skill - to interpret voice commands and translate them to Google Cloud Messaging messages - deployed to Heroku cloud
2. Android application - to receive messages from Google Cloud Messaging and send them over Bluetooth to Arduino - deployed to your Android phone
3. Arduino - to read messages over Bluetooth and control the robot
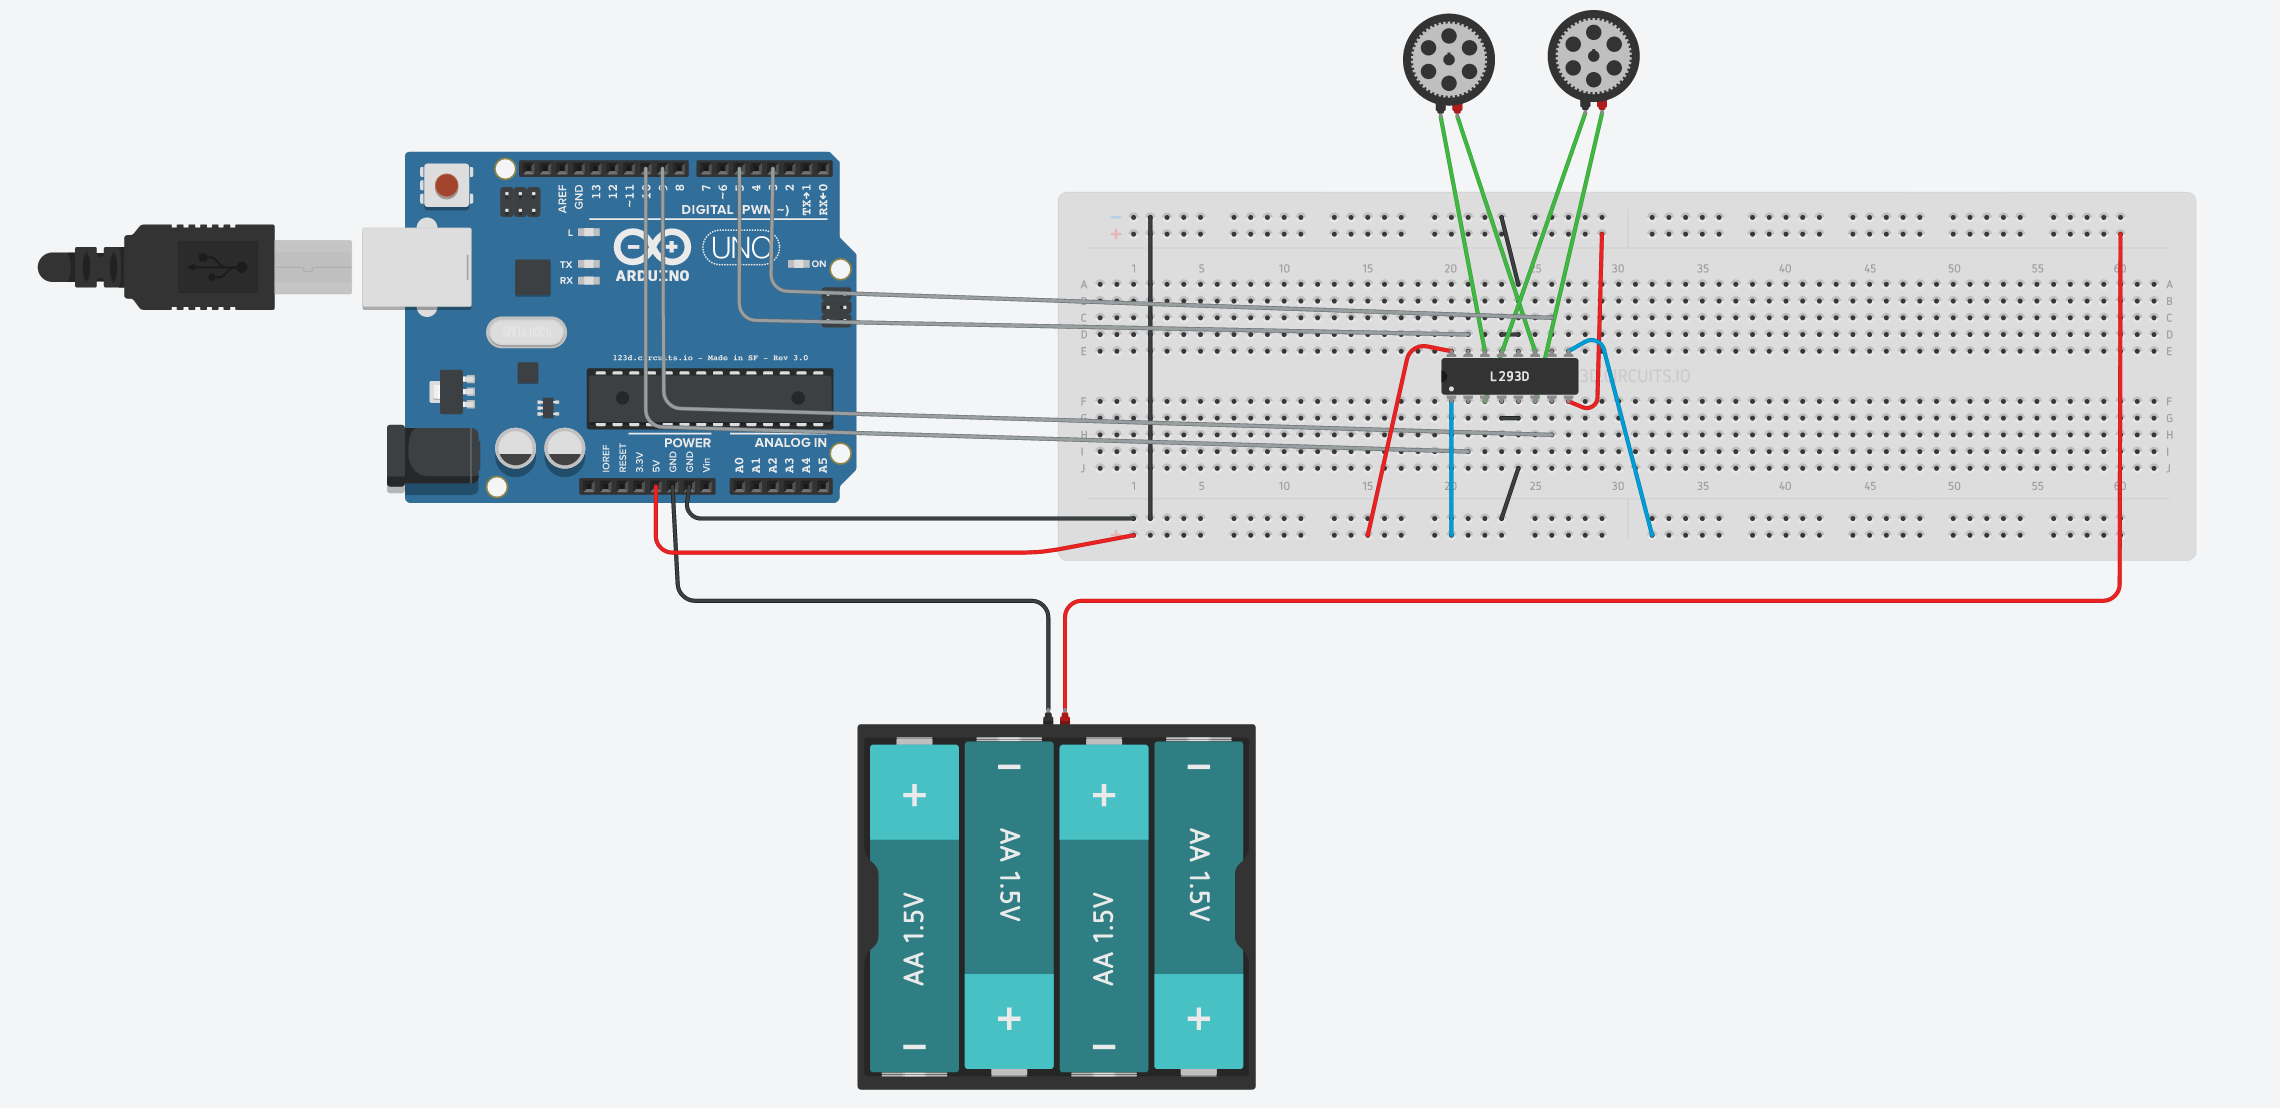
4. The robot kit and robot circuit - any robot kit will do, you need HC-06 or HC-05 for serial Bluetooth communication and 2xDC motors attached to L293D to move it
It's not an entry-level tutorial, but... everything is ready. All key components are open-sourced. It's just a matter of assembling & integrating it all together. So let's start.
The Control FlowHere is how all the pieces are working together:
1. You speak to Echo device
2. Echo connects to Alexa Service
3. Alexa Service opens Alexa Skill called Robot
4. Robot skill interprets voice commands and translates them to proper digital messages. Messages are sent to Google Cloud Messaging service
5. Android application is setup to listen for messages from Google Cloud Service
6. Android application receives an incoming remote message and relays it over Bluetooth to Arduino
7. Arduino using HC-06 Bluetooth serial module is reading the messages and moving the robot accordingly
Simple.
Google Cloud Services & Running Android ApplicationThis is a first step of my tutorial. We will setup services which are prerequisites for the rest of the solution.
In this step you will learn how to setup & generate the following:
- Google Cloud Messaging server key - secret key used by Robot skill to authenticate itself.
- Google Firebase registration token - phone-specific token which Robot skill uses to send remote messages to a phone.
You will need Google account. If you don't have one already, create it. Google Firebase and Google Cloud Messaging are free to start.
Checkout code section of this tutorial and fetch a copy of my BluetoothRobotControl project. Then watch the first part of my tutorial.
Deploying Alexa Skill to HerokuNow that we have Google Cloud Messaging server key and phone's registration token we can deploy the Robot skill application.
In this step you will learn how to:
- Create Heroku application
- Setup Robot skill
- Deploy it to Heroku
You need a Heroku account. If you don't have it already create one at: https://heroku.com. It's for free. You can run simple apps on Heroku for free. Also, majority of add-ons provides free plans. I love it.
Navigate to code section of this tutorial and fetch a copy of my alexa-robot-control project. Then watch the second part of my tutorial.
Registering Alexa Skill in Alexa Developer PortalWe have everything we need from the cloud part of the solution. It's time to register Robot skill in Alexa and test it.
In this step you will learn how to:
- Register & setup Alexa Skill
- Test it using Service Simulator
- Verify that Google Cloud Messaging messages are coming through to Android application
You need an Alexa Developer account. Just like Google Firebase & Heroku it's for free. Go ahead and create one now if you don't have it already: https://developer.amazon.com/alexa and watch the third part of my tutorial.
Arduino & Robot circuitsSo the cloud part is working. Now the hardware. In the last part of my tutorial you will learn how to:
- Use my project and my libraries
- Build the circuits
Navigate to code section of this tutorial and fetch a copy of my arduino project. Watch the video explaining the code structure and the circuits.
Show time and summaryBy now you should have your own voice-controlled Robot! Congratulations! Here is my robot in action.
I hope you enjoyed it as much as I did.
All my projects are open-sourced. If you would like to contribute to them you are most welcomed to do so. If you want to contribute back by opening a Github pull request that's even better.
CreditsThe inspiration for this project came from my sons Tymoteusz & Szymon. They simply asked me to extend their manually operated robot (Christmas present). The first version was IR-controlled robot, second was a Bluetooth-controlled robot and finally the third generation was this voice-controlled robot.
Thanks boys :)


_ztBMuBhMHo.jpg?auto=compress%2Cformat&w=48&h=48&fit=fill&bg=ffffff)


_3u05Tpwasz.png?auto=compress%2Cformat&w=40&h=40&fit=fillmax&bg=fff&dpr=2)


Comments
Please log in or sign up to comment.