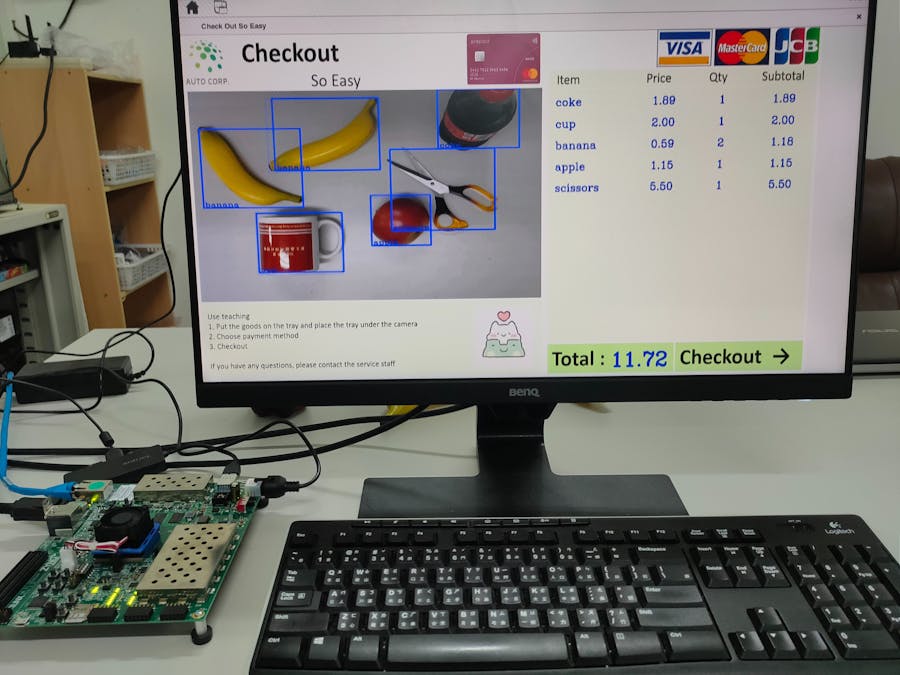
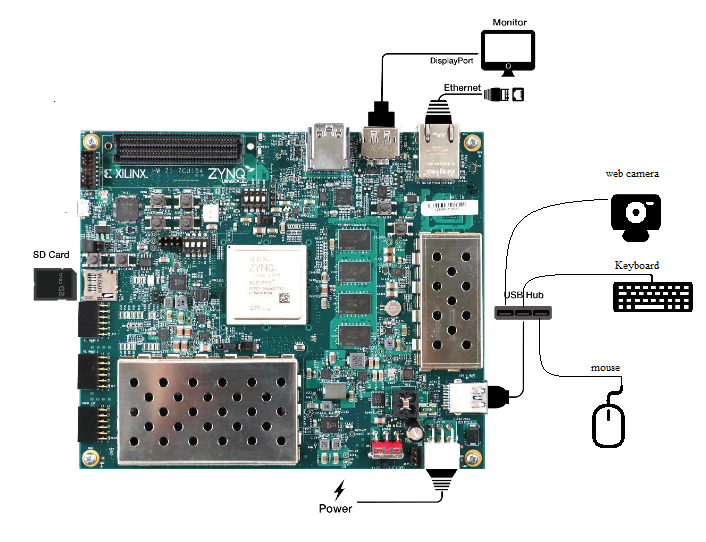
Checkout So Easy is a smart retail system on ZCU104 with VCU and DPU.
As following, there are two scenario of Checkout So Easy.
- 1.Checkout So Easy acts as a cloud
All things start with a video which records the commodities. A video with format such as mp4 been sent to the system. With the help of VCU decoder, we will feed the frames of the video after decoded into DPU to calculate the price of the commodities. The results such as detail of commodities, price, and the image detection video will been showed on the monitor.
- 2. Checkout So Easy acts as an edge
The information of commodities are captured from camera connected to ZCU104. Images captured from the camera will be sent into DPU to calculate the result of the commodities, and the details will been showed on the monitor. Different from scenario 1, the results on the monitor will be recorded frame by frame. With the help of VCU encoder, we can store the video made up by the frames. The videos prevent the disadvantage when some disputes occur, so we can check the whole procedure about the deals.
- In the demo of this project
As following demo video, in this project, we demo scenario 1. However, user also have the choice using the camera as an input source. That is, we have two modes of the Checkout So Easy. First, the source is video from somewhere and this is the same as scenario 1 mentioned above. Second, the source is camera. In this mode, we only use DPU to calculate the result of the images and show on the monitor.
Demo video :How To Recreate This Project :Step 1 : Build and Setup the Environment of the ZCU104 boardIf you use sd_card.img in prebuilt/, you can skip the instructions in this step.
Build Steps :
- 1. Clone the full repository (including submodules)
$ git clone --recurse-submodules $ git clone --recurse-submodules https://github.com/Xilinx/Vitis-In-Depth-Tutorial
$ cd Vitis-In-Depth-Tutorial/Runtime_and_System_Optimization/Design_Tutorials/02-ivas-ml/
Note: Vitis Patch Required: This design has a large rootfs, and Vitis 2020.1 has an issue packaging SD card images with ext4 partitions over 2GB. This patch changes the packaging flow to round up the initial rootfs size to the first full multiple of 512MB over the ext4 partition size. To install it:
$ cp ./vitis_patch/mkfsImage.sh ${XILINX_VITIS}/scripts/vitis/util- 2. Source Vitis2020.1, PetaLinux2020.1 and XRT2020.1
$ source ${XILINX_VITIS}/settings64.sh
$ source ${XILINX_PetaLinux}/settings.sh
$ source ${XILINX_XRT}/setup.sh- 3. Build the hardware platform
$ cd platform/dev/zcu104_vcu
$ make
It's possible that errors occur when petalinux-config kernel, petalinux-build, petalinux-build --sdk. You should properly modify Makefile in platform/dev/zcu104_vcu and platform/dev/zcu104_vcu/petalinux to re do the command which got errors(make again in platform/dev/zcu104_vcu)
- 4. Build the Vitis design(Adding the DPU ip)
One time, and one time only, you must apply the patch in the hw_src directory against the Vitis Vision library.
$ cd ../../../hw_src/Vitis_Libraries
$ patch -p1 < ../vision_lib_area_resize_ii_fix.patch
$ cd ..
$ cp ../../../../../dpu_conf_zcu104.vh .
$ cp ../../../../../zcu10x_config .
$ make- 5. Get the SD card image
After above steps, you will get sd_card.img in sd_card_zcu104/.
Or, you can download the prebuilt sd_card.img. (See SD card image)
All of following steps in this section are on the target(ZCU104 board)
The following files and directories should be put into /home/root/ :
1. jsons/
2. scripts/
3. test_data/
4. .bashrc
5. debug.ini
The following file should be put into / :
1. update.tar.gz
- 1. Resize rootfs :
cd /home/root/scripts
sh ext4_auto_resize.sh- 2. Install the dependencies and Vitis AI library v1.2
The following steps needs the board to have a path to the internet(script uses wget to download)
cd /home/root/scripts
sh update.sh
sh install_vai.shThe compiled file ssd_mobilenet_v2_coco_tf.elf is already in demo/, you can skip this step and directly use the provided file.
- 1. Build Vitis-AI environment
Follow the steps on Vitis-AI to build docker.
./docker_run.sh xilinx/vitis-ai-gpu:latest- 2. Download tensorflow models from Xilinx AI model zoo
To download .pb file only, run sh download_deploy_model.sh and you can skip the following instructions in this step.
You can get models by following the instructions on Xilinx/Vitis-AI/AI-Model-Zoo
In our project, we use xilinx_model_sample/tf_ssdmobilenetv2_coco_300_300_3.75G as our object detection model.
Copy xilinx_model_sample/tf_ssdmobilenetv2_coco_300_300_3.75G/quantized/deploy_model.pb to host/ssd_mobilenet/.
- 3. Compile the tensorflow model
After excuting ./ssdmobilenet_compile_b4096.sh, you will get dpu_ssd_mobilenet_v2_coco_tf.elf
The compiled file tfssdtest.so is already in demo/, you can skip this step and directly use the provided file.
- 1. Setting Up the Host
Follow the steps on Xilinx/Vitis-AI-Library
- 2. Cross-compile
run ./build_final.sh, you will get a compiled file tfssdtest.so with ELF 64-bit LSB shared object, ARM aarch64 format.
Copy the compiled file to demo/ for the next step.
Following steps are on the target(ZCU104):
If all settings are done, put the directory demo/ into /home/root/.
- 1. Revise the display resolution
sh set_monitor.sh- 2. Excute the Self-checkout-system demo
You need to use the sd_card.img in vcu_decode/
Real time checkout-system with camera:
python3 DEMO.py -c TrueCheckout-system with video source:
We provide a video file object_vid.mp4 for demo.
python3 DEMO.py -v <mp4 video filename>Xilinx Vitis-AI quantizer & compiler / Xilinx Vitis-Ai-Library : Xilinx/Vitis-AI
Xilinx Vitis Tutorial : Xilinx/Vitis-In-Depth-Tutorial


Comments
Please log in or sign up to comment.