


Hardware components | ||||||
_ztBMuBhMHo.jpg?auto=compress%2Cformat&w=48&h=48&fit=fill&bg=ffffff) |
| × | 1 | |||
 |
| × | 1 | |||
 |
| × | 1 | |||
 |
| × | 5 | |||
 |
| × | 1 | |||
 |
| × | 1 | |||
| × | 1 | ||||
Software apps and online services | ||||||
 |
| |||||
Hand tools and fabrication machines | ||||||
 |
| |||||
| ||||||
The Light gate is a digital switch-type sensor most commonly used in timing experiments. The Light Gate has an infrared transmitter and receiver that will detect an object passing through the 'gate'.
NOTE: We are going to make a light gate which will detect visible light not infrared light.
The Basic PrincipleThe light gate we are going to make works on the speed distance time law which is:
Speed = Distance / Time
The distance will be fixed and the time needs to be calculated.
We need a flashlight to emit the light and a photo resistor to collect the light.
The object to measure will be embedded with a breaker (a small piece of paper which will block the light from passing through).
The breaker would have a fixed length (say 4 cm).
When the breaker comes in between the flashlight and photo resistor, the light will be blocked. So we can take the readings of light intensity from the photo resistor and when there is a low reading (which means the light is blocked), we can say that the object is between the flashlight and photo resistor. At that time we will start a timer and wait until the light intensity increases (which means the object is gone). The timer reading will be like 860 ms.
So we can say that the object covered 4 cm (the length of the breaker) in 860 ms (the timer). Then convert the length to meter and time to seconds to get the speed in m/s Through equation we say that:
  Speed = Distance / Time
= Speed = (4 / 100) / (860 / 1000)
= Speed = 0.04 / 0.860
= Speed = 0.05 m/s
Now, lets create the device using Arduino.
1. Paper CuttingsWe need some paper cutting to do the project.
Recommended to use black paper sheet.
- A cylindrical cover for the photo resistor.
- A paper sheet of length 4 cm (you can use any) to use as breaker.
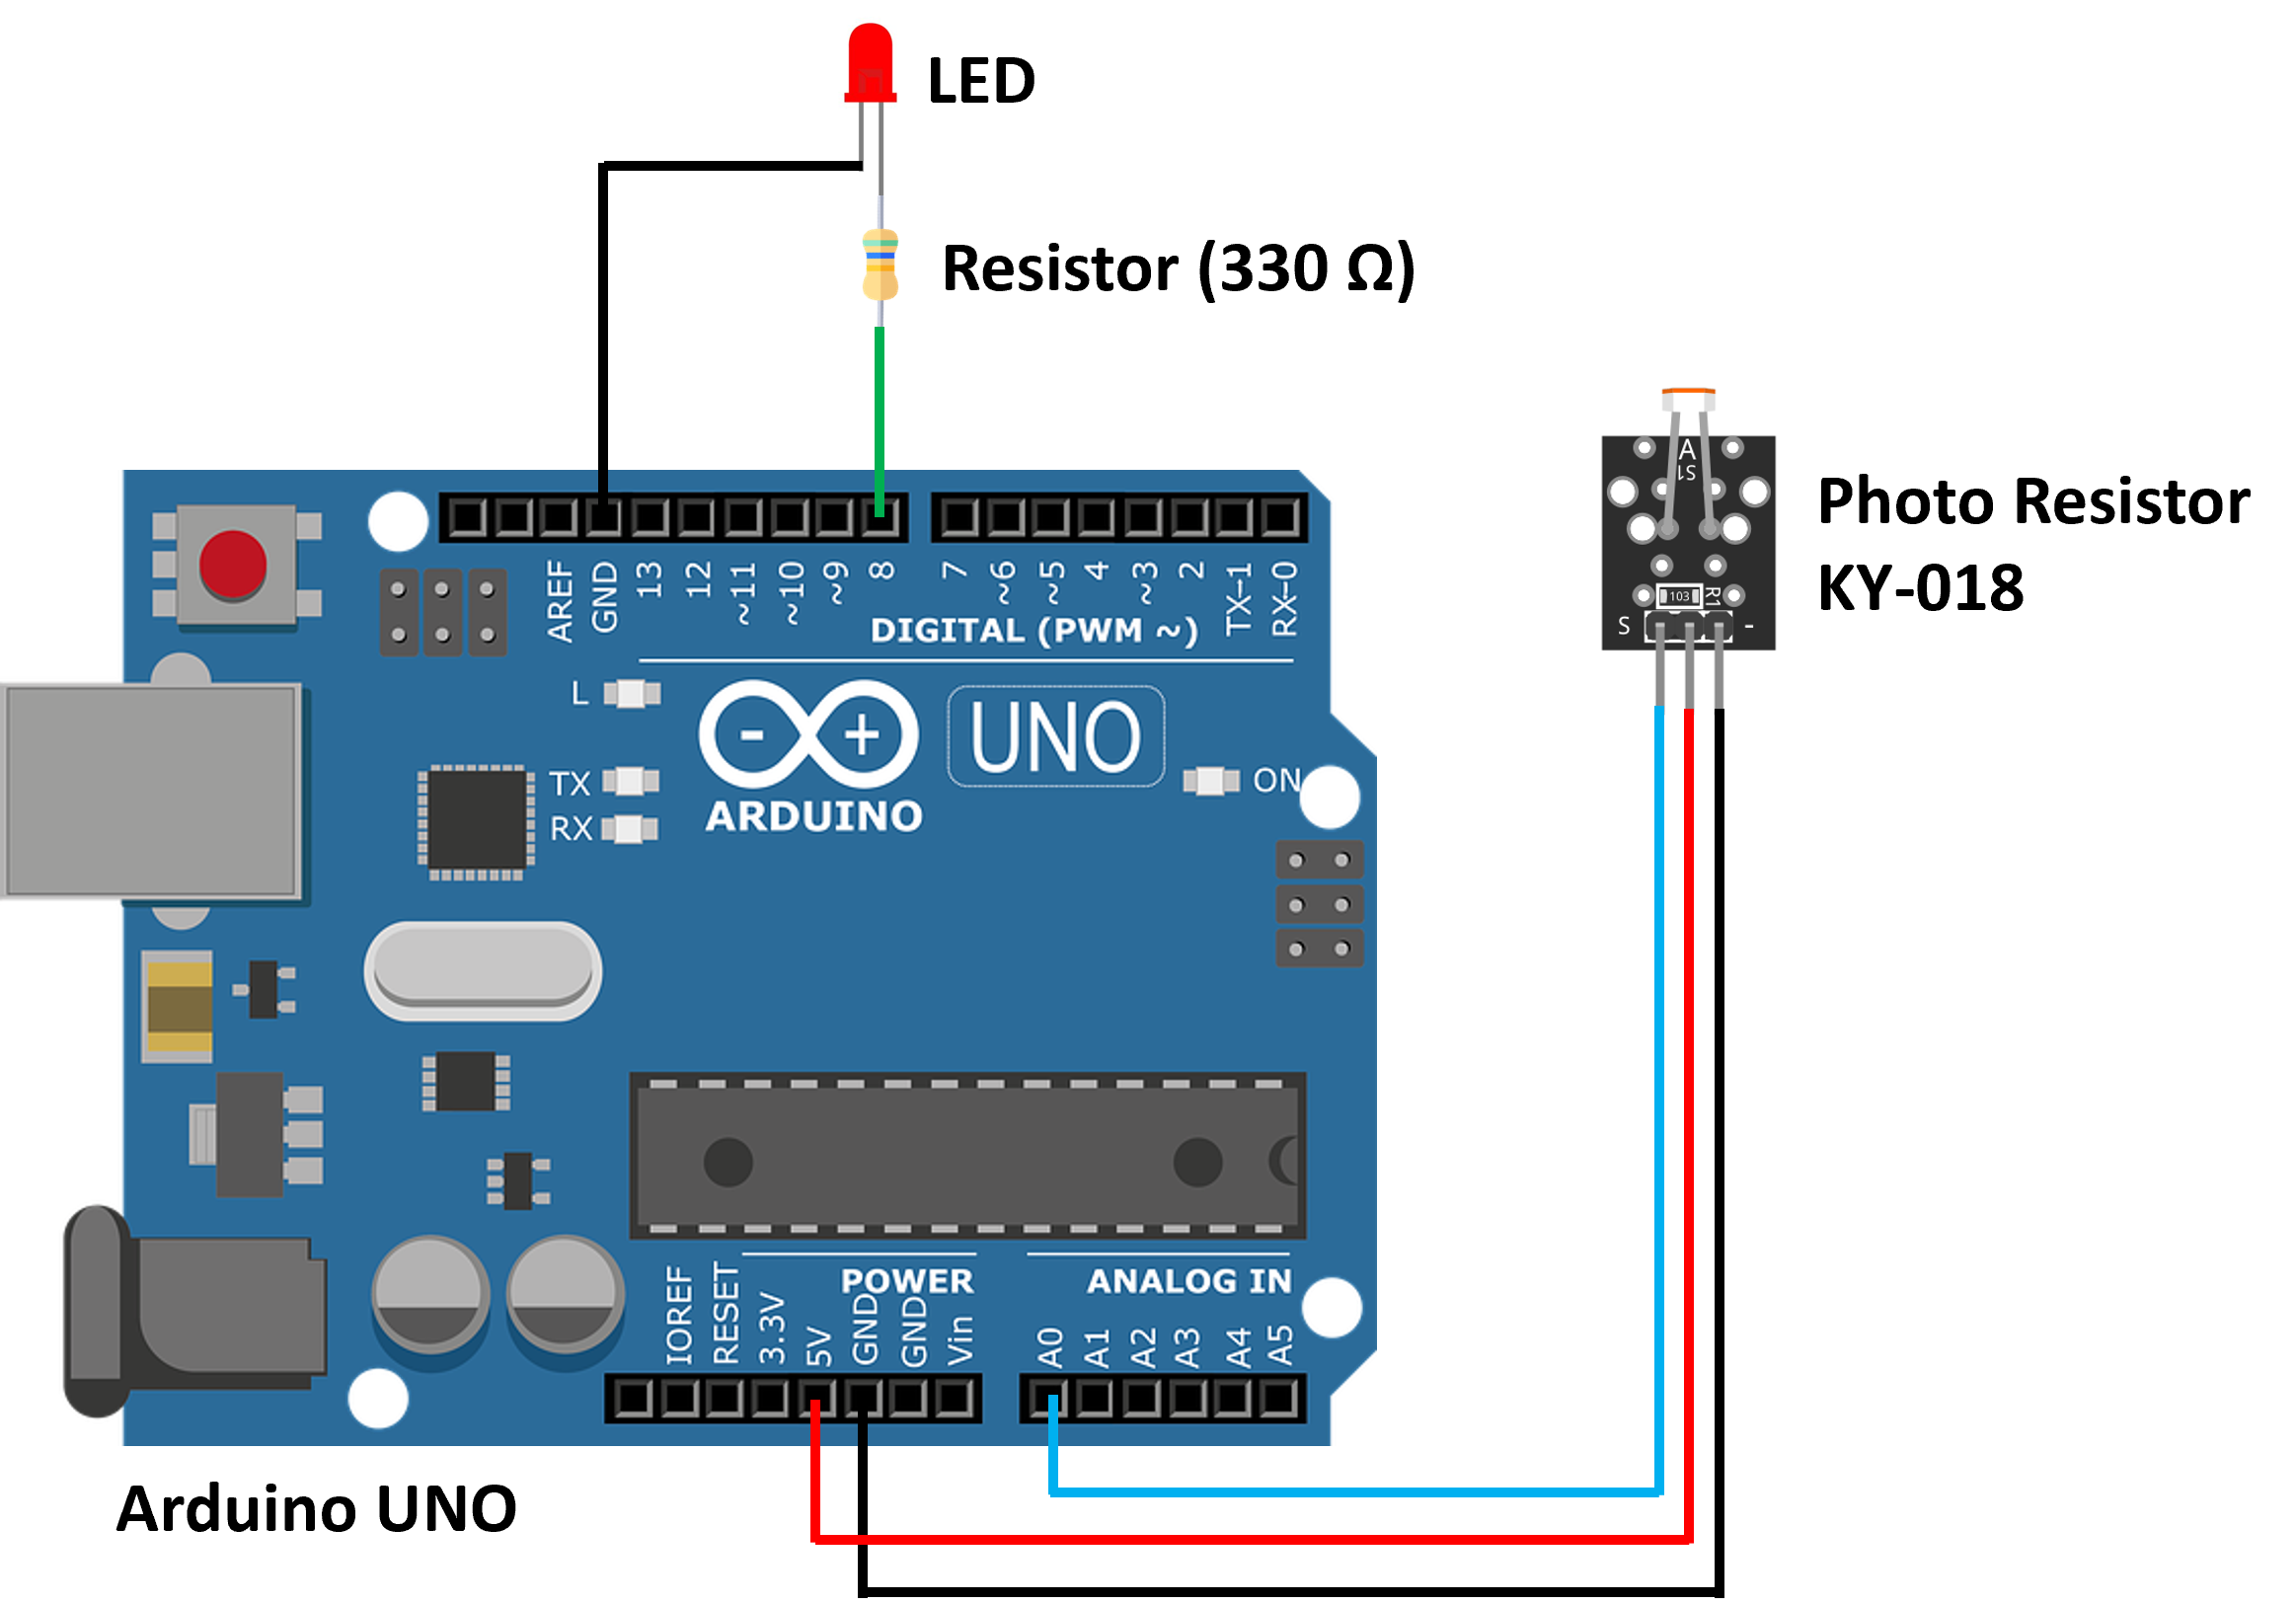
- Pin 8 on Arduino to the first leg of resistor.
- Resistors second leg to the positive terminal of LED.
- LED's negative terminal to GND of Arduino.
- Arduino's 5V to - of Photo Resistor.
- Arduino's GND to + of Photo Resistor.
- Arduino A0 pin to S pin of Photo resistor.
Go to code section to get the whole code.
In the code I have given lengthOfBreaker value as 0.04 because the length of the breaker is 4 cm which is 0.04 in meters. You can change it according to the length of your breaker.
Setup the components.
NOTE: The light should only be blocked by the breaker or any other thing with a length of 4 cm. Otherwise the measurement will go wrong!!
- Lift up the breadboard and photo resistor so that the object can move below it.
- Connect the Arduino UNO to your computer to get the Serial output.
- As soon as you turn on the Arduino, you should turn the flashlight on.
- Attach the breaker to the object you want to measure the speed.
As soon as the breaker blocks the light the LED turns on and when the object go past the light gate, the LED turns off and the speed will be shown on the Serial Monitor.


Comments
Please log in or sign up to comment.