It is very difficult to keep the track of health patients specially the ones in ICU. Nurses and Doctors don't know the pulse rate of a patient when they are not near the equipment.
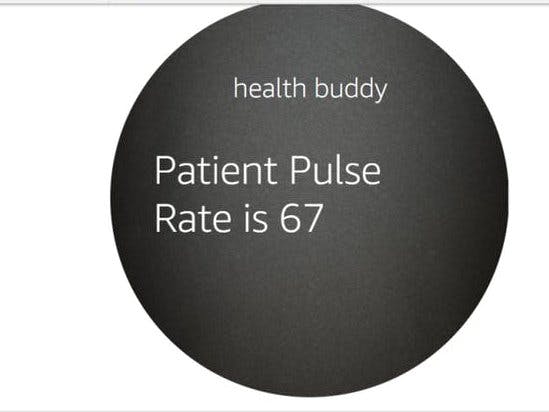
My project Health Buddy which uses Amazon Alexa Voice Service to tell you the Real-time Patient Pulse over the Internet with the help of WIZnet WIZ750SR.
Future ScopeCurrently this prototype can only tell pulse rate of one patient but with the array of sensors we can extend it to multiple patients and not just monitoring pulse rate but also the Glucose, Blood Pressure and more vital stats.
Want to build one? Follow the steps below, Pull Requests are always welcomed :)
Step 1- Download the WIZnet Tool
https://github.com/Wiznet/WIZnet-S2E-Tool-GUI
Install Python 3 if not installed.
sudo apt-get install python3
and for Windows Download from python.org
- Connect yourWIZNET to PC and LAN using Serial to USB Converter.
- PressSearch.
- Selectthe device and Configure with the following values.
Operation mode -> TCP server
Local IP -> any IP address that falls in the range of your LAN
Gateway -> To get this type “ipconfig” in cmd/ "ifconfig" in terminal
Local port -> 80
Baud rate -> 115200
Data bit -> 8
Parity -> None
Stop bit -> 1
Flow control -> None
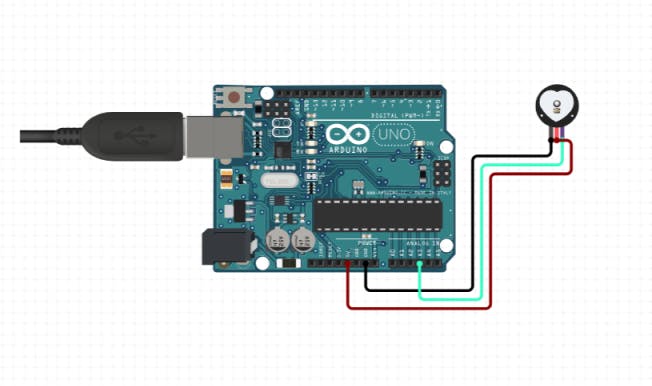
- Connect the Arduino with pulse sensor
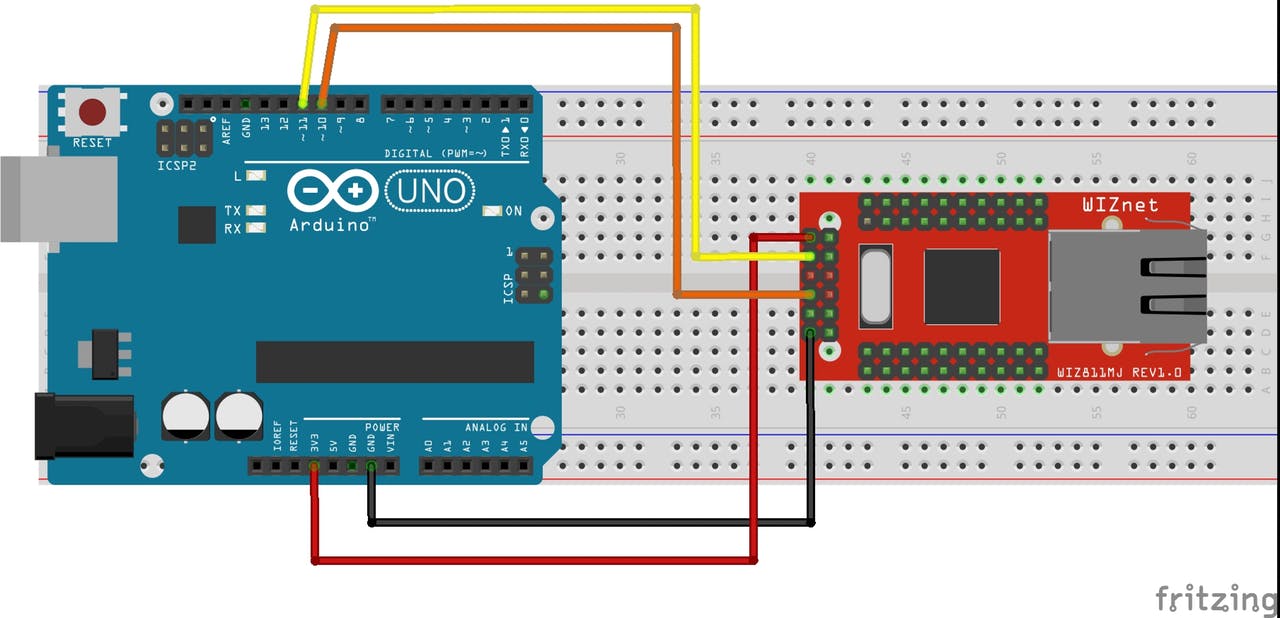
- Connect the WIZnet board with Arduino
- Run commands
cd Desktop
git clone https://github.com/madhurgupta10/Amazon-Alexa-Based-Remote-Health-Monitoring
- Then open the folder Amazon-Alexa-Based-Remote-Health-Monitoring
- Open the folderArduino
- Double click on Firmware.ino
- Deploy code to yourArduino UNO
Install Arduino IDE if not installed from arduino.cc
Step 3- Open Firebase.
- Click on Go to Console.
- Click on Add Project.
- Name your project.t
- Click on Create Project.
- Click on Database.
- Select Start in Test Mode.
- Note down your firebase id.
- Visit developer.amazon.com.
- Log in with your amazon credentials.
- Click on Developer Console.
- Click on Create Skill.
- Name the Skill.
- Click on Select (Custom Skill) and then Create Skill.
- Click on Invocation Tab and fill invocation name as health buddy.
- Click on JSON Editor Tab and Paste the code below.
{
 "interactionModel": {
   "languageModel": {
     "invocationName": "health buddy",
     "intents": [
       {
         "name": "AMAZON.FallbackIntent",
         "samples": [
         ]
       },
       {
         "name": "AMAZON.CancelIntent",
         "samples": [
         ]
       },
       {
         "name": "AMAZON.HelpIntent",
         "samples": [
         ]
       },
       {
         "name": "AMAZON.StopIntent",
         "samples": [
         ]
       },
       {
         "name": "Now",
         "slots": [
         ],
         "samples": [
           "ask health buddy",
           "latest heath",
           "health right now",
           "patient health"
         ]
       }
     ],
     "types": [
     ]
   }
 }
}
- Click on Build Model.
- Click on Endpoint Tab.
- Copy your Skill Id.
- Visit aws.amazon.com. (in new tab)
- Click on Sign in to console.
- Click on Lambda (search, if not on front page).
- Click on Create Function.
- Fill the details (see the pic)
- Click on Create Function.
- Click on Alexa Skill Kit.
- Click on Enable and paste your skill id.
- Click on Add,Save
- Scroll Down and Select Upload a.zip file.
- Open folder Amazon-Alexa-Based-Remote-Health-Monitoring from your desktop (recall Step 2)
- Navigate into the folder called Alexa/Lambda.
- Open the file named as lambda_function.py in any text editor.
- Now paste the firebase id into line (replace {your firebase url} with your firebase id)
- Now move this file to the lambda-zipped.zip archive. (if using WinRAR just drag and drop it to the archive)
- Now upload this lambda-zipped.zip to aws.
- Copy your ARN (see the pic)
- Now go back to developer.amazon.com.
- Paste the ARN and click on Save Endpoints.
- Click on Test Tab.
- Toggle the Switch.
- Type the command - starthealth buddy.
- if reply received you are good to go.
- Install Node-RED on your PC
npm install -g --unsafe-perm node-red
node-red
sudo npm install -g node-red-contrib-firebase
- Add TCP
- Now open your Alexa Device and say, "Alexa, start Health Buddy" while holding the pulse senor within your finger and thumb.


_ztBMuBhMHo.jpg?auto=compress%2Cformat&w=48&h=48&fit=fill&bg=ffffff)


Comments
Please log in or sign up to comment.