


Hardware components | ||||||
 |
| × | 1 | |||
| × | 1 | ||||
 |
| × | 1 | |||
 |
| × | 1 | |||
 |
| × | 1 | |||
 |
| × | 1 | |||
Software apps and online services | ||||||
 |
| |||||
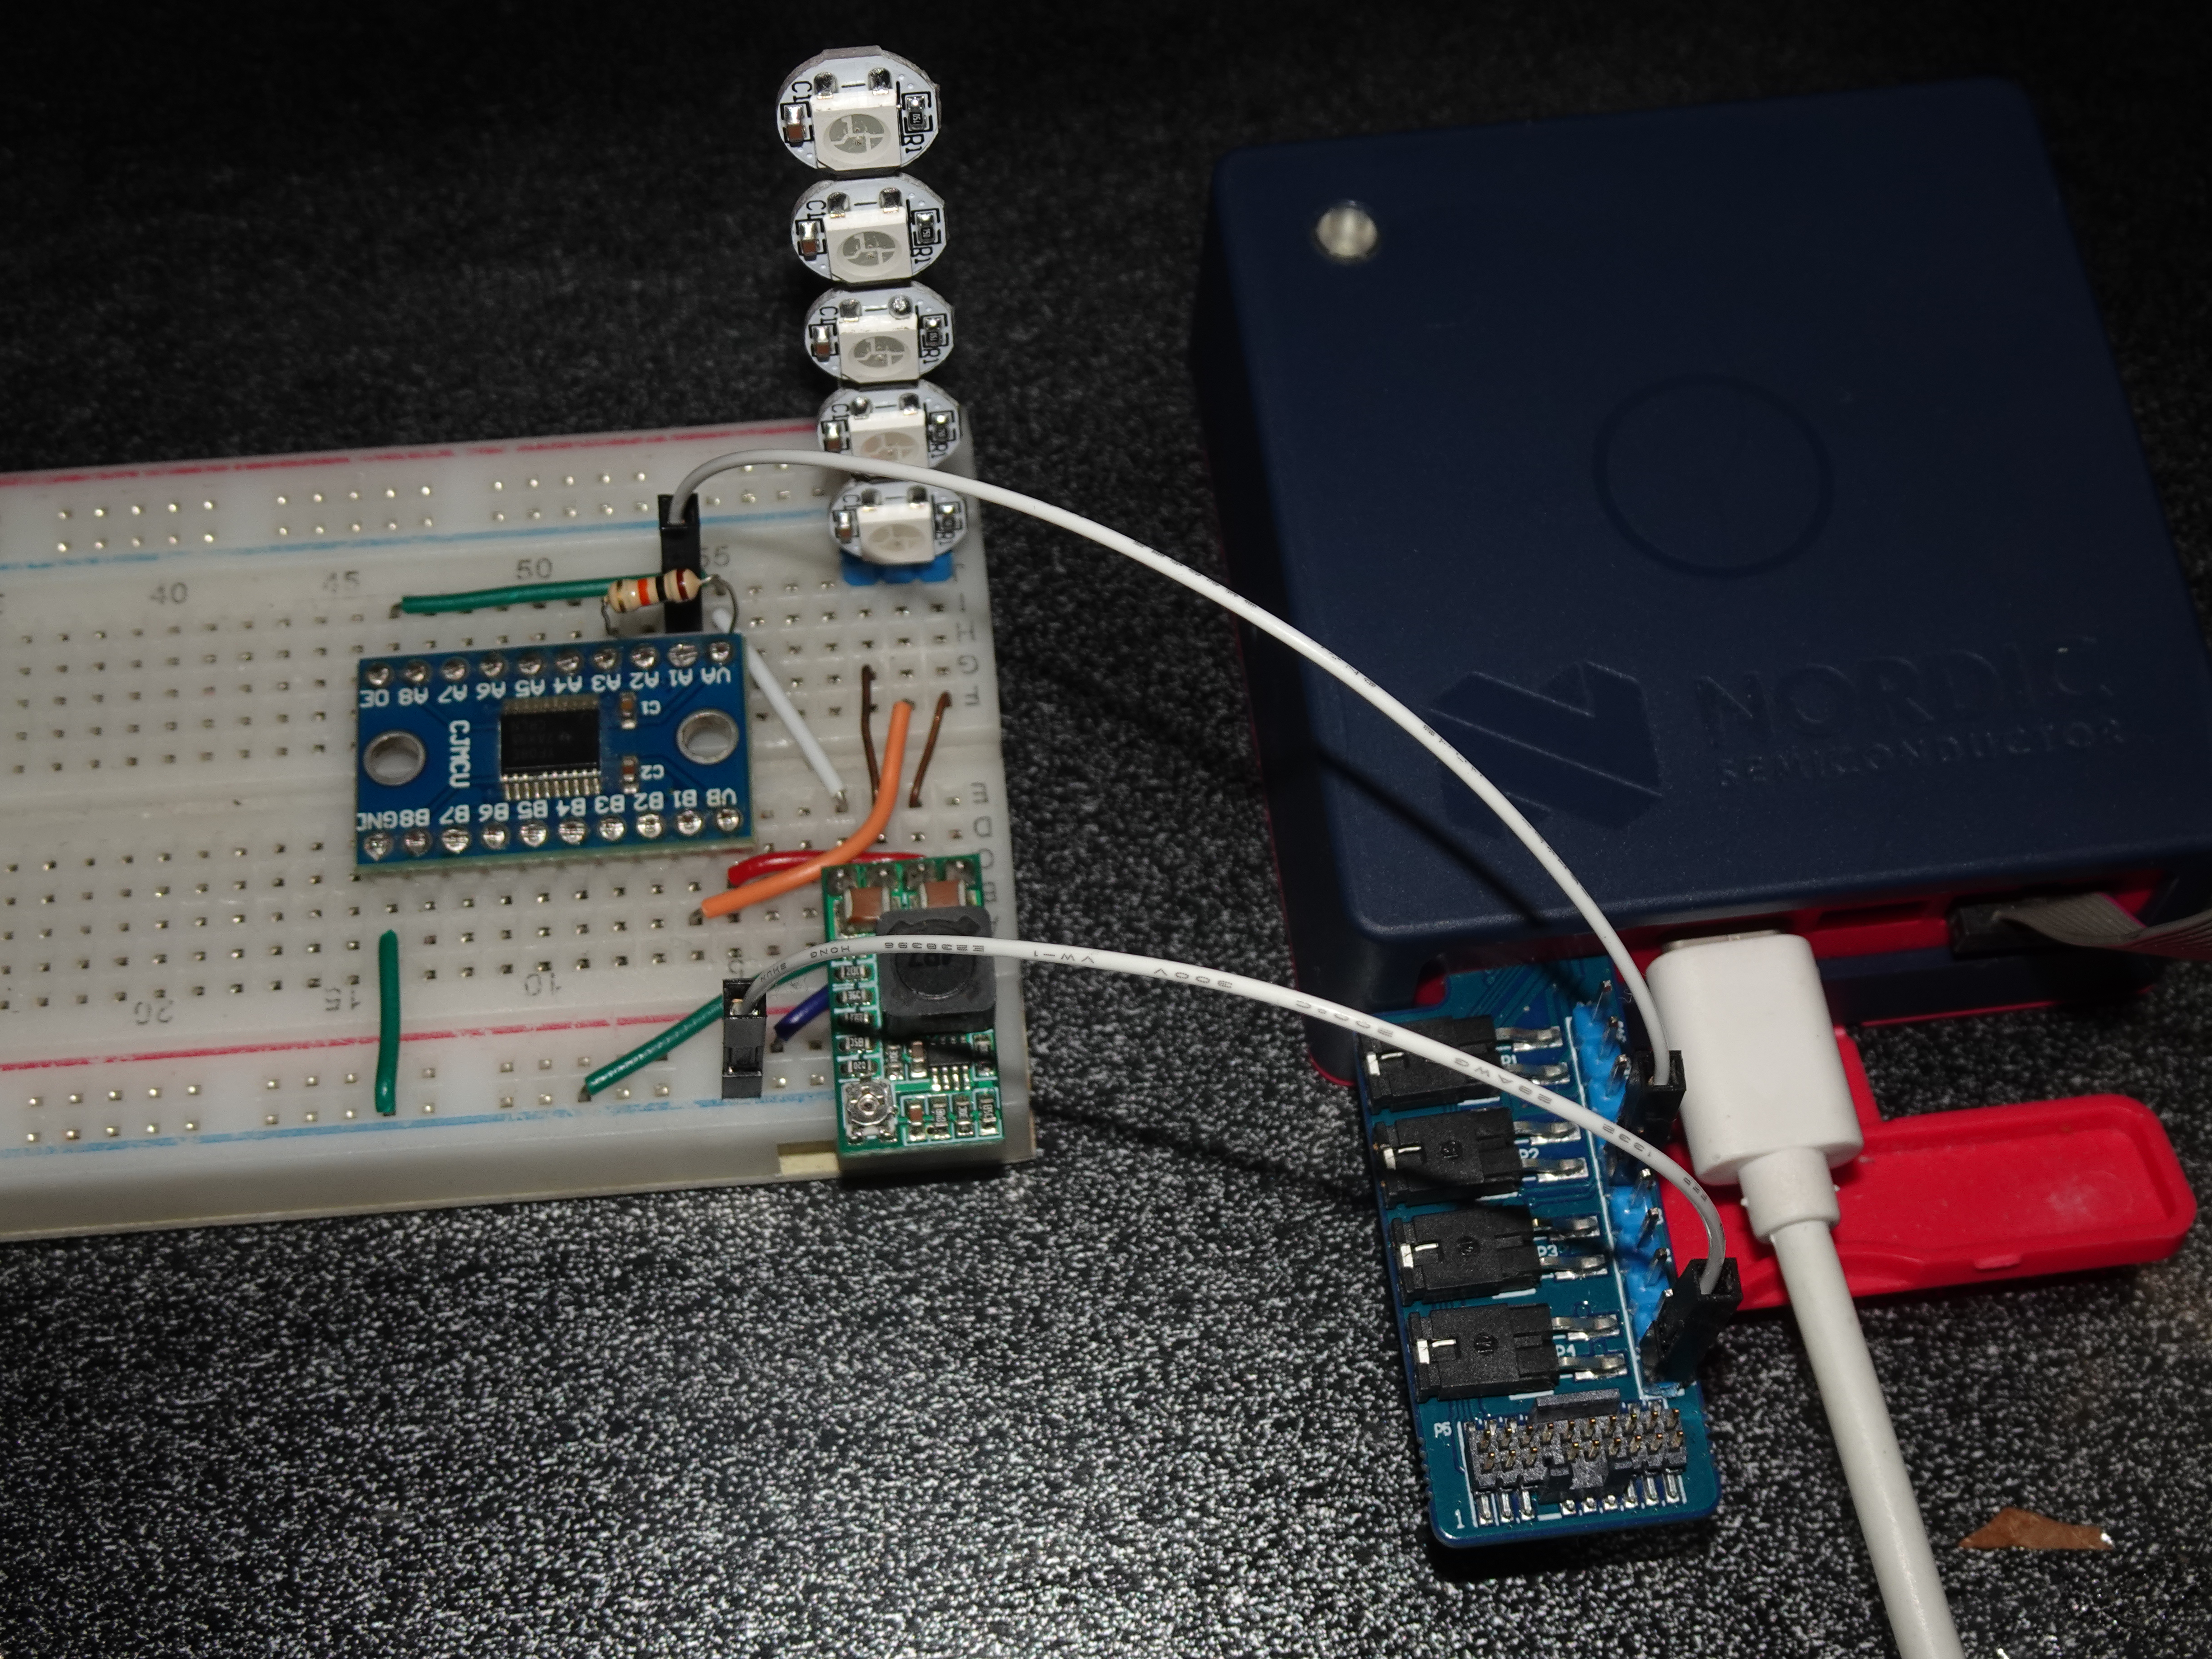
Thingy:53 is a compact nrf5340 based IoT development device from Nordic semiconductor with various kind of onboard sensors. In order to add eye catching factor in its project an external neopixel rgb leds can be added.
Here we will learn how to create a basic thingy:53 application to interface the neopixel leds attached through expansion port.
Apart from 2 expansion port GPIO pin there are another 5 GPIO pins available to interface various external sensors/modules. Five other GPIO pins are Trace_Debug pins shown in image below. In this example we will use TRACE3 (P0.08) pin as neopixel data line. (Pinout details are available HERE)
After deciding the GPIO pin for neopixel data_out, we can create a simple hello world example to build our neopixel code.
After creating a simple hello world application and selecting its build configuration we will change the k-config of our application for easy debugging and console monitoring. Also enable the "SENSORDRIVERS" in k-config config menu.
After making the above mentioned changes in k-config, we need to create an overlay file for thingy:53 in order to enable the communication with the neopixel leds. After creating the new overlay file add the following code in it. Overlay file will be very simple because it will only contain the information of single GPIO pin.
# Add these lines in thingy53_nrf5340_cpuapp_ns.overlay file.

/{
    leds {
        compatible = "gpio-leds";
        neopixel: rgb_led  {
            gpios = <&gpio0 8 GPIO_ACTIVE_HIGH>;
            label = "RGB LED";
        };
    };
};
Now we can add the neopixel.c and neopixel.h files (attached below) in src directory of our current application of thingy:53. The library files of NeoPixel will not be added automatically to our make configuration. In order to achieve that we need to make some changes in the CMakeLists.txt file of our application. This configuration file can also be accessed from one the side panels.
Change the following line in it.
target_sources(app PRIVATE src/main.c)as shown below after adding the neopixel.c and neopixel.h files in src directory.
target_sources(app PRIVATE src/main.c src/neopixel.c)Now change the main.c code of hello_world application with the main.c code attached below. Then we can successfully build and flash it to thingy53 using external SEGGER J-Tag probe. When thingy53 firmware programming is finished, we can also connect it through RTT interface, available under CONNECTED DEVICES panel, to assign/debug the NeoPixel rgb leds.
In order to run the neopixel leds external 5.0V supply is recommended and it is also recommended to use a level translator between neopixel leds and thingy:53 GPIO pin.
Demo video:Note:
1) main.c, neopixel.c, neopixel.h and overlay files are attached below.
2) thingy:53 pinout details link: here
3) thingy:53 debug and current measurements board pinout details link: here
_3u05Tpwasz.png?auto=compress%2Cformat&w=40&h=40&fit=fillmax&bg=fff&dpr=2)
Comments
Please log in or sign up to comment.