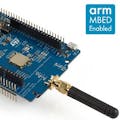
Thingy:53 is a compact nrf5340 based IoT development device from Nordic semiconductor with various kind of onboard sensors. BH1749 is one of the sensor available in this device which can be used to read the various light parameters like IR and rgb color.
Here we will learn how to create a basic thingy:53 application in order to read the light parameters using BH1749 light sensor available on this device.
Before moving forward to creating a new application, we need to know the nRF5340 GPIO pins/communication interface used to communicate with BH1749.
From thingy:53 schematic we can find out that I2C interface is used to communicate with BH1749 and its I2C address is 0x38 (it can also be obtained from BH1749 datasheet).
P1.02 and P1.03 shown in above image represent GPIO port 1 pin 2 and pin 3 are used for I2C interfacing with sensor. And we can find the corresponding I2C interface number attached to these two GPIO pins of nRF5340 soc from its datasheet OR alternately we can also get this information from pin configuration file of thingy:53 available in the SDK file (its full path along with file name is given below).
C:\ncs\v2.1.0\zephyr\boards\arm\thingy53_nrf5340\thingy53_nrf5340_common-pinctrl.dtsiIn above mentioned file we can see that P1.02 and P1.03 correspond to I2C1 interface of nRF5340 of thingy:53 device.
We can also find this information more conveniently from one of our information panel available in Visual Studio Code loaded with nRF connect for desktop (this panel will only be visible after creating and configuring the build setting of an thingy53 application).
Now knowing all the basic stuff about onboard BH1749, we can create a new application for our thingy53.
After creating a simple hello world application and selecting its build configuration we will change the k-config of our application as shown below, for easy debugging and console monitoring. Also enable the "SENSORDRIVERS" in k-config config menu.
After making the above mentioned changes in k-config, we need to create an overlay file for thingy:53 in order to enable and communicate with the BH1749 sensor. After creating the new overlay file add the following code in it.
&i2c1 {
    compatible = "nordic,nrf-twim";
    status = "okay";
    clock-frequency = <I2C_BITRATE_STANDARD>;
    bh1749: bh1749@38 {
        compatible = "rohm,bh1749";
        label = "BH1749";
        reg = <0x38>;
        int-gpios = <&gpio1 5 (GPIO_PULL_UP | GPIO_ACTIVE_LOW)>;
    };
};
Now change the main.c code of hello_world application with the code attached below. Then we can successfully build and flash it to thingy53 using external SEGGER J-Tag probe. When thingy53 firmware programming is finished, we can connect it through RTT interface, available under CONNECTED DEVICES panel, to read the BH1749 sensor values.
Note:
1)main.c and overlay files are attached below.
If you are new to programming Nordic Semiconductors devices or not much familiar with nRF connect SDK then let me suggest you some very good and easy to understandable stuff.
1) https://academy.nordicsemi.com/
On above link you can find very beginner friendly courses related to Nordic devices and SDKs.
2) https://academy.nordicsemi.com/courses/nrf-connect-sdk-fundamentals/
More precisely this is the link of the course related to thingy:53 it will help a lot in getting familiarized with thingy:53 programming environment and SDK functions.
3) https://academy.nordicsemi.com/topic/exercise-2-12/
Lesson 6: Exercise 2 is almost exactly same as my code. You can follow this exercise to learn all the stuff going on in this code. The code taught in this exercise is only reading the RGB component of light while I just read few more registers in the i2c burst command to read the IR component as well.


Comments
Please log in or sign up to comment.