

Hardware components | ||||||
 |
| × | 1 | |||
 |
| × | 2 | |||
 |
| × | 1 | |||
 |
| × | 1 | |||
 |
| × | 1 | |||
Software apps and online services | ||||||
| ||||||
 |
| |||||
 |
| |||||
 |
| |||||
| ||||||
| ||||||
Hand tools and fabrication machines | ||||||
 |
| |||||
 |
| |||||
Being afraid of your work environment or your health, it is always a question mark when unpredictable situation arises. Of course, nothing can predict that. But the thing we can do is passing the information of your situation to the concerned person.
The idea of the system is, by saying a word to Google Assistant, the Alarm automatically goes ON. And with your approval, messages can be sent to the person whom you want to inform about the crisis. A LED will be ON, notifying that the SMS is received by the person. If the situation is a Robbery/theft scene, the person can be a Cop. If the situation is on emergency health related, the person can be your Doctor too. To distinguish with persons, one can also program the SMS with their addresses too.
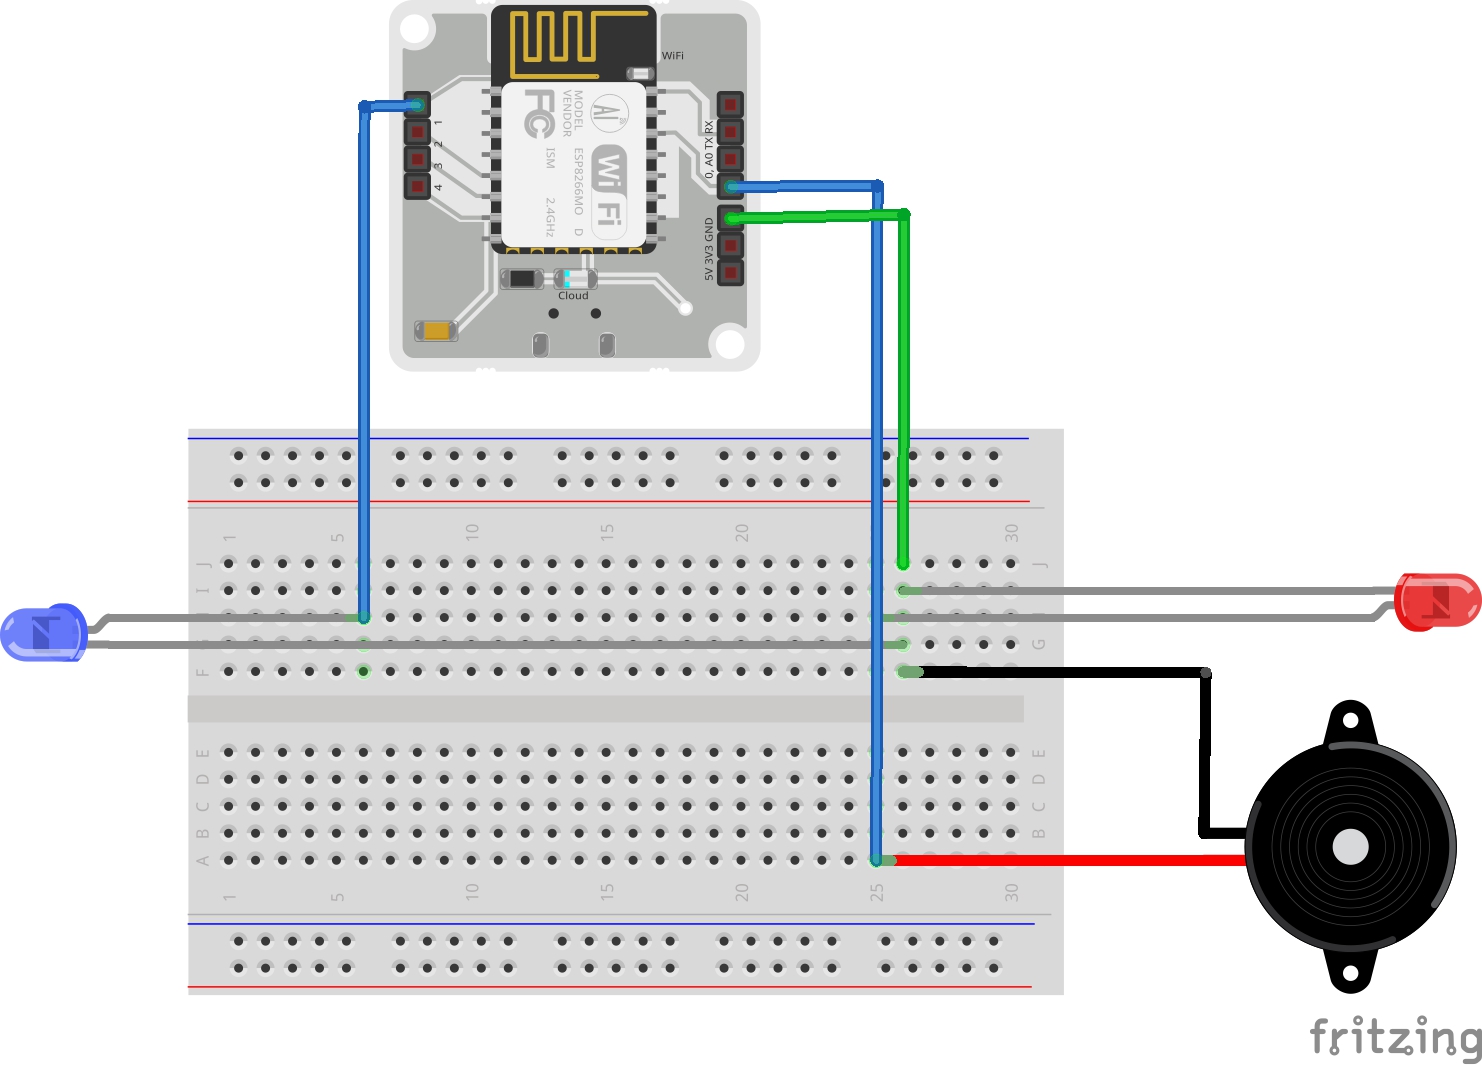
STEP 1 : HARDWARE CONNECTIONSConnection for the circuit is shown below. The schematic is made using Fritzing.
Here the right part which consists of LED and Buzzer forms the alarm circuit. The left part which has a Blue LED is to confirm that SMS notifications are sent.
1. Connect the +ve of LED (longer leg) to pin 0 of module and the shorter leg to GND of module.
2. Connect the +ve of Buzzer (longer leg) to the same pin 0 and shorter leg to GND. This forms the alarm circuit.
3. Next, Connect another LED to pin 1 of module. This is to confirm that SMS notification is sent and received by the person successfully.
STEP 2 : CREATING APPLETS IN IFTTT1. Click on "+" and search for Google Assistant.
2. Select "Say a simple phrase".
3. You'll be redirected with the following page.
4. Fill the Trigger Fields and click "Create trigger".
5.Next, Click on "That" and search for Webhooks, Select "Make a web request".
6. You'll be redirected with following details.
7. Give the URL with your API key, pin number and device name. Those details are available in the Cloud. Select method as GET and type as "application/json". Click "Create action".
8. That's it. You are done with the alarm circuit.
STEP 3 : CREATING TWILIO SCENARIOTwilio Web Service is used here to send SMS with user interests.
1. Sign up your Twilio Account
2. Verify your account with the phone number you want to receive SMS. Also note that, you'll be given with $15 for the trial account. With every SMS, the amount gets reduced.
3. Give your project a suitable name and select "Programmable SMS". To get the sender's number, Select "Get Number". A random number gets generated and that is the from number where the message gets generated.
STEP 4 : PYTHON ENVIRONMENTI used Python in my Ubuntu Server installed in VMware Workstation. The coding part is to allow the user to give permission manually to send SMS.
1. Update the packages on Ubuntu Server using following code
sudo apt-get -y update2. Install Python 3 in the server using following code
sudo apt install python3-pip3. Install Bolt Library by executing
sudo pip3 install boltiot4. Make a new python file to store all the account and cloud credentials. To open a new file named "conf.py", execute
sudo nano conf.py5. To access the Twilio account with bolt cloud, we store from_number, to_number, auth_token, sid codes from twilio dashboard. We also store the api-key and device-id of module from the cloud. Type the following,
SID='YOUR SSID FROM DASHBOARD OF TWILIO'
AUTH_TOKEN='YOUR AUTH_TOKEN FROM DASHBOARD OF TWILIO'
FROM_NUMBER='YOU WILL FIND THIS ON TWILIO DASHBOARD'
TO_NUMBER='THE NUMBER WHICH MESSAGES SHOULD BE RECEIVED'
API_KEY='FROM BOLT CLOUD'
DEVICE_ID='FROM BOLT CLOUD'
6. To save press "Ctrl+X". Exit and create new file named alert by the same way you opted for conf file. This is the file where the main program is.
7. Before beginning the main program, it is must to import your config file and other functions such as Sms to include in program with the keyword import.
import conf
from boltiot import Sms,Bolt
mybolt = Bolt(conf.API_KEY,conf.DEVICE_ID)
sms = Sms(conf.SID,conf.AUTH_TOKEN,conf.TO_NUMBER,conf.FROM_NUMBER)
8. To view the main program, kindly reach Code part at the end. At last, we make another LED ON, just to confirm that the SMS has been sent successfully.
9. To run the main program, type the below command and execute
sudo python3 alert.py1. Power up the device via USB cable.
2. Say "I am in danger" on your google assistant and in turn the Alarm goes ON.
3. In case, if you need to inform the authority "Press 1" in your VMware. And yes the message will be received.
HOLA!!YOUNAILEDIT!!


Comments