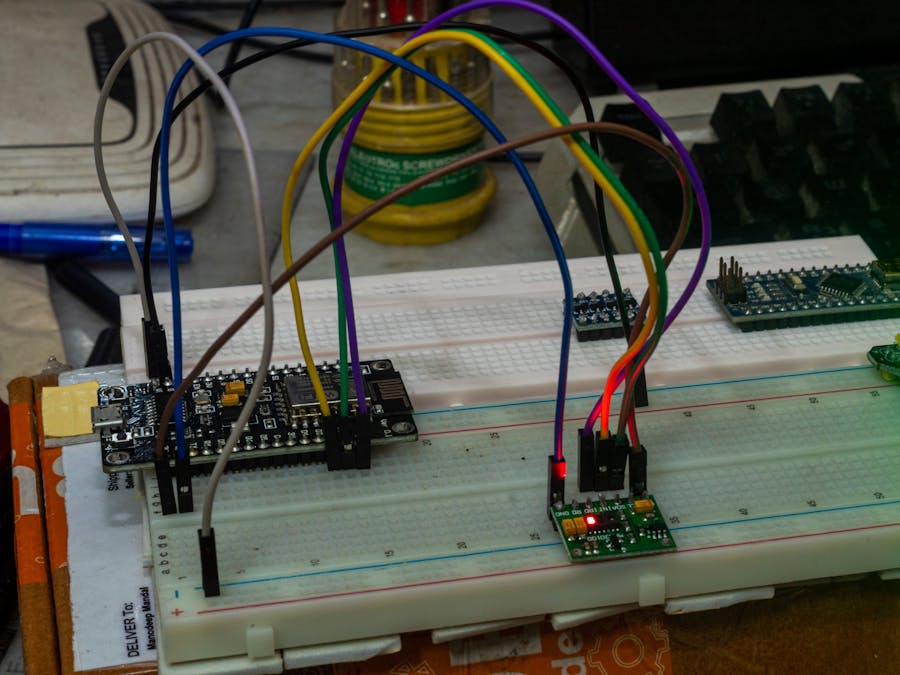
India is badly hit by the second wave of COVID 19. There's a shortage of pulse oximeters. I and my family got infected with COVID 19 and couldn't find any Oximeters for a reasonable price anywhere. So I searched the internet to find any DIY solution and came across this cheap MAX30100 pulse oximeter and heart rate sensor module.
General Description ofMAX30100:-
The MAX30100 is an integrated pulse oximetry and heart rate monitor sensor solution. It combines two LEDs, a photodetector, optimized optics, and low-noise analog signal processing to detect pulse oximetry and heart-rate signals. The MAX30100 operates from 1.8V and 3.3V power supplies and can be powered down through software with negligible standby current, permitting the power supply to remain connected at all times.
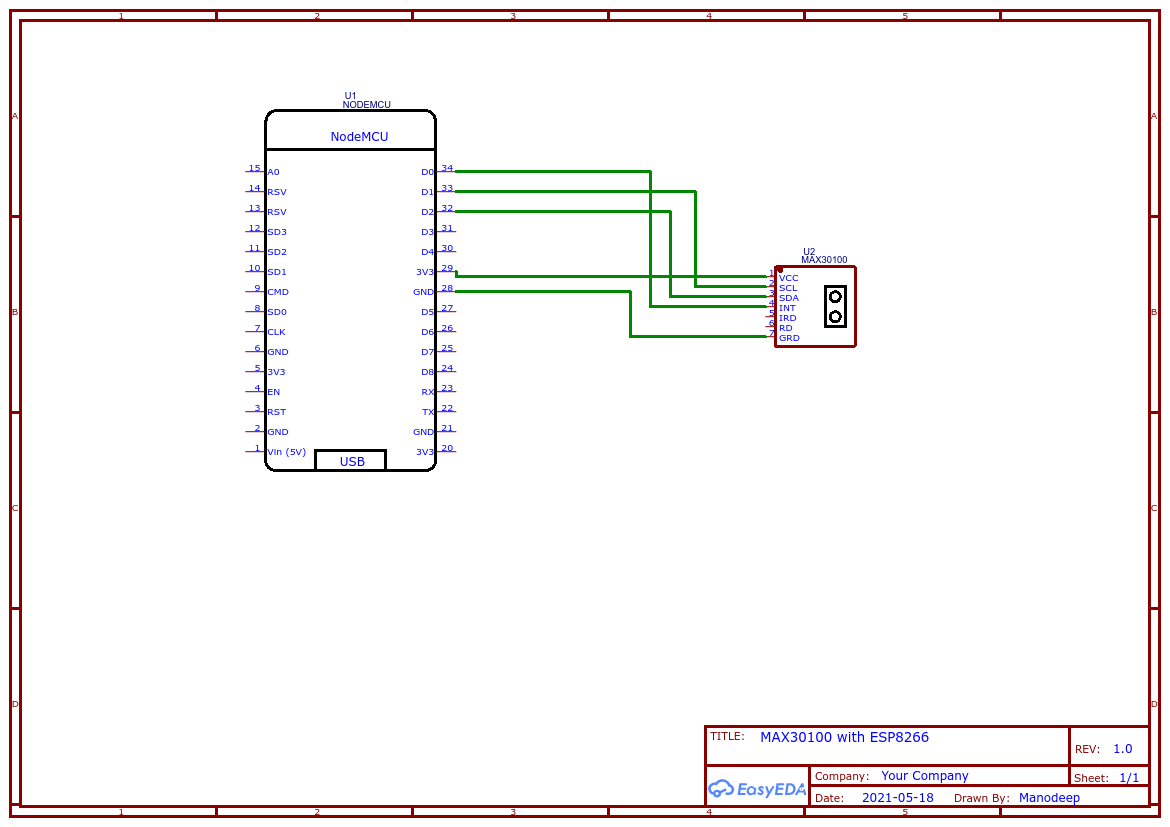
System Block Diagram:-
*for more information on MAX30100 sensor, please visit - https://datasheets.maximintegrated.com/en/ds/MAX30100.pdf
Setting up the Blynk Android App:-Blynk is an application that runs over Android and IOS devices to controlany IoT based application using Smartphones. It allows you to createyour Graphical user interface for IoT application. Here we will setup the Blynk application to monitor BPM & SPO2 over Wi-Fi usingNodeMCU ESP8266.
1.So download and install the Blynk Application from Google Play store.IOS users can download from the App Store. Once the installation iscompleted, open the app & sign-up using your Email id and Password.
2. Now click on “New Project”. In the pop up set the parameters like Project name, Board and connection type as shown in the photo above.For this MAX30100 ESP8266 project select the device as NodeMCU and connection type as Wi-Fi. Then click on Create.
3.Now click on the “+” sign to add the widgets. We need to read thevalue of BPM & SpO2. So select a pair of widget named “ValueDisplay” & “Gauge”.
4.After dragging the widgets, set their parameters as shown in theimage above. Click on Value Display and set the pin to “V7” &“V8“. Similarly, in gauge settings, set the output pin to “V7”& “V8”.
Afterthe successful creation of the Project, go back to setting and clickon Send Email. You will get an Authenticate ID on registered mail.Save the Authenticate ID for future reference.


_1x_bGT19vVAby.png?auto=compress%2Cformat&w=40&h=40&fit=fillmax&bg=fff&dpr=2)


Comments
Please log in or sign up to comment.