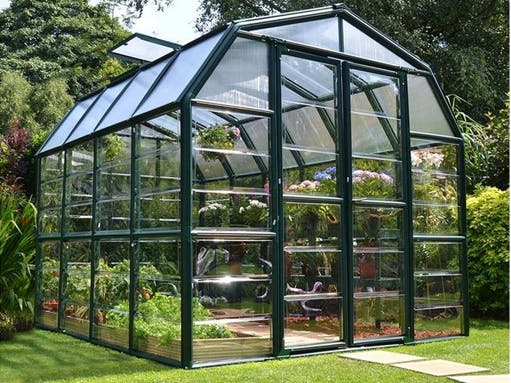
The goal of this project is building a greenhouse monitoring system that measures parameters like temperature and humidity, and transmits data through a wireless connection to an android app. This app receives the data and displays it using a program interface, allowing us to remote monitor our greenhouse.
This is the model of the project:
The main feature of greenhouse cultivation is to have different environmental conditions so that we can grow different types of plants, vegetables, etc. Of course depending on what we cultivate we must ensure that values such as temperature and humidity remain in the ideal range for that plant. In our case we take as an example the cultivation of tomatoes: in fact, for the cultivation of the tomato, the temperature should be between 20 and 26 ° C for optimal cultivation, moreover the ideal humidity for a correct conservation is between 80% and 90% during the day, 65-75% during the night.
Step 1: Thing, Certificate and Policy in AWSTo start our project we have to create a "thing" on AWS IoT to allow the connection between the cloud and the stm board. In the IoT core screen just go to "Manage" -> "Things" -> "Create" -> "Create a single thing".
Once the "thing" is created, the object certificate, the public key and the private key will be generated automatically by clicking "One-click certificate creation". Download everything as we will need it later, and hit Activate.
After that we have to create a policy of the thing in order to allow the exchange of messages. Go to "Secure" -> "Policies" -> "Create". Then, click advanced mode and attach the policy document to the thing and modify it as shown below.
The program is created using the online compiler of ARM, using MBED.
You can open a free account on mbed.com and write the code in the compiler there.
After we are done creating the IoT thing in AWS IoT, we have to program the board. The board will connect with AWS IoT by using WiFi and MQTT protocol and publish the measured values in a topic.
First, we have to initialize sensor values and connect to Wi-Fi. In the "mbed_app.json" section we have to insert the correct Wi-Fi SSID and the Wi-Fi password in order to establish the connection.
Second, we have to insert the certificate and the private key previously downloaded in the "MQTT_server_setting.h" section.
Then we get the sensor data and through MQTT protocol we publish them to the topic.
After finishing with the code on the compiler, click "Compile". A file will be generated. Take this file and insert it into the folder of the board. Open Realterm if you want to see the messages and the values being sent.
The full code for the program is available on GitHub.
Step 3: Creating rules in AWS IoTFinally we can manage our data. Create a rule and add action like storing updated data in a S3 bucket or DynamoDb. To do this, we need to go to "Act" -> "Create". So we have to write an SQL query to choose which data we want to use for our actions. Finally, in the same section, we can add action to manage our data, like store them in a S3 bucket, etc.
To read the data remotely, so we can monitor the environment from our smartphone we wrote a simple android app that shows the data in real time, and sends you notifications if the values are too high or too low.
Clicking the Connect button, will establish a connection to the AWS IoT platform The Android App subscribes on the MQTT topic and receives the values that were published by the IoT board.
For this to make it work, we have to modify our thing that we created earlier for the board.
MQTT enables the IoT device to send, and publish information in a given topic. The publisher publishes the values in the topic, and the sender subscribes to the channel in order to get the values. The Board is the publisher and the mobile device is the subscriber.
You can start by reading the AWS-sdk android samples provided by AWS on this GitHub page.
Then edit the GUI, to add some textViews for the values and the buttons needed for Connection, Disconnect, and Submit.
Make sure to add all the dependencies on the "build.gradle" file.
The whole code together with all the events and buttons, connection and subscription methods that we added or modified is available on GitHub.
LinksGithub: https://github.com/shend5?tab=repositories
LinkedIn accounts:
- Matteo Rizza: https://www.linkedin.com/in/matteo-rizza/
- Shend Osmanaj: https://www.linkedin.com/in/shendosmanaj/
- Shilpa Joy: https://www.linkedin.com/in/shilpa-joy/
- Alfin Joji: https://www.linkedin.com/in/alfin-joji-947b44111/
Slide presentation:
- Idea presentation: https://www.slideshare.net/ShilpaJoy5/greenhouse-weather-monitoring
- Project overview presentation: https://www.slideshare.net/ShilpaJoy5/greenhouse-monitoring
- Final Project Presentation: https://www.slideshare.net/MatteoRizza/greenhouse-monitoring-final


Comments
Please log in or sign up to comment.