


Hardware components | ||||||
 |
| × | 1 | |||
Recently at work we had a special event where we expected to have a large number of customers for a relatively small number of sales associates. We decided we wanted to have a sign-in system that would display who's waiting and who's being helped. We also decided this would be a good use for one of the spare Pis we have at the store.
In order to do this, we needed to set up a LAMP (Linux, Apache, MySQL, PHP) server on one of the Pis (we chose a Pi 3), set up a small database, and of course code the system itself. Although we had some inspiration from seeing other systems, neither of us had worked on one ourselves so we had to figure out how we wanted to do things on our own.
So what is a LAMP server? As noted above, it is made up of Linux, Apache, MySQL, and PHP.
- Linux The "kernel" inside Raspbian (it's also used in Ubuntu, Fedora, SUSE, etc.). It's the operating system architecture that the Pi runs on.
- Apache A webserver which runs many of the internet's largest and busiest sites. It allows for your website to be seen by the world. Hackmypi.com runs on an Apache server.
- MySQL A database server which allows you to organize data in tables comprised of named columns, with rows containing individual "sets" of that data. These databases comprise any information that is stored by a website. In our case, it stored who was waiting to be helped, who was being helped, and who was finished.
- PHP An interpreted programming language which is often used to dynamically create webpages, as well as to act on user input to do various things on the server (upload a file, add an entry to a log, etc.). Basically, it allows for more interaction with a webpage.
Why did we need a LAMP server? Well, we decided to do this as a website so it would be easy to connect every computer involved to the system. In our case, we had a check-in computer, a display computer (to show who was waiting) and two management computers for employees to manage the queue. We had also discussed writing some applications to do the client/server aspect of it, but quite frankly we had too little time to do that properly, and a LAMP server meant we could focus on the things that were needed the most.
This will be the first in a short series of articles describing what to do to create your own sign-in system with a Raspberry Pi!
Setting up a LAMP server on your PiFirst of course we needed to set up the LAMP server. To do this on a Pi is actually just a few simple terminal commands. First up, install Apache:
sudo apt-get install apache2
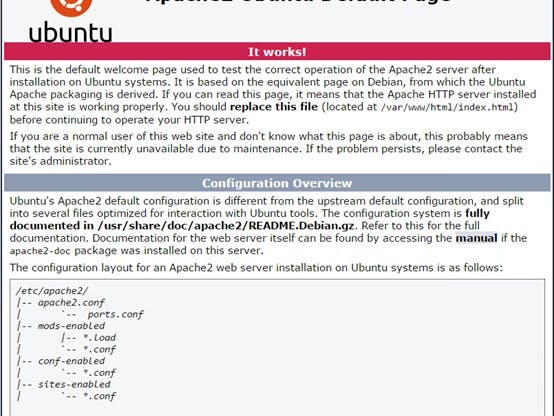
This will install Apache on your Pi. Its default directory for storing any web files is /var/www/html. To validate that Apache is up and running, try browsing to "http://x.x.x.x/index.html", where "x.x.x.x" is the IP address of your Pi. To find the IP address of your Pi, after it is connected to your Wifi, type:
sudo ifconfig
into a terminal window. Next to 'wlan0' you will see an "ipv4" address; this is your IP address (write this down). On a second computer navigate to "http://x.x.x.x/index.html", where "x.x.x.x" is the IP address of your Pi, you should see a page telling you that it's the default webpage for an Apache installation. If so, success! If you get an error then you'll need to find out what's causing it before going further.
Once you've installed Apache, it's time to move on to MySQL. Type in the following command:
sudo apt-get install mysql
During installation, you'll be asked to set up a password for MySQL's "root" user. Please make a secure password for this, as just like Linux's "root", the MySQL "root" user has full access to everything stored in your database.
Next you'll want to install PHP. This allows you to create webpages whose content can change based on things outside the website itself (like the information stored in your database!). You'll need 2 commands for this:
sudo apt-get install php php-mysql
The reason you need the second command is to restart Apache so it will use the modules which were just installed. To verify everything is up and running, create a file named "phpinfo.php" in the "/var/www/html" directory.
cd /var/www/html
and put the following code in it inside of brackets:
?php phpinfo(); ?
After saving the file, view it in your web browser at http://x.x.x.x/phpinfo.php, just like earlier. If it displays a page giving you detailed information on the installation and setup of PHP on your webserver, success!
In the code I give in the future guides we'll be using PDO (PHP Data Objects), so you'll want to browse through the page and make sure that there is an entry for both "PDO" and "pdo_mysql", and that "mysql" is listed in the PDO section as one of the "PDO drivers".
So what to do if something went wrong? The best place to look is in Apache's own error logs. Those are typically stored in "/var/logs/apache2". The last few lines of errors should at least give you an idea of what's going on. Another good place to look is Stack Overflow; it's a website I've often used when I couldn't figure out what was wrong with my code. Try doing a "site:stackoverflow.com" google search of your problem, and there's a good chance someone already had the same problem and posted a fix!
Enter your Name and Email to receive notifications about new posts.
Like what you see?Consider backing us on Patreon to help cover server/project costs! Follow us on Facebook or Twitter! Shop using our Amazon Affiliate link!
Contact MeFeel free to email me at mwagner@hackmypi.com with any questions!


Comments
Please log in or sign up to comment.