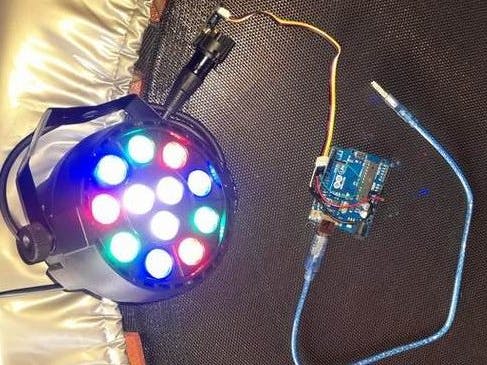
The task was to control a lighting system with an Arduino via DMX. In the trade there are already adapters from PC to DMX but so far rarely an Arduino control. Therefore I took my old Arduino out of the drawer and bought a DMX512 interface (industry standard EIA-485 interface). Additionally a DMX compatible device (e.g. LED RGB fixture) is required and a DMX cable to the fixture. All plugged together and recorded with simple software. Lo and behold, not so difficult. Have fun and I look forward to further suggestions.
After you have all the components together, you need to download and install the Arduino SDK at https://www.arduino.cc/en/software. Plug the Arduino into a free USB port and access it with the SDK. If these steps are unknown, then read the following tutorial and work through it (https://www.arduino.cc/en/Guide/ArduinoUno).
Now we need a library (DmxSimple.h) which can be used for the DMX 512. First download the *.ZIP from (https://github.com/PaulStoffregen/DmxSimple) and then install it in the Arduino SDK (https://www.arduino.cc/en/guide/libraries).
Now the test setup is assembled.
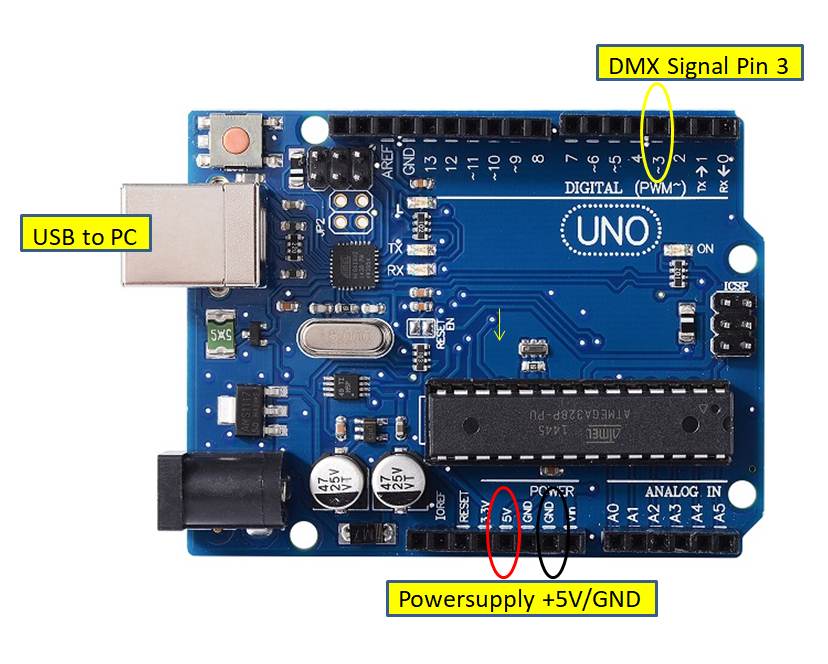
Step 1. Connect the Arduino UNO to the PC (via USB)
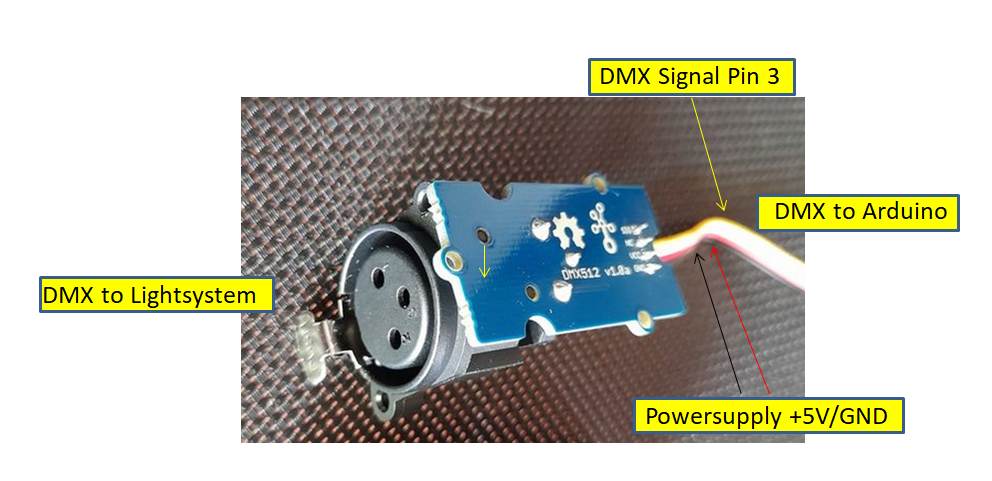
Step 2. Plug DMX 512 shield to the Arduino UNO (with 3 wires)
a) wire 1: plus/red to PIN 5V
b) wire 2: minus/black to GND
c) wire 3: signal/yellow to PIN 3 (Digital/PWM)
Step 3. Connect DMX 512 with light system
a) Plug the DMX adapter cable with 3 pole cable into the socket on the DMX shield (DMX cable approx. 30cm)
b) Plug the DMX adapter cable with 3 pin cable into the socket on the lighting system (e.g. LED spotlight) (DMX cable approx.30cm)
4. Establish power supply for light system, switch on.
5. Set the DMX channel "d001" on the back of the light system e.g. via menu keys. This can be very different from light system to light system. With older fixtures, a DIP strip must be set to activate the correct DMX address. To do this, it is essential to read the enclosed instructions for use of the lighting system.
So now the test setup is built and prepared.
Very important information for the correct setting is to program the DMX channel settings correctly: For this purpose, a description of the DMX channels and addresses is included with each lighting system. These describe what the lighting system does when this address is addressed by programming. Therefore, do not be disappointed if my example does not work for you, because usually the lighting systems always have different control addresses. Unfortunately, you as a maker must always work out for your system! Following my example:
Video Link Test Setup: https://c.gmx.net/@334340224932910899/v3j22LrUQH-2hh8u21MrEQ
The next step explains the programming.


_ztBMuBhMHo.jpg?auto=compress%2Cformat&w=48&h=48&fit=fill&bg=ffffff)


Comments
Please log in or sign up to comment.