If you have done any IoT project, you may know that everything almost all the time consist on sensors measuring physical magnitudes, sending them through the internet and controlling devices with the I/O ports.
But today we are going to learn how to use the ESP32 CAM, that is an ESP32 Development board that has a Built-In camera.
This board can help us on developing projects that can see, and some interesting aplications are:
- Security Camera.
- Longs Time Lapse Shots.
- 3D Printer Monitoring Camera.
- Door bell camera.
- Etc.
If you are a visual learner I know that a video worth more than 1000 words, so here is a Tutorial video. (I am a Spanish speaker, so please consider turning on English subtitles):
Hope you to enjoy the project.
Step 1: Skills Needed.
As you can noticed, nothing looks very difficult on this project, but you will need some basics knowings about:
-Using the Arduino IDE.
-3D printing or Handcraft (for the enclousures).
-Welding.
Step 2: Components and Parts List.
Here is the list of materials and tools you will need to do the project yourself.
- -ESP32 CAM: https://www.banggood.com/custlink/GGvhrjV0tY
- -USB to TTL: https://amzn.to/2EBbIiX
- -Hot Glue gun.
- -Soldering Iron.
- -Some jumper Wires.
- -USB cable.
- -Enclousure.
NOTE: If you want to create a PCB to place your ESP32 CAM more professionally you should design your PCB and manufacture it with JLCPCB.
Cheap PCBs and SMT Assembly from $2 USD + (2 Coupons).
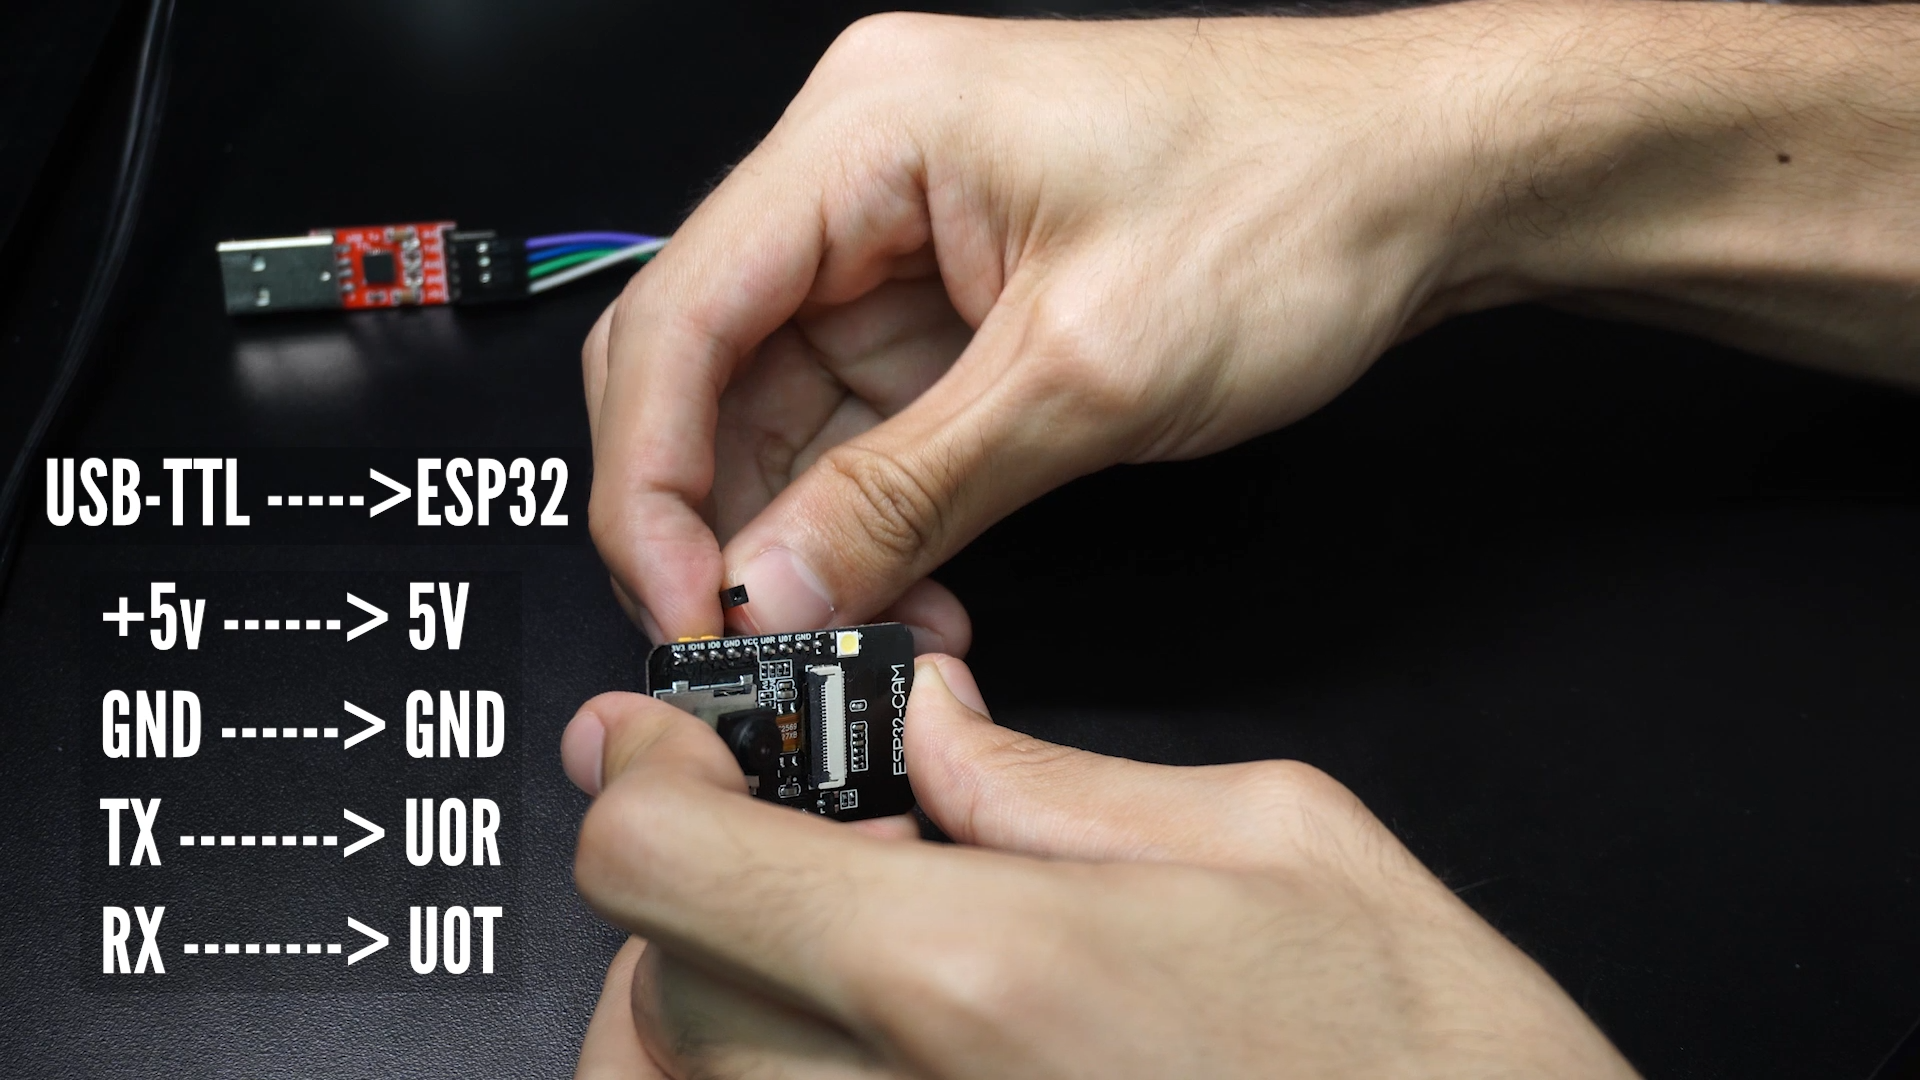
Step 3: Programming Conections:
The ESP32 is board from the ESP family developed by Espressif and if you have used one of their boards, mainly the ESP-01 (ESP8266), you may know that the GPIO0 (Pin) is the one that decide on the boot mode of the Chip, so for this case you need to connect a jumper between the GPIO0 and Gnd.
Step 4: Installing the Enviroment for the ESP32 in the Arduino IDE.
First you need to Install the Arduino IDE.
Open it, then click on Archive>Preferences
On Aditionals URL's paste this link:
https://dl.espressif.com/dl/package_esp32_index.js...
And install the ESP32 Boards Package as shown in the screenshots.
Step 5: Uploading the Camera Web Server Sketch
Select the Board "Ai thinker ESP32-CAM"
Go to Archive> Examples> ESP32> Camera> CameraWebServer.
In the sketch uncomment the model of the ESP32 CAM you are using.
Put the WiFi credentials and Upload.
Once the ESP32 is burned.
Disconect the GPIO0-GND jumper and reset the board, look at the IP printed on the Serial Monitor.
Search for it on your favorite Web Browser and done.
Click on Start Stream to look what's your camera seeing.
Step 6: Assemble Your ESP32 Within the Enclosure
Wire up the USB cable through the case so the power wires can be soldered to the power pins (+5v and GND) of the ESP.
Glue the ESP32 CAM so the camera sensor can see through the square cutout.
Screw it. and glue the Camera to the power adapter.
Step 7: Test It and Enjoy It.
Just connect your camera in a WiFi reaching place, and go to your browser and look at the place you are watching.


Comments
Please log in or sign up to comment.