


Hardware components | ||||||
_ztBMuBhMHo.jpg?auto=compress%2Cformat&w=48&h=48&fit=fill&bg=ffffff) |
| × | 1 | |||
 |
| × | 1 | |||
 |
| × | 1 | |||
 |
| × | 1 | |||
 |
| × | 1 | |||
 |
| × | 1 | |||
 |
| × | 1 | |||
Software apps and online services | ||||||
 |
| |||||
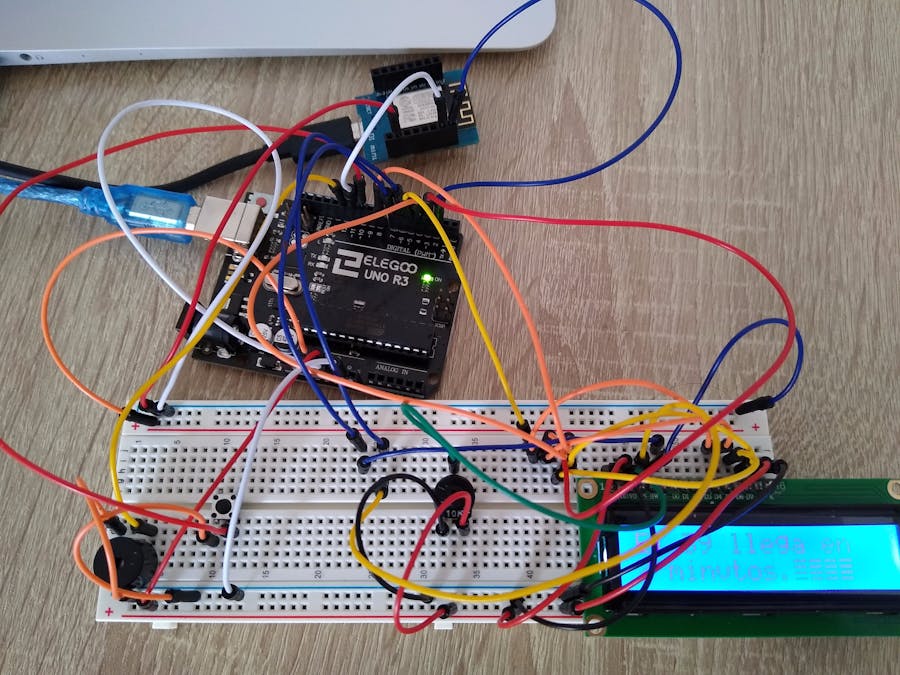
EVERYONE HATES LOSING A BUS and installing useless apps on the mobile that you're going to use once in life. For solving this problem, I've developed a new system that will ask an API Rest Service when the next bus will arrive. Once API Rest service has responded, time left to the next bus will be displayed in an LCD Screen. An ESP8266 will be the board responsible for asking the API REST Service and the LCD screen will be controlled by an Arduino Uno. I've personalized this project for Zaragoza API. This API provides information about the time to arrive on the next bus or geographical coordinates of bus stops, for instance. In my case, I have 2 bus lines that I'm interested in, 39 and CI2. So, I've prepared the system for selecting the bus line I'm interested in each moment, and time is displayed on the LCD screen. If I want not to arrive late for the buses, I've to go out from home 5 minutes before the bus arrive. Due to this situation, a buzzer will sound every time there are 5 minutes left to the next bus.
Project Development DescriptionProject is composed by 2 codes, one that will manage arduino uno and the other one, responsible for managing ESP8266 board.
We'll start explaining ESP8266 code:
As I've explained above, this board will continually ask an API. The response of the API is via JSON, this way will need to parse information into an object. For parsing the JSON we'll use ArduinoJson Library which can deal with parse and serialization with ease.
It's recommended to use an API Client such as Postman to verify the message that you are sending to the API (GET/POST, Headers and Params) is correct. You can see an example on the figure below:
ArudinoJson Library (Version 6) offers an online assistant. This way, if you introduce a response example it generates the code for serialization or parsing JSONs. You can find this assistant in this link:
https://arduinojson.org/v6/assistant/
So, if you introduce your JSON example, this assistant will provide you a possible solution for parsing and work with these structures. In my case, I'll work with two different structure due to one bus stop has 1 bus only and the other one has 2 buses available.
For preparing the GET part, we'll create a WifiClient from ESP8266WifiMulti Library. Next, connect client to API host and start sending GET Request, params and headers. Next, example from muy code:
WiFiClient client;
 String server = "www.zaragoza.es";
 // This will send the request to the server
 if (client.connect(server,80)) {
   //Serial.println("Conectado");
   if (selectbus == 39) {
     client.print("GET /api/recurso/urbanismo-infraestructuras/transporte-urbano/poste/tuzsa-508?");
     client.println(" HTTP/1.0");
     client.println("Host: www.zaragoza.es");
     client.println("Content-Type: application/json");
     client.println("Accept: application/json");
     client.println();
   } else {
     client.print("GET /api/recurso/urbanismo-infraestructuras/transporte-urbano/poste/tuzsa-3022?");
     client.println(" HTTP/1.0");
     client.println("Host: www.zaragoza.es");
     client.println("Content-Type: application/json");
     client.println("Accept: application/json");
     client.println();
   }
 } else {
   //Serial.println("Connection Failed!!!");
 }
Adapt your code for the API you're requesting.
Once we know how to obtain and process JSON response, there is just task to complete: send parts of the response via Serial Protocol to the Arduino Uno board.
Once ESP8266 board has been correctly programmed, we'll focus directly on Arduino Uno board code. Arduino Uno functions are:
- Receiving and processing messages sent by ESP8266
- Controlling LCD Screen and Updating time left to next bus
- Selecting which bus we're interested on
- Make buffer sound when there is 5 minutes left to next bus
For receiving and processing message sent by ESP8266, a SoftwareSerial object is going to be created (In my case, port Rx will be 2 and Tx pin, 11). This way, on each iteration client will ask for some information, it will receive ESP8266 update and it'll display new update on the LCD Screen.
String payload;
   // listen for communication from the ESP8266 and then write it to the serial monitor
   while ( ESPserial.available() > 0 )   {
     lcd.clear();
     //Serial.write( ESPserial.read() );
     char c = ESPserial.read();
     payload +=c;
   }
  [...]
 lcd.print(payload);
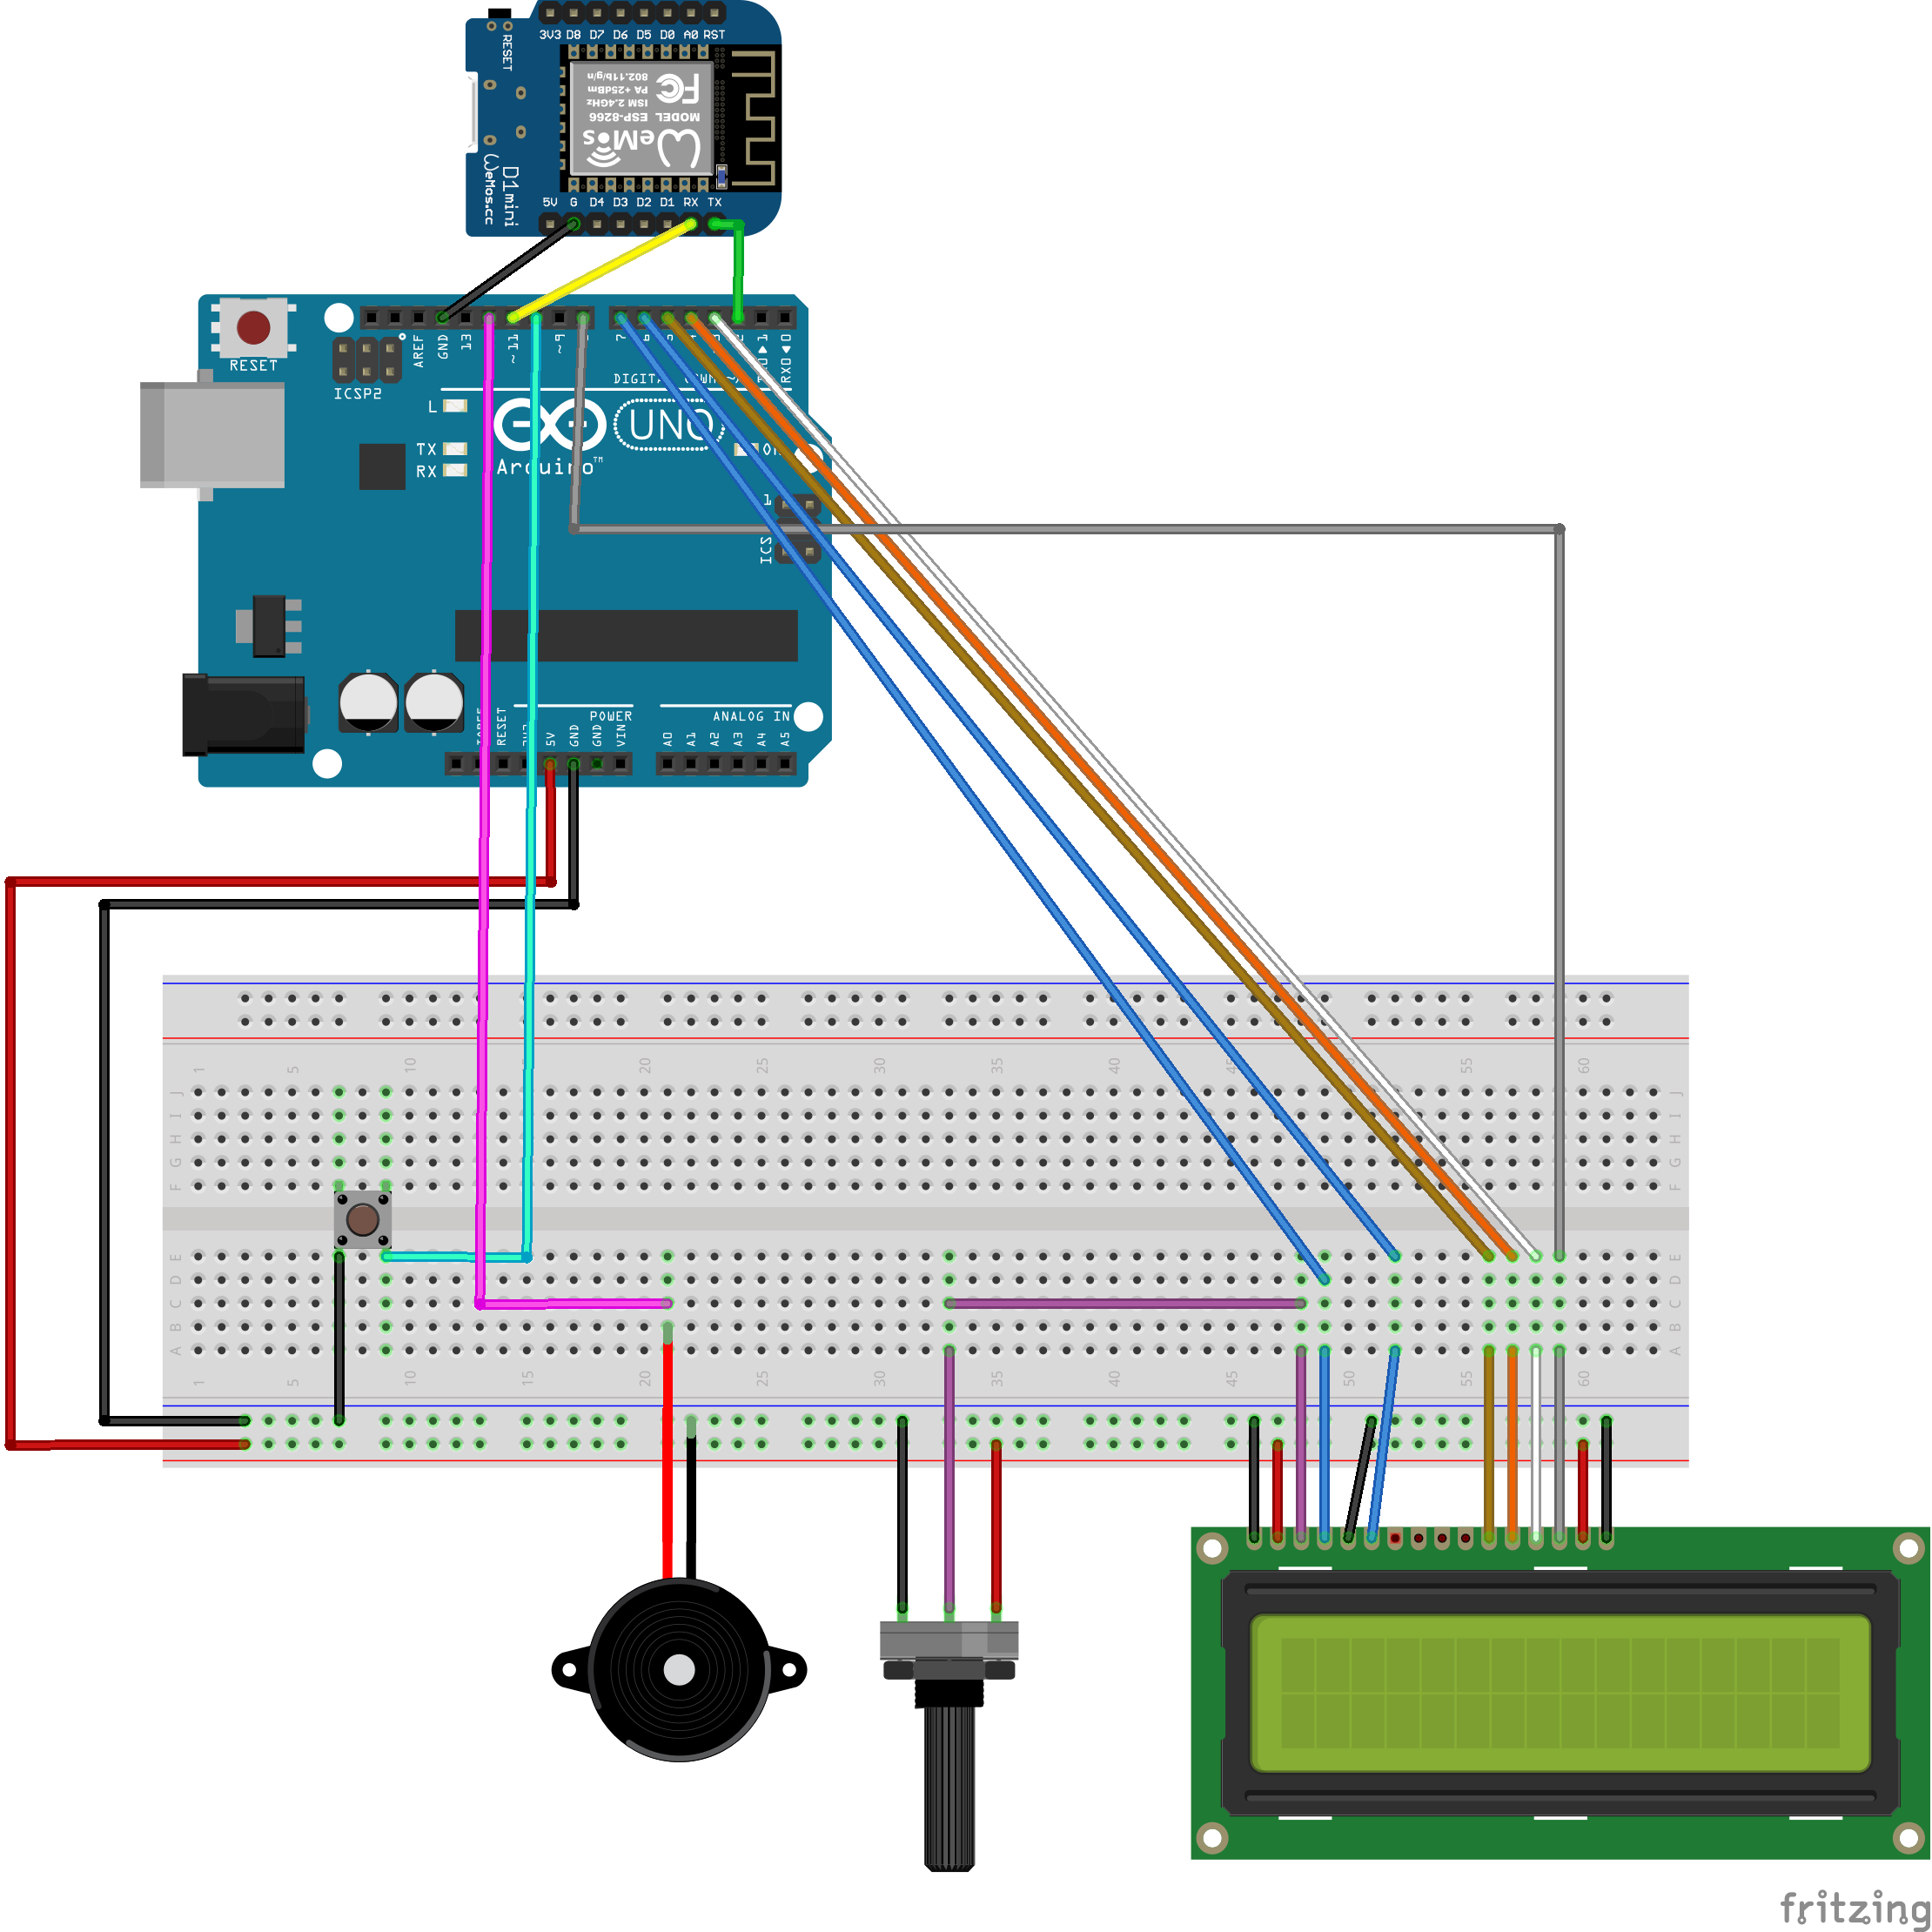
For controlling LCD Screen, LiquidCrystal Library will be used. For the control of the screen, 7, 6, 4, 3 &8 pins will be used. Further information about LCD screen and its connection, on Schema below.
Automatically each time Arduino Uno and ESP8266 start, system is configured to ask for time left to next 39 bus. If I want to ask for time left to next CI2, you'll have to push button installed. This way, Arduino Uno will send via SerialPort Tx#11 a key word to ESP8266. This way, ESP8266 knows that it has to change get conditions and ask for CI2 bus stop information.
At last but not least, system makes a buffer sound every time there is 5 minutes left to the next bus in order to not lose next bus. This way, I'll be sure I'll arrive next bus and EVERYONE HAPPY!!!
Next the code that manages logic explained above:
void loop()
{
   String payload;
   // listen for communication from the ESP8266 and then write it to the serial monitor
   while ( ESPserial.available() > 0 )   {
     lcd.clear();
     //Serial.write( ESPserial.read() );
     char c = ESPserial.read();
     payload +=c;
   }
   //delay(3000);
   // listen for user input and send it to the ESP8266
   if ( Serial.available() )       {  ESPserial.write( Serial.read() );  }
   int sensorVal = digitalRead(PIN_PULSADOR);
//    Serial.println(sensorVal);
   if (sensorVal != estado_anterior) {
     if (sensorVal == HIGH) {
       digitalWrite(PIN_LED, LOW);
     }
     else {
       digitalWrite(PIN_LED, HIGH);
       ESPserial.write("CI");
       if (selbus == 39) {
         selbus = 50;
     } else {
         selbus = 39;
   }
       //Serial.println("CI");
     }
   }
   if (selbus == 39) {
   lcd.home();
   lcd.print("El 39 llega en");
   } else {
       lcd.home();
       lcd.print("El CI2 llega en");
   }
   lcd.setCursor(0,1);
   lcd.print(payload);
   if (payload[0] == '5') {
    tone(12, 440,100);
   }
   estado_anterior = sensorVal;
}


_3u05Tpwasz.png?auto=compress%2Cformat&w=40&h=40&fit=fillmax&bg=fff&dpr=2)
Comments