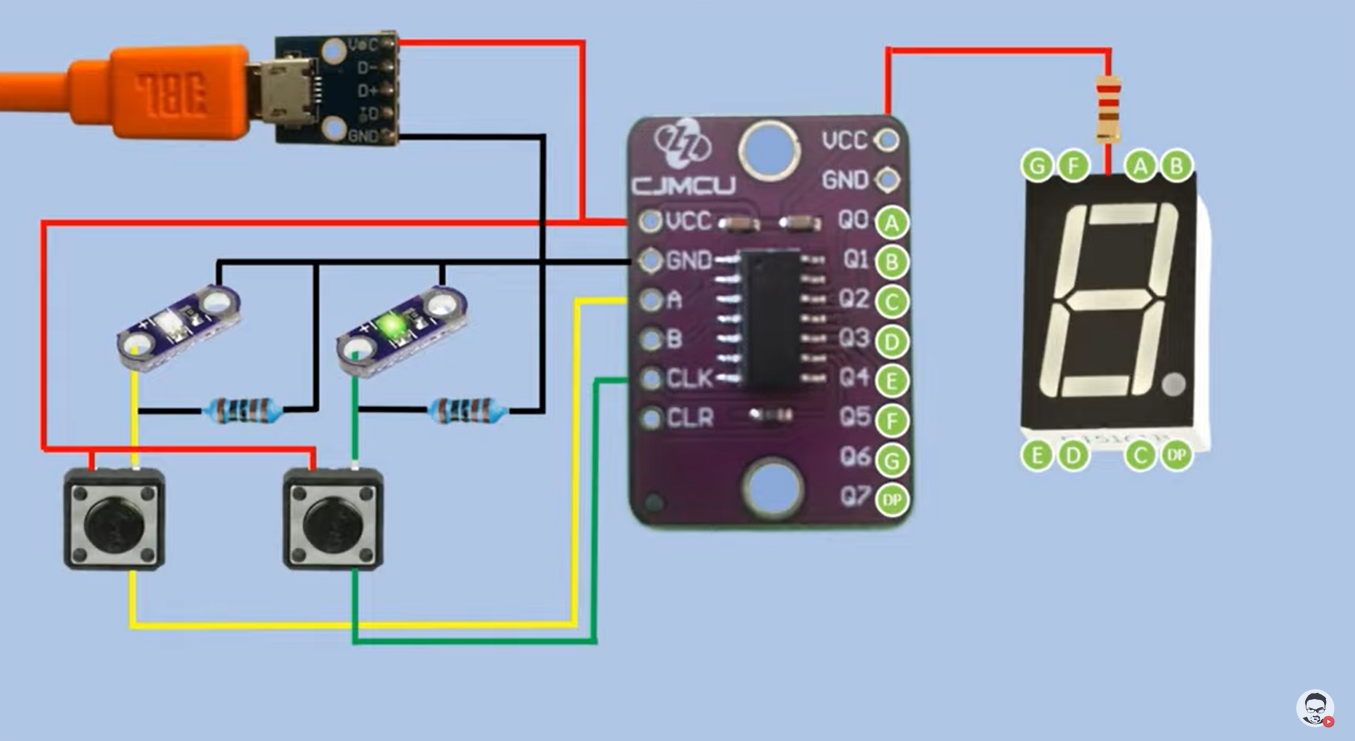
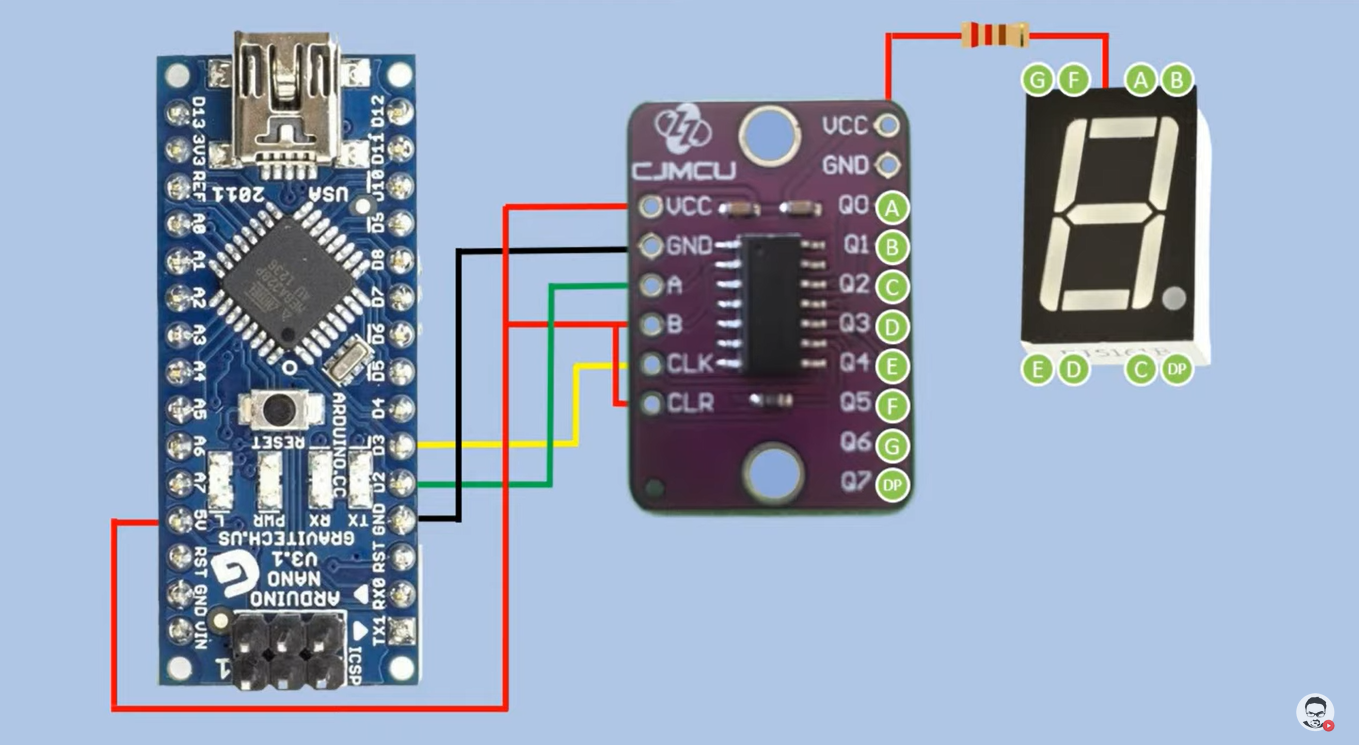
mdraber
Published © GPL3+

How to use 74HC164 shift register with Arduino

I found this shift register chip which is different to the most commonly used 74HC595. See how it works and what are the differences

BeginnerProtip2 hours1,336
How to use 74HC164 shift register with Arduino

Things used in this project

Hardware components

Arduino Nano R3
Arduino Nano R3
×1
74HC164 shift register
×1
Common Anode 7 segment display
×1

Story

Read more

Schematics

Schematics of the circuit to manually inputting the state of 7 seg display

Using pushbuttons we set the state of each segment and push it to the register. With this type of shift register you imediately see the results shifted out to coresponding leds of the 7 segment display

Circuit to control 7 segment display with shift register and Arduino Nano

Code

This is a code to count from 0 to 9 on the seven segments display

Arduino
The two commented lines are required for 74HC595 shift register.
int Data_pin = 2; 
int Latch_pin = 4;//for 595 only
Int Clock_pin = 3;

int digits [10][8]{
  {1,1,1,1,1,1,0,0}, //dig.0
  {0,1,1,0,0,0,0,0}, //dig.1
  {1,1,0,1,1,0,1,0}, //dig.2
  {1,1,1,1,0,0,1,0}, //dig.3
  {0,1,1,0,0,1,1,0}, //dig.4
  {1,0,1,1,0,1,1,0}, //dig.5
  {1,0,1,1,1,1,1,0}, //dig.6
  {1,1,1,0,0,0,0,0}, //dig.7
  {1,1,1,1,1,1,1,0}, //dig.8
  {1,1,1,1,0,1,1,0}, //dig.9
};

void setup() {  
  pinMode(Data_pin, OUTPUT);
  pinMode(Latch_pin, OUTPUT);
  pinMode(Clock_pin, OUTPUT);
}
void DisplayDigit(int Digit){
  // below line is needed for 74HC595 
  //digitalWrite(Latch_pin, LOW); 
  for (int i = 7; i>=0; i--){
    digitalWrite(Clock_pin,LOW);
    digitalWrite(Data_pin,!digits[Digit][i]); 
    digitalWrite(Clock_pin,HIGH);
    delay(100);
  }
  // below line is needed for 74HC595
  //digitalWrite(Latch_pin, HIGH); 
}


void loop() {
  for (int i=0;i<10;i++){  
    DisplayDigit(i);  
    delay(800);
  }
}

Credits

mdraber

mdraber

49 projects • 65 followers

Comments