In this project, we’ll create a basic light-following robot using Arduino UNO. It’s a great beginner project that employs LDR (Light Dependent Resistor) sensors for light detection and an MX1508 motor driver for control.
Working PrincipleMotor Control:We use a two-wheeled chassis car with straightforward motor control:
- Idle: Both motors stop.
- Turn Left: Left motor stops, right motor rotates forward.
- Turn Right: Left motor rotates forward, right motor stops.
- Move Forward: Both motors rotate forward.
Sensor Control:We use two LDR sensors:
- Right Sensor Detects Light: Turn right.
- Left Sensor Detects Light: Turn left.
- Both Sensors Detect Light: Move straight.
- No Light Detected: Stop.
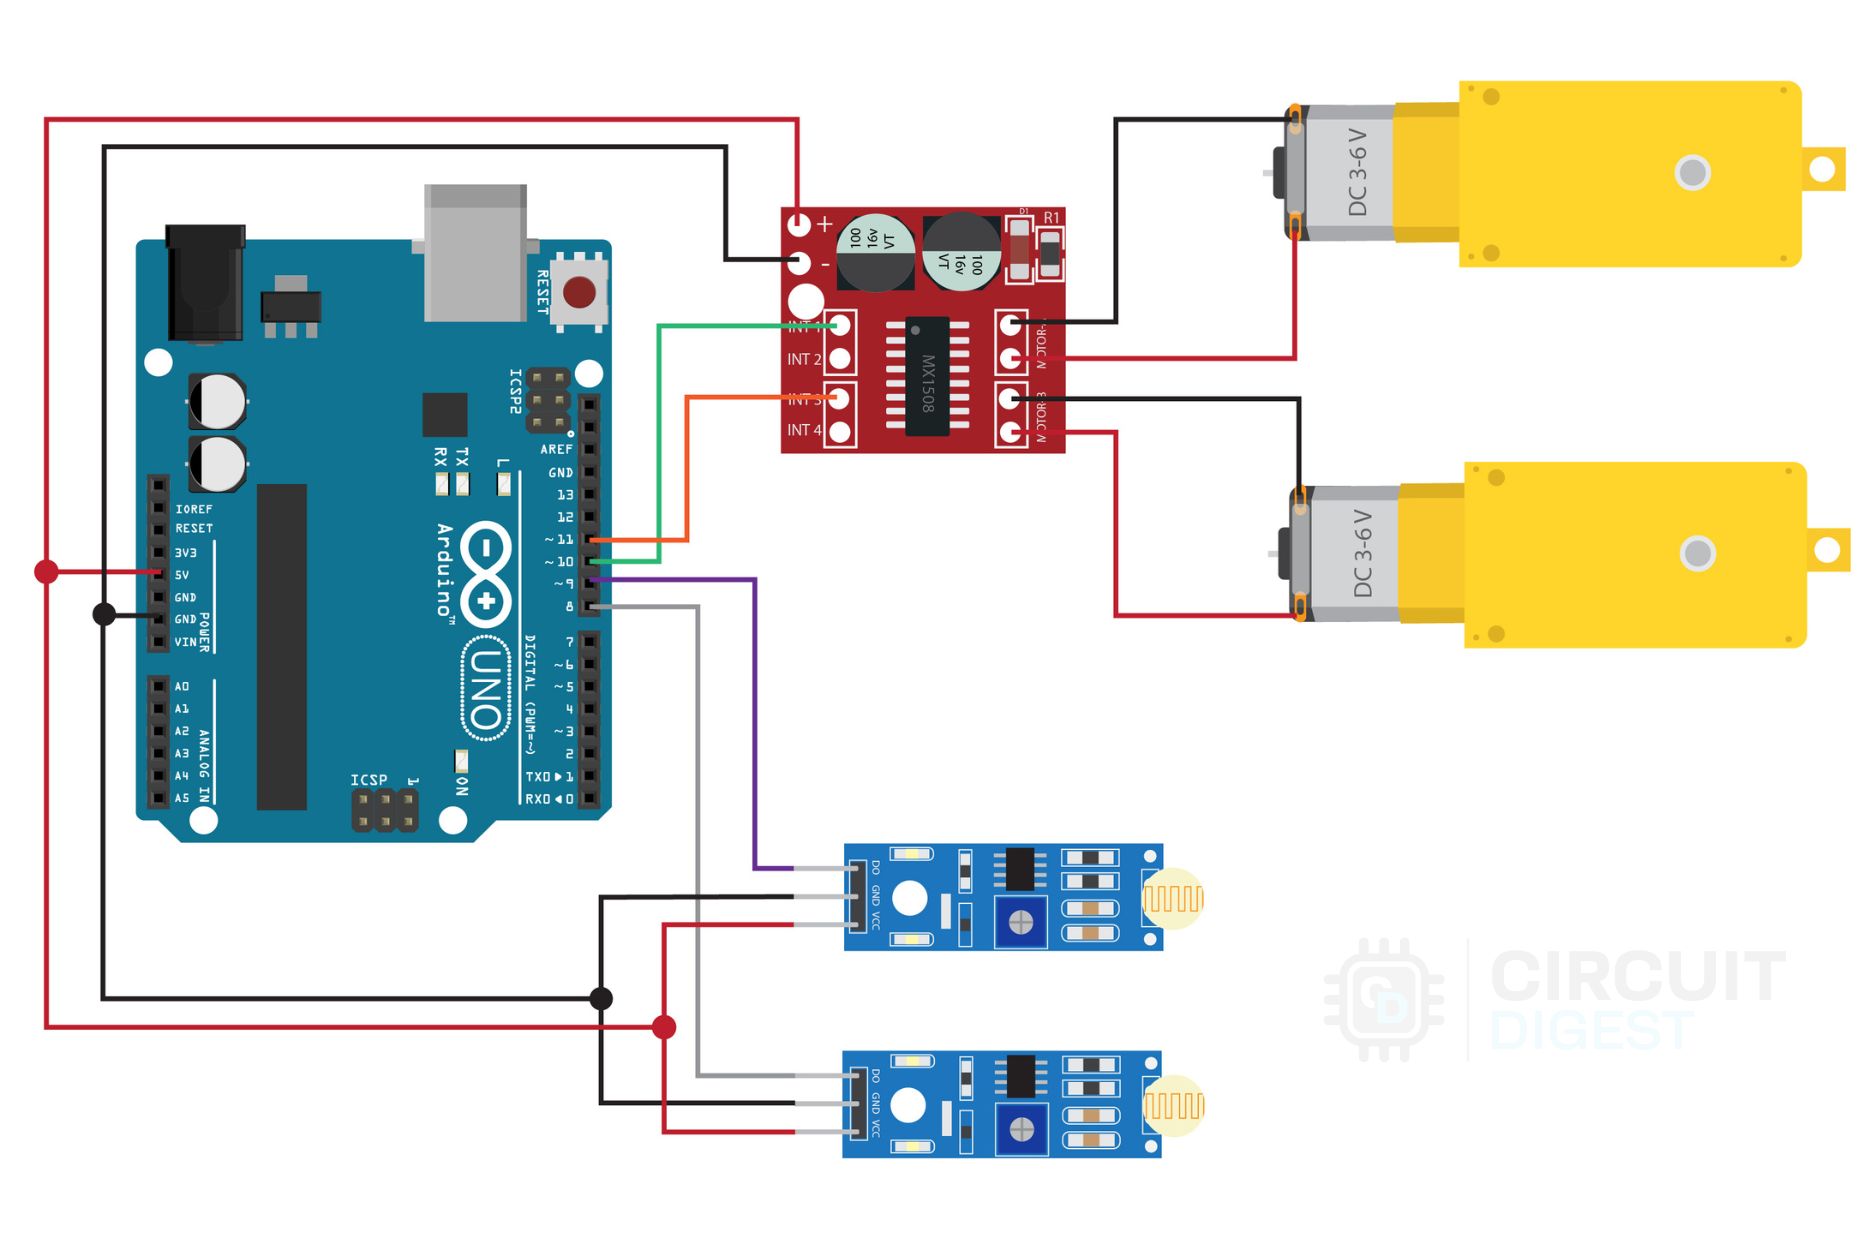
Circuit Diagram:Circuit connections are more simple. Direct to the schematics in the respective section for clear understanding.
- LDR modules connect to digital pins 8 and 9.
- MX1508 motor driver connects to pins 10 and 11 for motor control.
- Power inputs connect to the Arduino’s 5V and GND.
ConclusionIn this project, we’ve successfully built a simple light-following robot using Arduino UNO, LDR sensors, and an MX1508 motor driver. This robot provides a hands-on introduction to sensor-based control and motor management, making it an ideal project for beginners.
To further enhance your understanding and gain access to the complete code and detailed instructions, visit the Simple Light Following Robot using Arduino UNO. Circuit Digest offers comprehensive resources and tutorials that can help you refine this project and explore additional modifications. Dive in to explore the full potential of your light-following robot and discover more exciting projects!


_ztBMuBhMHo.jpg?auto=compress%2Cformat&w=48&h=48&fit=fill&bg=ffffff)


Comments
Please log in or sign up to comment.