I read interesting blog post that answered my question: "Which Monitoring System uses SpaceX company?" It is the open source project Grafana that supports many data sources and one of them is the best time-series database InfluxDB. The workflow is simple:
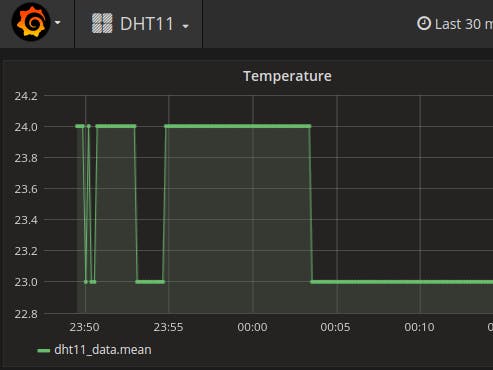
Your device/sensor produces time-series data that you send by one HTTP POST request to the database. Grafana is connected to that database and provides flexible data visualization. The result you can see here.
Granafa and InfluxDB are open source projects so you can use them for free for your home/company projects. In generally you have two options:
- install them to your home physical server or to the virtual server
- use cloud solution e.g. Corlysis.
In this tutorial I am going to show you how easily you can use the same monitoring system as SpaceX for your project. I selected the cheap NodeMCU board, temperature-humidity sensor DHT11 and Corlysis. In generally you can use any board that has internet connection e.g. Raspberry Pi.
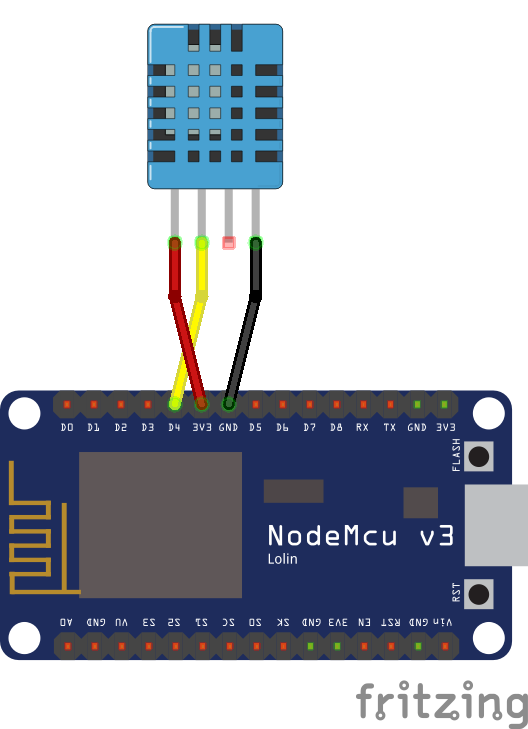
Connect the DHT11 sensor to the NodeMCUNo soldering required - just use 3 wires to connect the DHT11 sensor to the NodeMCU:
Good news is that you can use your favorite Arduino IDE (1.6.4 and higher) to develop this project. You just have to add ESP8266 board: click to the File -> Preferences and copy: http://arduino.esp8266.com/stable/package_esp8266com_index.json to the "Additional Boards Manager URLs" and click OK.
After that go to the Tools -> Board -> Boards Manager and install the esp8266.
And finally select NodeMCU board:
Right now you are ready to verify that you can communicate with the NodeMCU:
void setup() {
  Serial.begin(9600);
  Serial.println("NodeMCU test");
}
void loop() {
  Serial.println("NodeMCU test");
  delay(1000);
}
There are many libraries that can help you with reading data from the DHT11 sensor. I selected the DHTesp. To install it in Arduino IDE go to the Sketch -> Include Library -> Manage Libraries and install DHT sensor library for ESPx.
Then click to the File -> Examples -> DHT sensor library for ESPx -> DHT_Test and upload this code to your NodeMCU to verify that you are able to read sensor data.
Sending sensor data to the time-series databaseCreate Corlysis account and by one click create new InfluxDB database. If you have an free account your data are stored only for two weeks.
Copy the code that is provided bellow to your Arduino IDE and update those lines:
// Wi-Fi settings
const char* ssid = "YOUR-SSID";
const char* password = "YOUR-PASSWORD";
// Sensor settings
const uint8_t sensor_address = 0x76;
// Corlysis Setting - click to the database to get those info
const char* db_name = "YOUR-DB_NAME";
const char* db_password = "YOUR-DB-PASSWORD";
const unsigned long delayTimeMs = 10000;
Upload that code to the NodeMCU and that is all. Right now you are sending data from your sensor to the time-series database InfluxDB by HTTP POST. You can also easily update this script for different sensors.
We have DHT11 data in our database and every 10 seconds new samples are coming. Go to the Corlysis app and click to the Grafana in the top menu. Your database is pre-configured as the data source so you just click to create new dashboard and new graph and select your measurement and field name to see e.g. temperature graph. I recommend to you to see this video:
Now you are using the same online monitoring system as the SpaceX.


Comments
Please log in or sign up to comment.