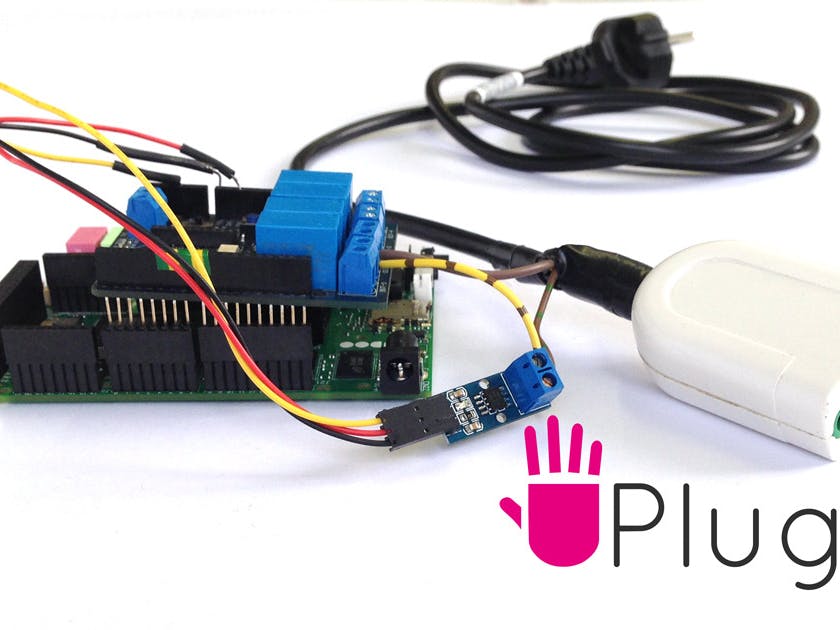
Welcome to project UPlug, an advanced power consumption monitoring and managing system. This project’s goal is to monitor home appliance’s power consumption, both in real time and with historical statistics, and to eventually turn them of remotely. UPlug also features automatic recognition of the connected appliance, thanks to a neural network system.
With this project we are really unleashing some of the immense Diy potential of UDOO!
Please note that the project is still in Beta version, even if the code is pretty mature.
UPlug project is quite complex, so to better understand how it works let’s examine it, in all its inner parts:
-
The core UPlug application, which is written in Java.
-
An Arduino Sketch that collects data from the sensors and sends it to UPlug core
-
An Android Application
-
A Neural Network System, built into Uplug core, which learns proactively from sensors readings and recognized connected appliances, from a list of 4 devices for which it has been already trained.
Let’s see what we need to build UPlug:
Ready? Let’s go!
First, we are going to install the Open Java Jdk (it is included in Udoo’s Ubuntu by default, so if you’re using stock OS, just skip this step).
When Java is installed we just have to copy the native dynamic library librxtxserial.so to proper folder with:
This allows Uplug core to communicate properly though serial with UDOO’s Sam3x, which will be handling the sensors. Then we properly set Udoo’s serial port with correct parameters, by adding this to /etc/rc.local
Since Java cannot automatically recognize Udoo’s serial port, which is /dev/ttymxc3 , we just set a symbolink link pointing to the correct path:
Then we properly set up the Arduino sketch, we used the integrated Arduino Ide of Udoo’s Ubuntu to compile and upload the sketch. We took our code from EmonLib:
Now let’s proceed with wiring:
As you can see, we took apart one standard male to female power cord, and put aside one of the AC wire in it. We connected it to the Arduino relay shield. We then connected the same relais to the Current Sensor and then back to the Power Cord.
We then connected the Current sensor to the Arduino Power Shield, which is of course attached on top of Udoo.
Then we ensure that Udoo is connected to our network, so our Android client app can retrieve the power consumption data from Udoo, which is acting like its server.
Once we’ve done that, we can just start the . jar file of Uplug. Which is basically the core of our project
This starts this chain of processes:
-
Reads the data gathered from the sensors through the Serial Port
-
Analyzes the data
-
Starts a Server which will deliver all these datas to our Android Client app
In addition to the previously installed librxtxserial.so, Uplug uses the following libraries as well:
- RXtxComm.jar, which enables serial port communication bridge from Java to Udoo
- MySQL connector, which allows data to be stored into the Mysql database
UplugCore.jar then starts reading the current consumption through the Shield sensor, which acts at 1Hz (1 read per second). The data is then temporarily stored, and every 24 hours they are pushed into the mysql database.
So, as you may imagine, you just have to set up a Server and a mysql database. To do that, just follow our Web Server Tutorial.
Once your LAMP Server is up and running, you are ready to create your database. For your convenience we just prepared this empty database, ready to be used as Uplog data storage facility. Just create it and make sure that Uplug has right privileges to use a write it:
Uplug features also a Neural Network Analysis system which automatically analizes power consumptions data, and through historical analysis it can automatically detect which kind of device is currently being fed by Uplug.
Once this has done, the backend of Uplug is basically done. What remains to be done is upload and install the Uplug Android application.
The app is structured into six activities:
-
UplugMainActivity.java is the activity that appears once te app is started and allows other sub-sections to be selected if one of the buttons is selected
-
StatisticheActivity.java opens if Statistic sub-section is selected, allow to select different aggregated statistics
-
ConsumoIstantaneoActivity.java shows real time consumption readings
-
GraficoActivity.java shows database’s data into graphics
-
ImpostaElettrodomestico.java allows to set the currently connected appliance
-
ClassificazioneActivity.java shows the data gathered into the last 24 hours for the connected appliance
-
ClientActivity.java connects to Udoo’s Server Socket to retrieve the data
For each activity there is an associated .XML file that describes how the graphical frontend should look. Every time an activity is launched, the onCreate() method exectues setContentView() which properly associates the .XML file to the right activity and renders the corresponding view.
If you reached the end of the project you basically obtained a nice and useful power consumption monitor, you can then tailor it to your specific needs by changing the code as your prefer. You can for example interconnect several Uplug system to gather and collect power consumption statistics of a wide range of devices, and use it for remotely turning them off or on.
In the future scenario of internet of things, this is a nice point where to start tinkering!


Comments
Please log in or sign up to comment.