This project was an attempt to enable my garage to work with Home Assistant using MQTT for a couple of practical use cases (dude, you can just click the clicker!). I know, I know...however I like to not only control it but monitor the behavior over time along with temperature and humidity.
So, I tried out the Sonoff SV for my first time use of that model on something practical and could benefit from the relay switch built-in. Plus it was inspired by a YouTube video from DrZzs
I deviated on a few steps from Drzzs such as leveraging rules on the sonoff SV to auto turn-off relay versus an MQTT call from Home Assistant. It saved 3-400 ms, amount of external dependencies required and piece of mind knowing my garage door isn't getting pushed into the concrete if Hassio decides to restart.
The picture below is from my first build as I have already completed build 2.
This is also posted on my web site: https://mikereams.wordpress.com/2019/01/05/configuring-sonoff-sv-for-garage/
My Amazon Gear- Sonoff SV - https://amzn.to/2AzqXnh
- Wired Door Sensor Magnetic Switch - https://amzn.to/2LQETO6
- USB to TTL Serial Converter - https://amzn.to/2C58P4u
- DHT11 Humidity & Temperature Sensors - https://amzn.to/2RRYmDP
- Soldering Iron
- Jumper Wires
- Glue Gun
- Soap Box
- MQTT Broker
- Home Assistant
- Plastic Tie Wraps and electrical tape
- Old USB cable you don't mind cutting
Option # 1 - Flash with Sonoff/Tasmota (The route I ended up on)
Option #2 - Use Adruino IDE (fun for learning)
Sonoff SV FlashI used ESPEasy_mega for flashing my sonoff while using Tasmota 6.4.1 (sonoff.bin) -https://github.com/letscontrolit/ESPEasy/releases
If using a Mini USB to flash like I am, then you will need to install CP210x USB to UART Bridge VCP Drivers from - https://www.silabs.com/products/development-tools/software/usb-to-uart-bridge-vcp-drivers
You can also use the Arduino IDE flashing route but involves a few more steps. For flashing a Sonoff, watch Dr.Zzs video: https://youtu.be/chyVjtYb0EA
The following commands were used after flashing the Sonoff SV (6.4.1). I created a rule from having to require an outside process to turn off the relay (which worked in Home Assistant). You could easily perform the relay shutoff command via MQTT but I preferred closest to the source since it's an option.
I recently upgraded to the latest Sonoff-Tasmota 6.4.1 which includes integration with Home Assistant - keep it in mind it will change the publish and subscribe settings. I also opted to allow the Sonoff rules to turnoff the relay after 1 second rather than via MQTT in Home Assistant.
sonoff commands:
Backlog SwitchMode1 0;SwitchMode2 2;Switchretain 1;Powerretain 1;switchtopic2 garage1state; SensorRetain 1;PowerOnState 3
rule1 on Power1#state=1 do backlog power1 1; ruletimer1 1 endon on rules#timer=1 do power1 off endon
rule1 1
SetOption19 1
SetOption19 0
- This enables Home-Assistant automatic discovery and disables it. This sets the topics to support HA.
- You may have to issue the command to enable then disable again to populate homeassistant info. Note that both of these options must be in polarity to each other, meaning one has to be On while the other is Off. When either is enabled, I noticed issues with HA.
SetOption30 0
- Zero (0) will Automatic announcement as 'switch' for relays and 'light' for PWM in Home-Assistant MQTT discovery message.
- One (1) will Enforce Home-Assistant discovery as 'light' platform also for relays
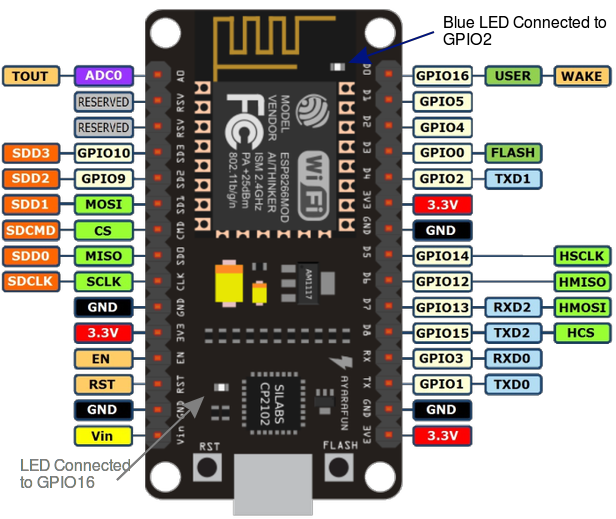
Now that I got my new HiLetgo 5pcs DHT11 Temperature and Humidity Sensor Modules gear from Amazon, I just added it into GPIO4 (Middle 3 set) and now getting Temp and Humidity.
For Home Assistant configurations related to this build, see below configuration samples used. For my entire configuration of home assistant, visit - https://github.com/TheSolventArchitect/Hassio
Groups.yaml
garage_doors:
name: Garage Doors
view: no
icon: mdi:garage
control: hidden
entities:
- cover.garage_door_1
- cover.garage_door_2
Customize.yaml
cover.garage_door_1:
device_class: garage
friendly_name: Garage Door 1
homebridge_name: Garage Door 1
cover.garage_door_2:
device_class: garage
friendly_name: Garage Door 2
homebridge_name: Garage Door 2
binary_sensor.garage_door_2_power_relay_mqtt_status:
friendly_name: Garage Door 2 Power Relay Status
homebridge_hidden: true
homebridge_name: Garage Door 2 Power Relay Status
binary_sensor.garage_door_1_power_relay_mqtt_status:
friendly_name: Garage Door 1 Power Relay Status
homebridge_hidden: true
homebridge_name: Garage Door 1 Power Relay Status
Intent_Script.yaml
closeGarageDoorOne:
speech:
type: plain
text: 'OK, closing garage door one'
action:
service: cover.garage_door_1
openGarageDoorOne:
speech:
type: plain
text: 'OK, opening garage door one'
action:
service: cover.garage_door_1
Cloud.yaml
alexa:
filter:
include_domains:
- scene
- camera
- media_player
- cover
- switch
- light
Configuration.yaml
cover:
- platform: mqtt
name: "Garage Door 2"
state_topic: "garage2state/cmnd/POWER2"
command_topic: "garage_2/cmnd/POWER"
payload_open: "ON"
payload_close: "ON"
payload_stop: "ON"
state_open: "ON"
state_closed: "OFF"
optimistic: false
retain: false
- platform: mqtt
name: "Garage Door 3"
state_topic: "garage3state/cmnd/POWER2"
command_topic: "garage_3/cmnd/POWER"
payload_open: "ON"
payload_close: "ON"
payload_stop: "ON"
state_open: "ON"
state_closed: "OFF"
optimistic: false
retain: false
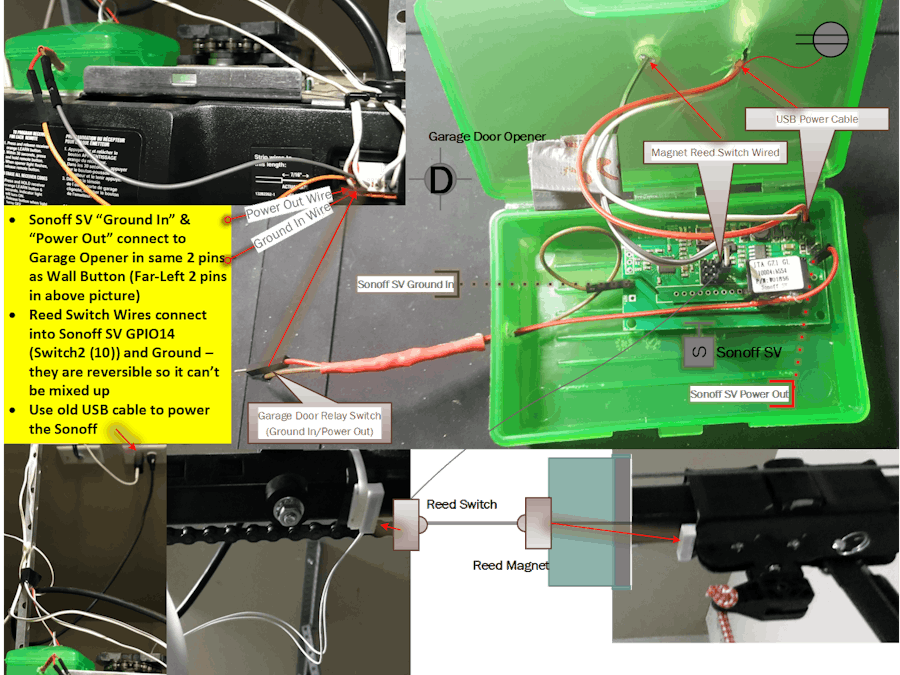
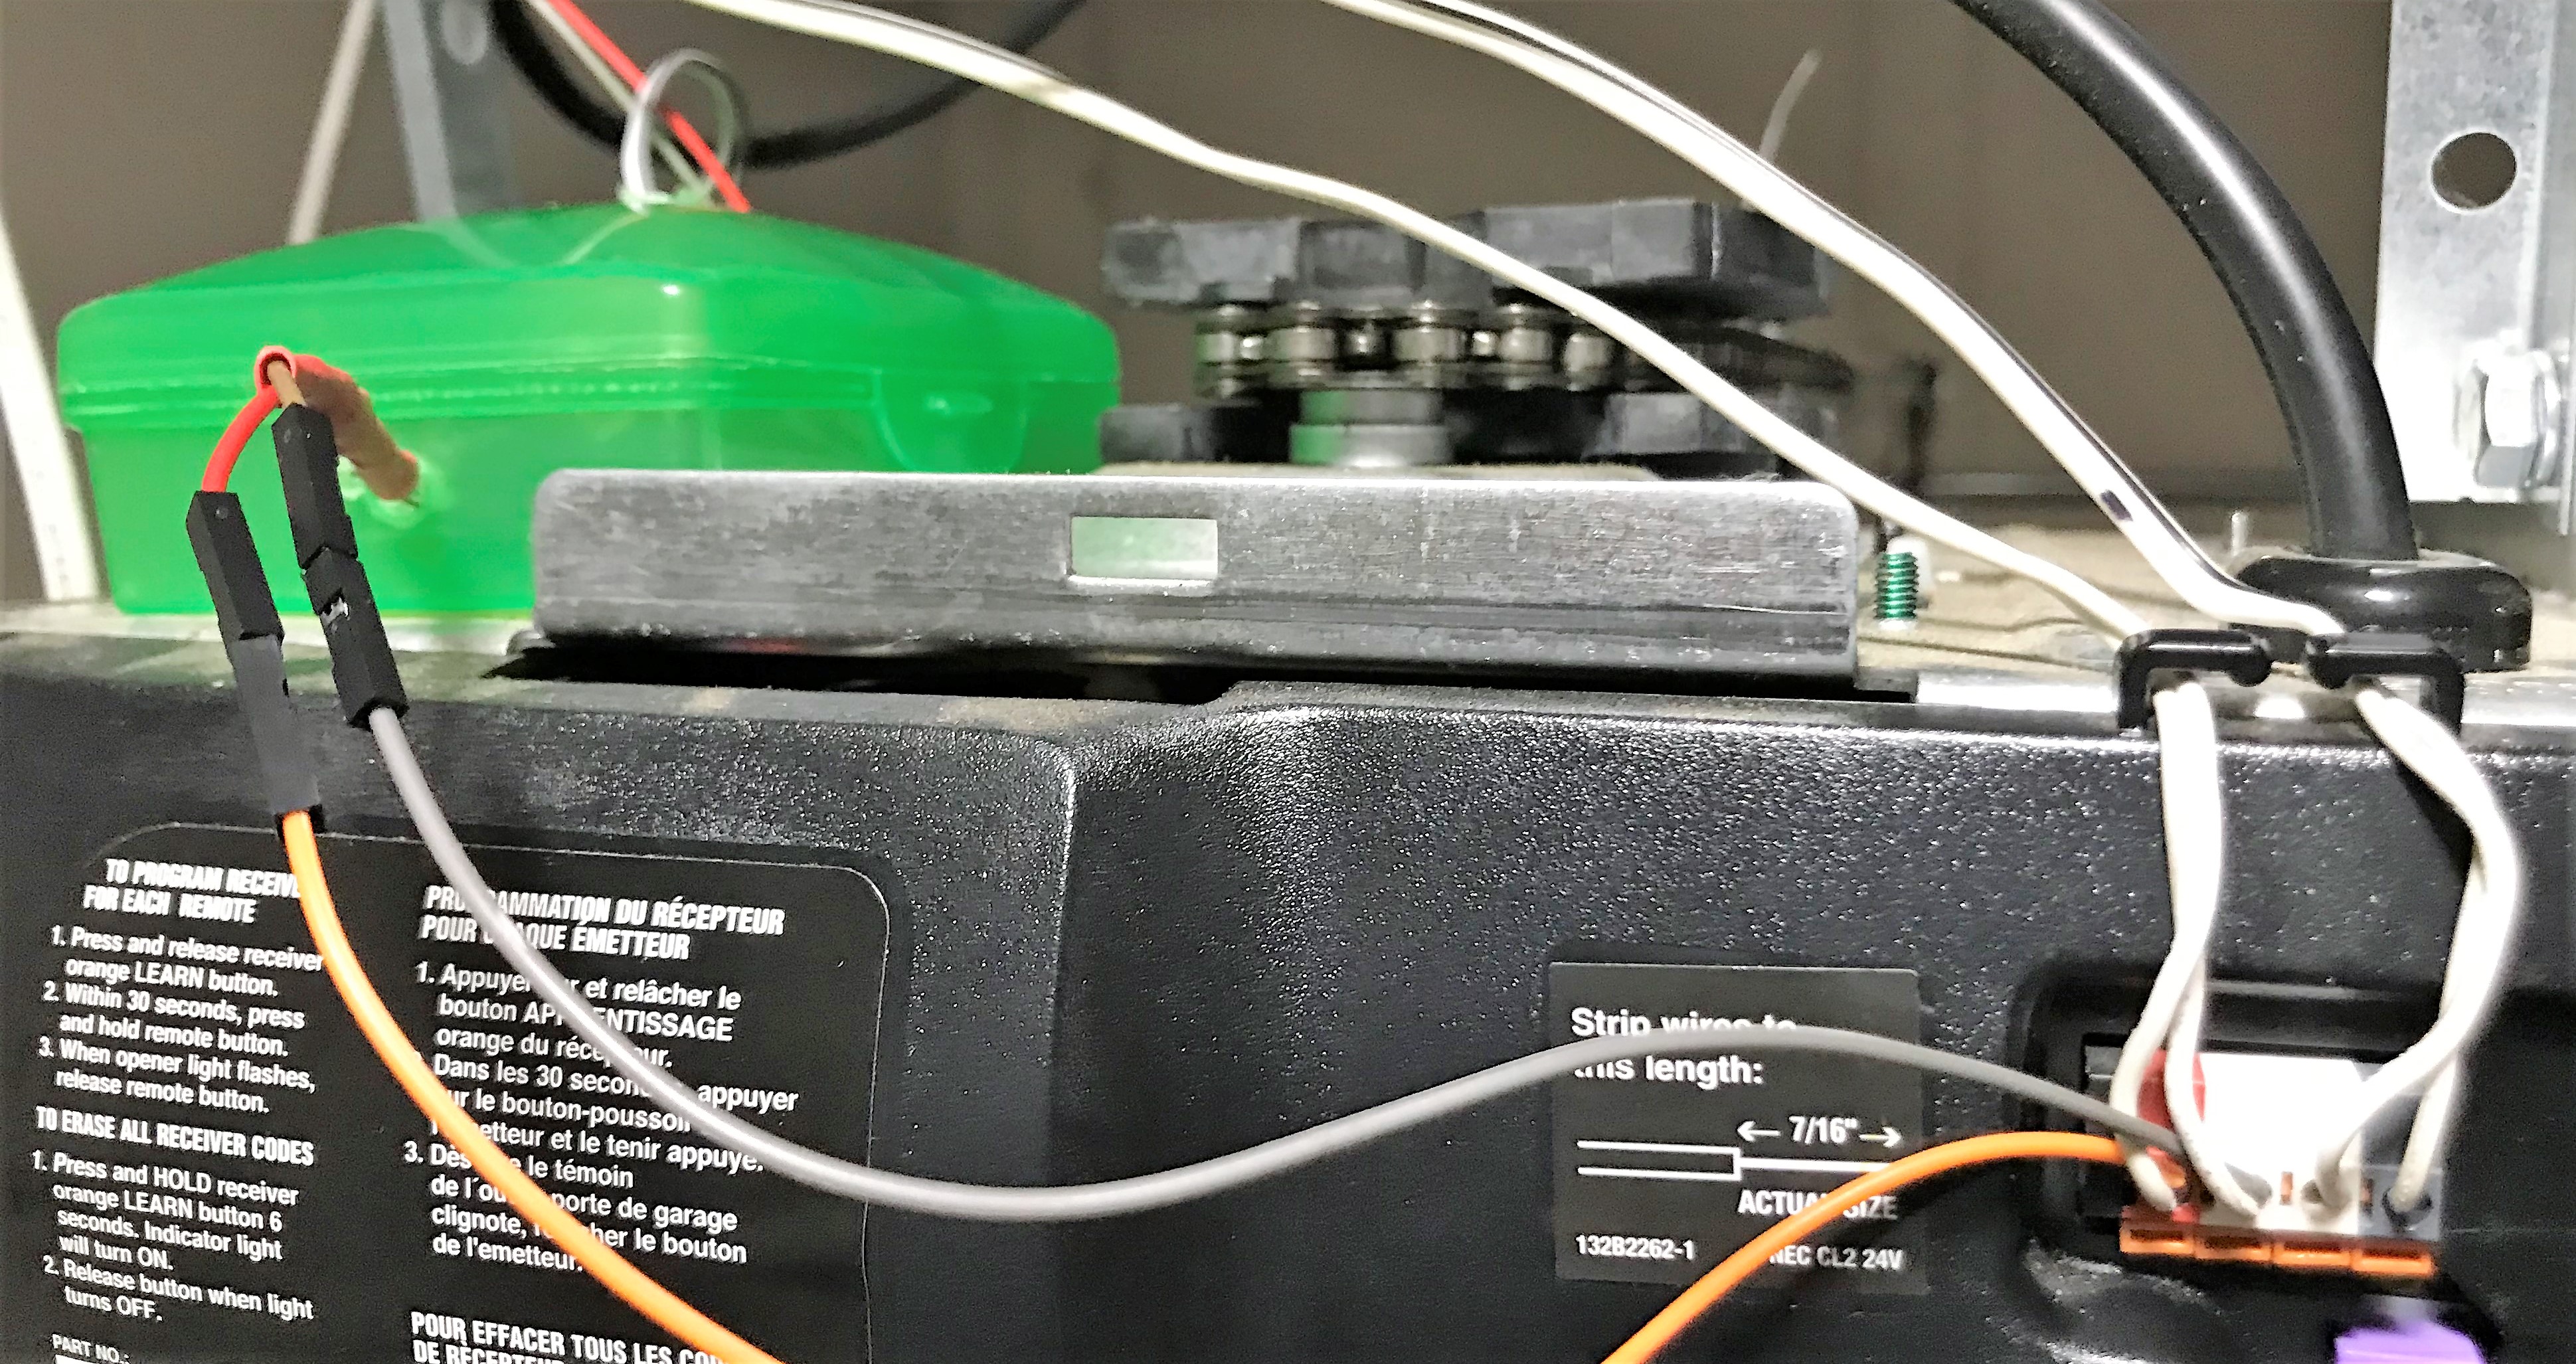
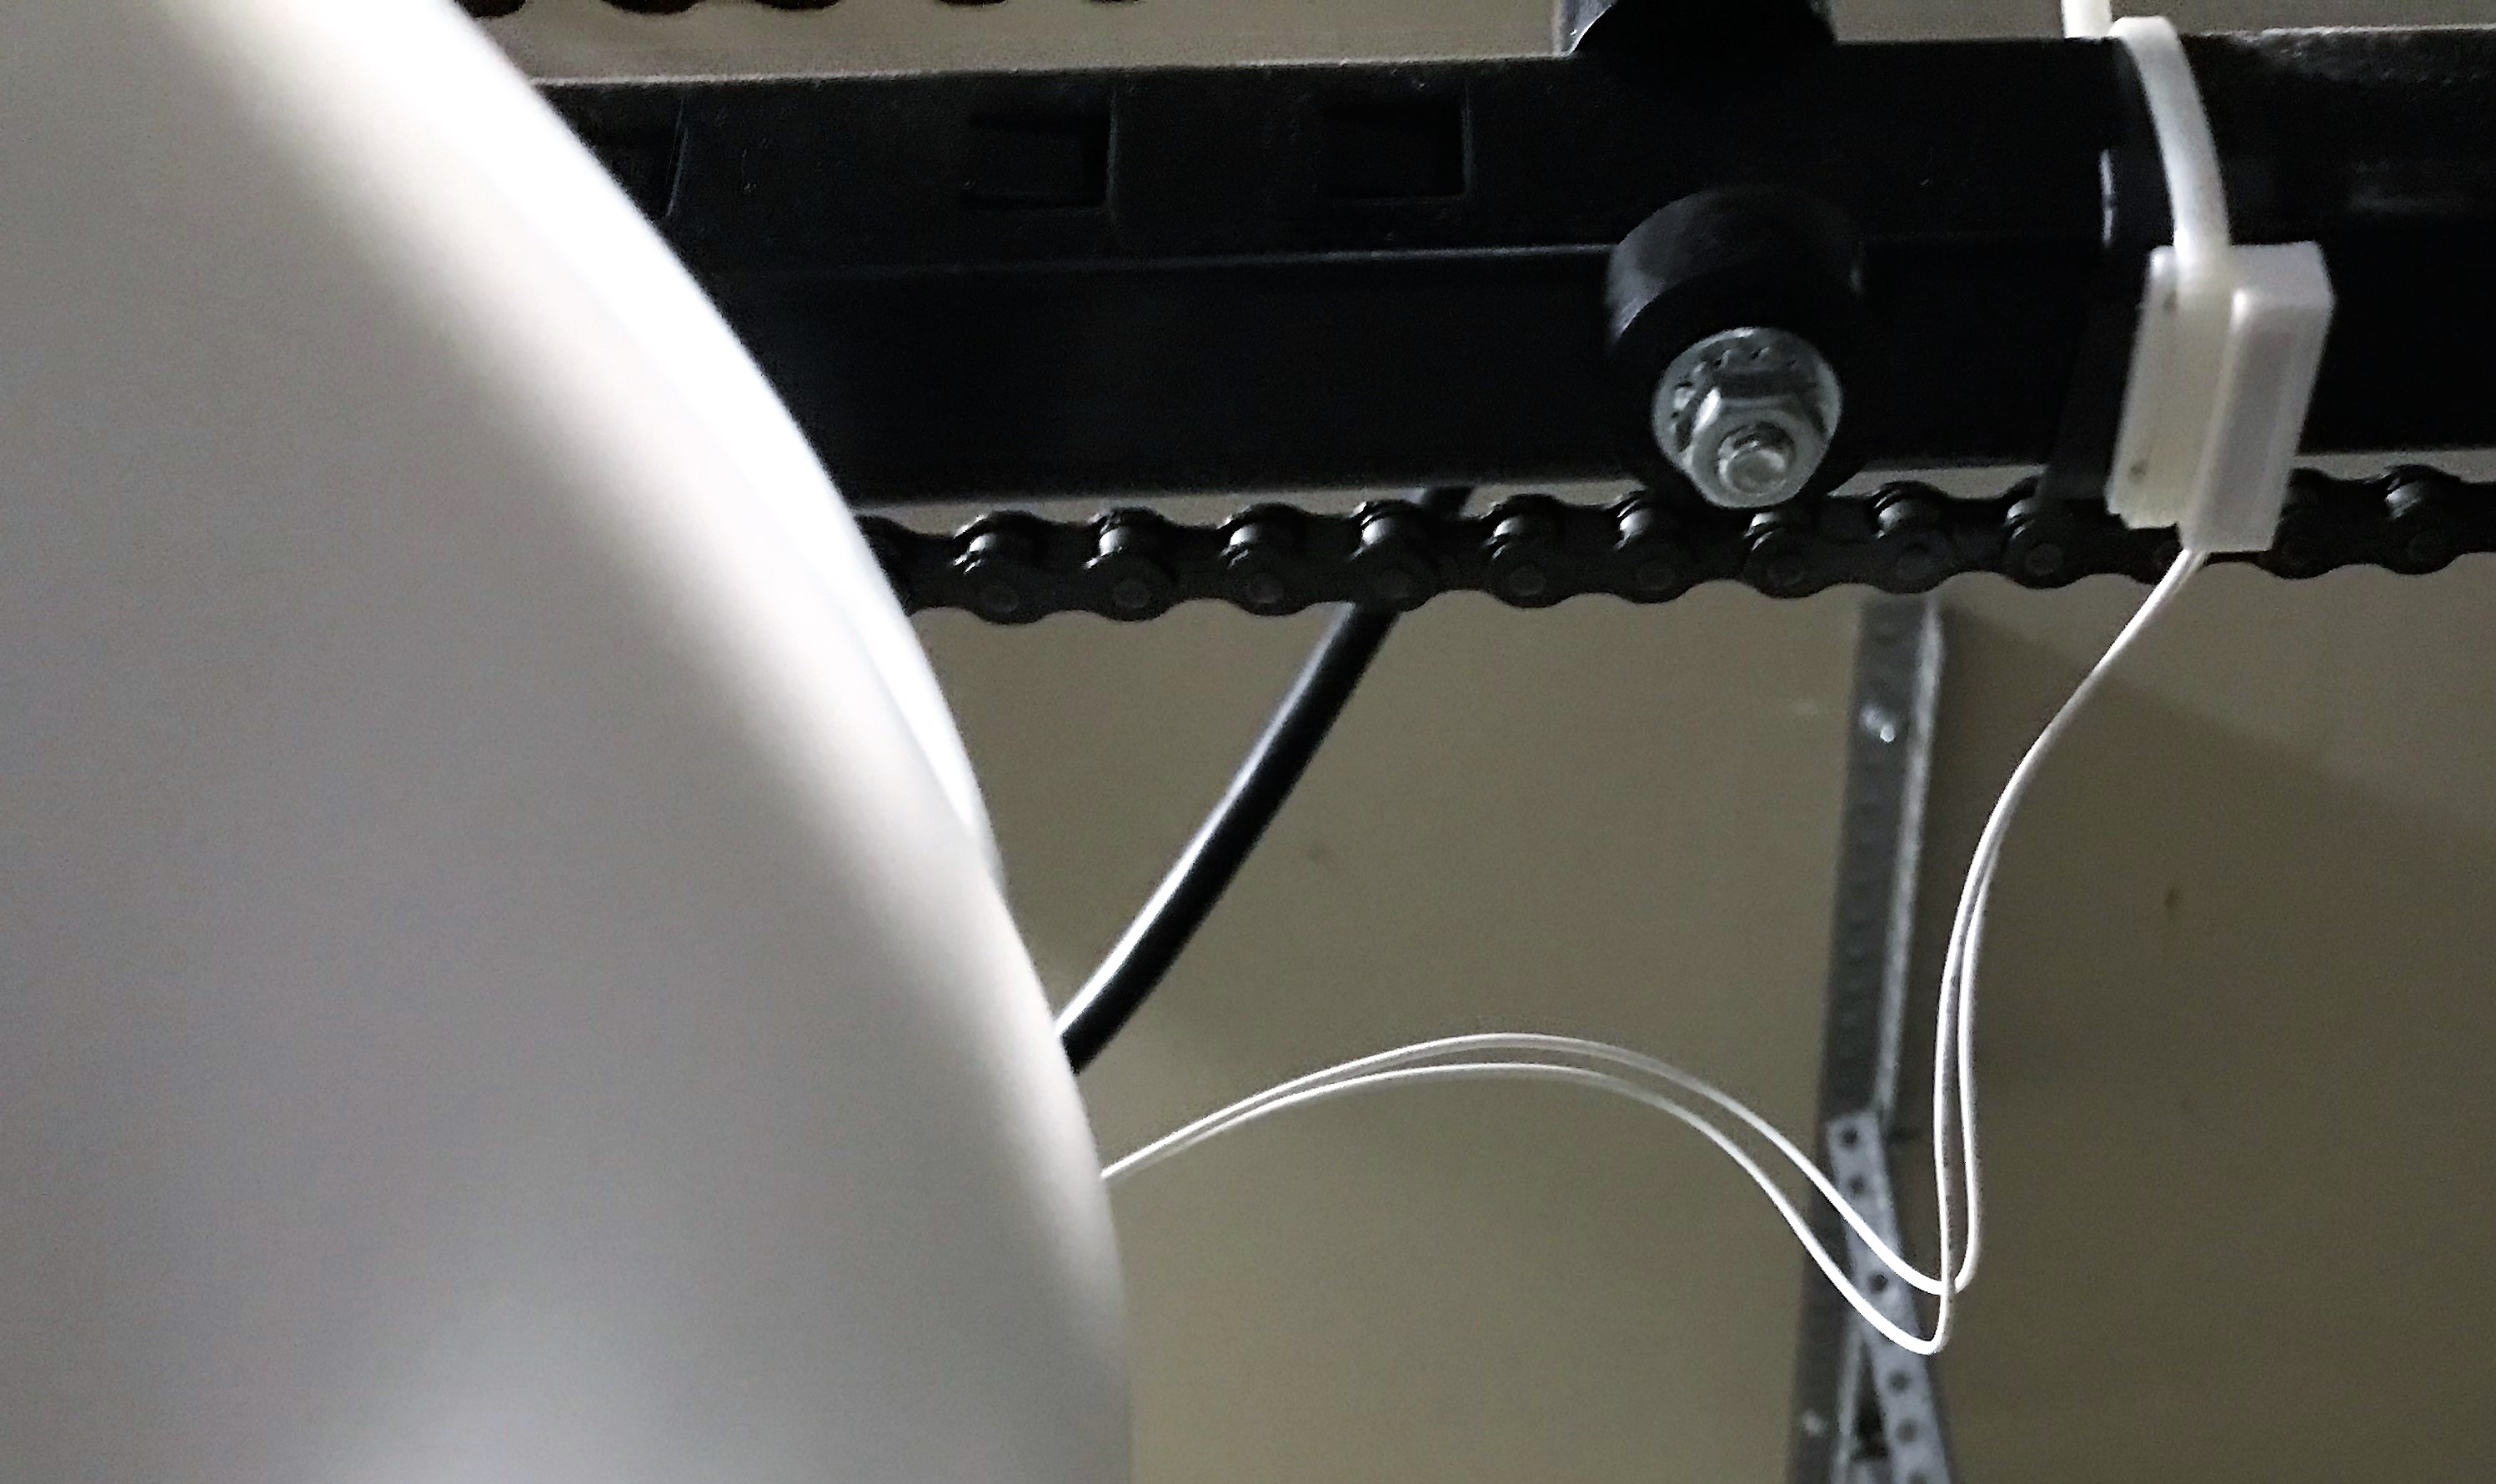
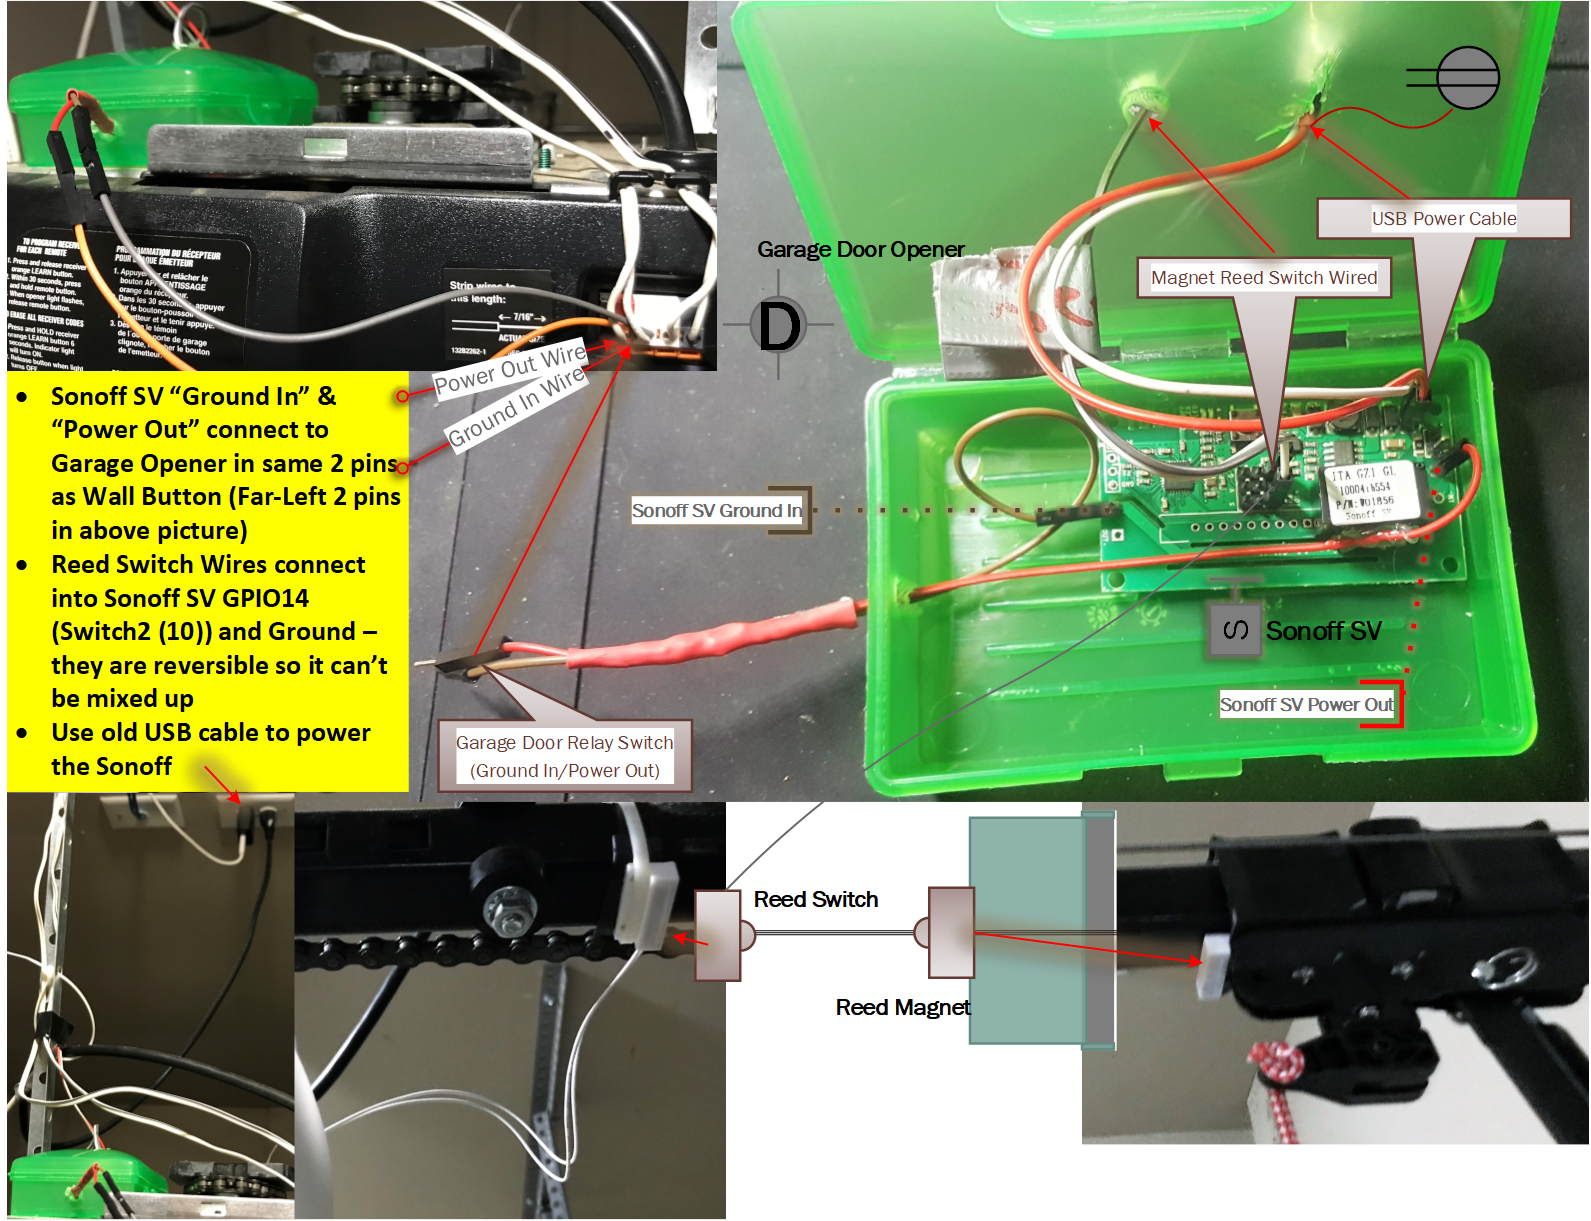
Complete Wiring DiagramsWired and ready to go!
Link to Visio 2013 Diagram Template is in Attachments.






Comments
Please log in or sign up to comment.