


Hardware components | ||||||
_ztBMuBhMHo.jpg?auto=compress%2Cformat&w=48&h=48&fit=fill&bg=ffffff) |
| × | 1 | |||
Software apps and online services | ||||||
 |
| |||||
| ||||||
In an earlier project of mine, titled "Easiest Way to Add a Full Color LCD", I showed a programming tool for a LCD display that didn't require writing of any code. What may not have been clear, is that the programming tool comes with a run-time simulator. Essentially you can create what appears like a Windows applet that communicates serially through the USB cable to the Arduino. You can develop this with free software, without needing knowledge of Windows programming.
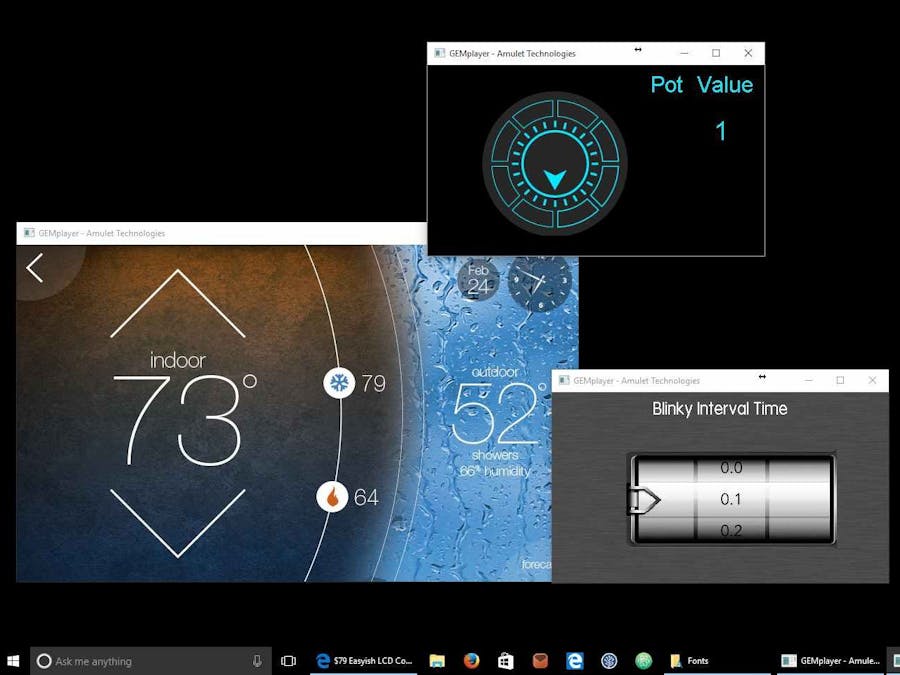
Freshen Up the "Blink"In the Arduino community, everybody is familiar with the example sketch, called "Blink". It is the "Hello World" for hardware. The goal is to make the blink rate controlled from the PC, running the simulation shown below:
The numbers represent the interval time between blinks in seconds. If your PC had a touchscreen, this would be "crazy cool" because you can touch the scroll wheel and be able to "flick" the wheel around.
HardwareYou need just this:
You will need to download and install the GEMstudio Pro software from Amulet Technologies. It is a free 30-day trial, but even after 30 days, the software still works, you just get an annoying pop-up message when you launch the program.
You will also need to download and install the Arduino Amulet Communication library. The library and instructions for installing can be found on Github. The repository contains some Arduino examples, so you can take a look and see how the library is used. For further details on the library, you can also take a look at my earlier project.
Arduino Sketch
If you are familiar with Serial and the Blink sketch, this will look familiar. Most of the additions are due to the using the Amulet library.
/* Read a image scroller value from the LCD simulation.  Values range from 0 to 500  (0 sec to 0.5 sec)
*  Arduino will read this value and use it to determine on/off interval time
*  To make Amulet send the variable, place this command in image scroller widget
*  Href in GEmstudio:  	Amulet:usb.word(0).setValue(intrinsicValue)
*/
#include <AmuletLCD.h>
#define VDP_SIZE 32
//Amulet variables used to pass data from simulation to Arduino
uint16_t AmuletWords[VDP_SIZE]  = {0,0,0,0,0,0,0,0,0,0,0,0,0,0,0,0,0,0,0,0,0,0,0,0,0,0,0,0,0,0,0,0};
AmuletLCD myModule;
unsigned long interval;        // declare interval
void setup() {
 //start communication with simulation at default baud
 myModule.begin(115200);
 //register our local buffer with Amulet state machine
 myModule.setWordPointer(AmuletWords,VDP_SIZE);
 pinMode(13, OUTPUT);
}
void loop() {
 //store analog data in local buffer and wait for Amulet to poll that buffer.
    interval = AmuletWords[0];
    digitalWrite(13, HIGH);  		        // set the LED on
    delay(interval);              		// wait for interval msec.
    digitalWrite(13, LOW);    		        // set the LED off
    delay(interval);              		// wait for interval msec.
}
//This method automatically gets called if there is any serial data available
 void serialEvent() {
   myModule.serialEvent();  //send any incoming data to the Amulet state machine
}
The single assignment statement:
interval = AmuletWords[0];
is the key line of code that handles the communication with the Amulet display or GEMstudio simulation. The library does a nice job of abstracting out the serial packet generation, ACKs and NACKs, opcode translations, CRC creation and detection.
Compile and upload this code to the Arduino. We are now finished with the Arduino code. Let's create the GUI on the PC side.
GEMstudio Pro
I'm reluctant to call GEMstudio an IDE because designing in it is more of an artistic endeavor than a programming one. At least for everything I do. Most of my time is spent on creating the images or looking for them on the internet. These are the images used for this project:
You are given the ability to program if you want to. Just take a look at the Breakout game demo that's included with the GEMstudio download. There's programming for the ball movement, collision detection, hit counts, etc.
Since most of the my designing entails clicking a mouse, I'd rather show a video than a lot of screenshots of where and what to click. The video is captioned so it should be easy to follow along.
A big benefit of this design platform is, if you ever did want to deploy your design to a real LCD display, it can be deployed to an Amulet display with ease. All the work is already done.
If there is any particular demo app you'd like to see interfacing with the Arduino, let me know through the comments section and I'll use it as the topic of my next project.


Comments
Please log in or sign up to comment.