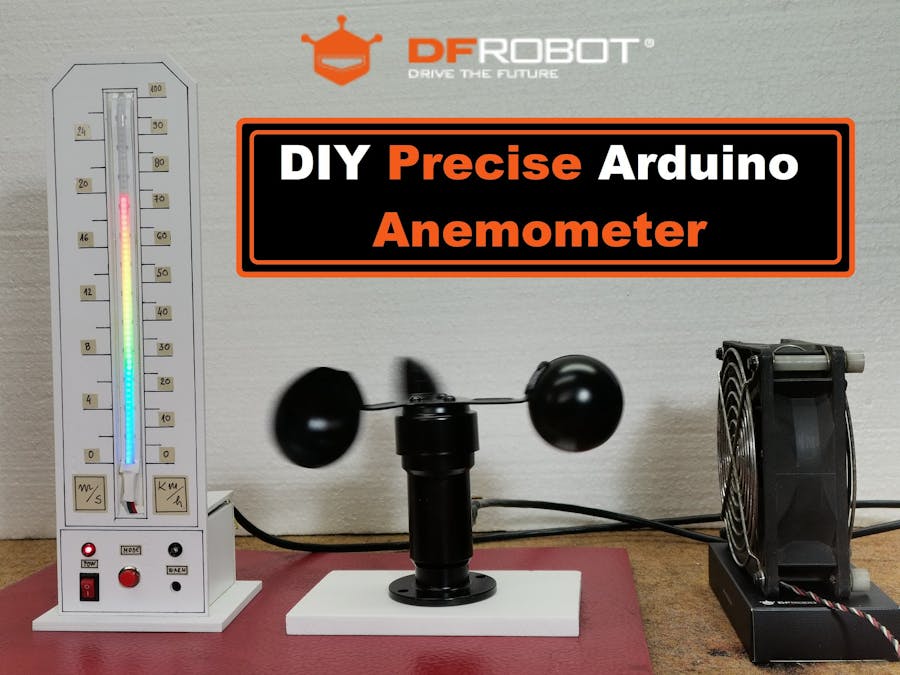
Anemometer is an instrument that measures the speed of the wind. It consists of a series of cups mounted at the end of arms that rotate in the wind. The speed with which the cups rotate indicates the wind speed.
This project is sponsored by DFRobot:
https://www.dfrobot.com/?tracking=61ee19d8ddc08
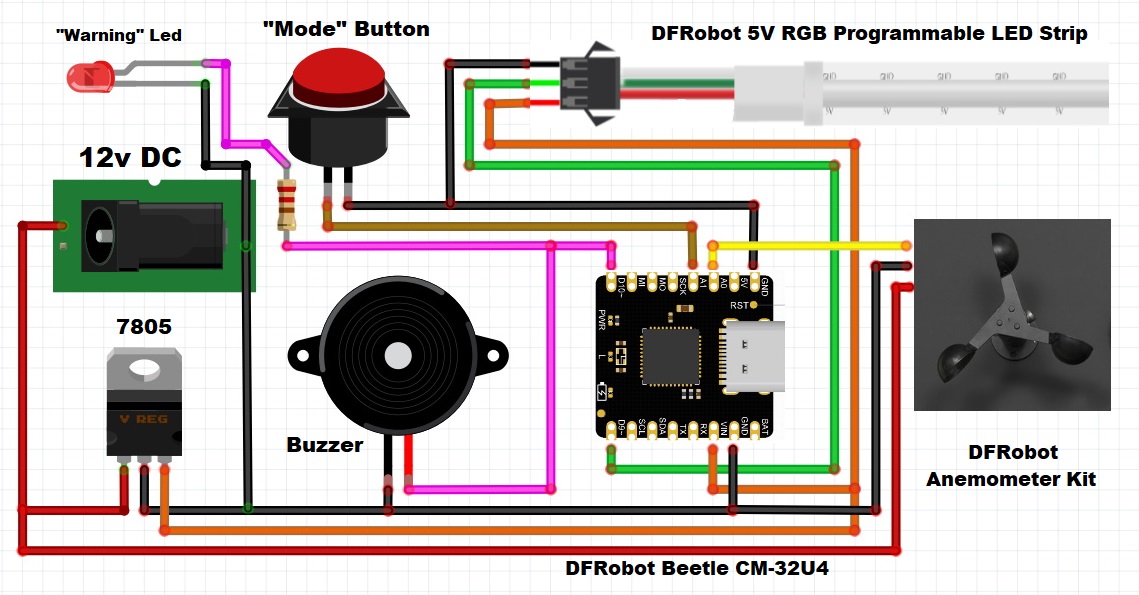
In this case, the speed of rotation of the Cups is proportional to the voltage on the yellow wire. This voltage ranges from 0 V to 5 V depending on the wind speed from 0 to 100 km / h. Then we bring this signal to the analog input of the microcontroller. We read the current wind speed on a scale consisting of a strip of 50 RGB Leds marked in km / h and m / s. The color of the corresponding Led changes from blue at low wind speeds, then to shades of green, to red and magenta at very high wind speeds. At wind speeds greater than 60km / h White warning LED and audible signal are activated.
The device is very simple to build and contains only a few components:
- DFRobot Beetle CM-32U4 - Compatible with Arduino Leonardo
- DFRobot Anemometer Kit 0-5V (IP65 grade)
- DFRobot 5V RGB Programmable RGB LED Strip (50cm)
- and push button
Let me mention that the Anemometer signal is compatible with 5 V microcontrollers, so if we use a 3.3 V microcontroller such as ESP32, we should also use a level converter board. The warning LED, buzzer, and RGB LED strip are connected to the digital pins of the microcontroller. The button is used to select between "line" and "dot" mode to display the value.
Arduino code is relatively simple and can be used to display the value of any sensor that has an analog output. It is only necessary to make a change in the line:
" int w = map(sensorValue, 0, 1023, 0, NUM_PIXEL); "
based on the voltage range generated by the sensor. If the range is from 0 to 5 V as in this case, then there is no need for any changes.
The Anemometer Kit comes with a 4m cable, but I extended it to 12m and it worked perfectly. In terms of accuracy, I compared it with my professional anemometers brand "TFA" and "La Crosse", and the results were almost identical, which means that at least in my case the anemometer is factory calibrated. If there are any deviations, it can be easily fixed with a small modification of the line of code indicated earlier.
I will use 12cm fan to generate air flow. Depending on the distance, we will also change the flow. When switched on, the Anemometer operates in "TEST" mode, and now all the diodes are switched on successively one by one to the maximum and then returned. After that, the device is started in Dot mode, and only one LED diode show the value of the wind speed. If we press the button, the device switches to Line mode and the value is displayed as a line. When the wind speed reaches a certain speed previously defined in the code, a warning sound and light signal is activated
Finally, the device is placed in a suitable box made of PVC material with a thickness of 3 mm, and the scale is drawn with a marker.


Comments
Please log in or sign up to comment.