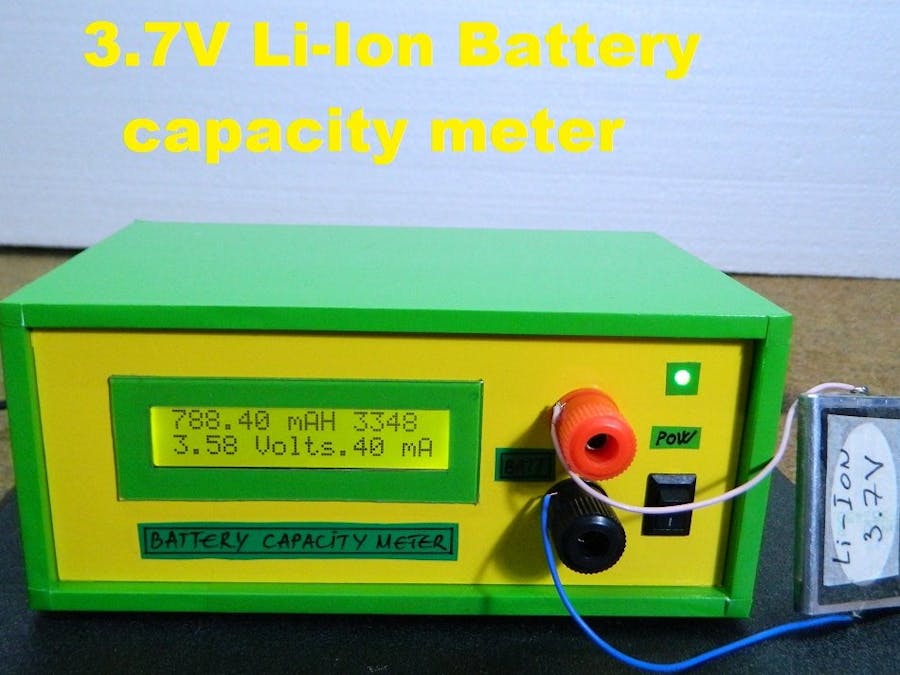
Today I will show you how to make a Li-ion capacity tester using an Arduino. Battery capacity tester will discharge a fully charged Lithium-Ion cell through a resistor while measuring the current flowing through the resistor to calculate its capacity.
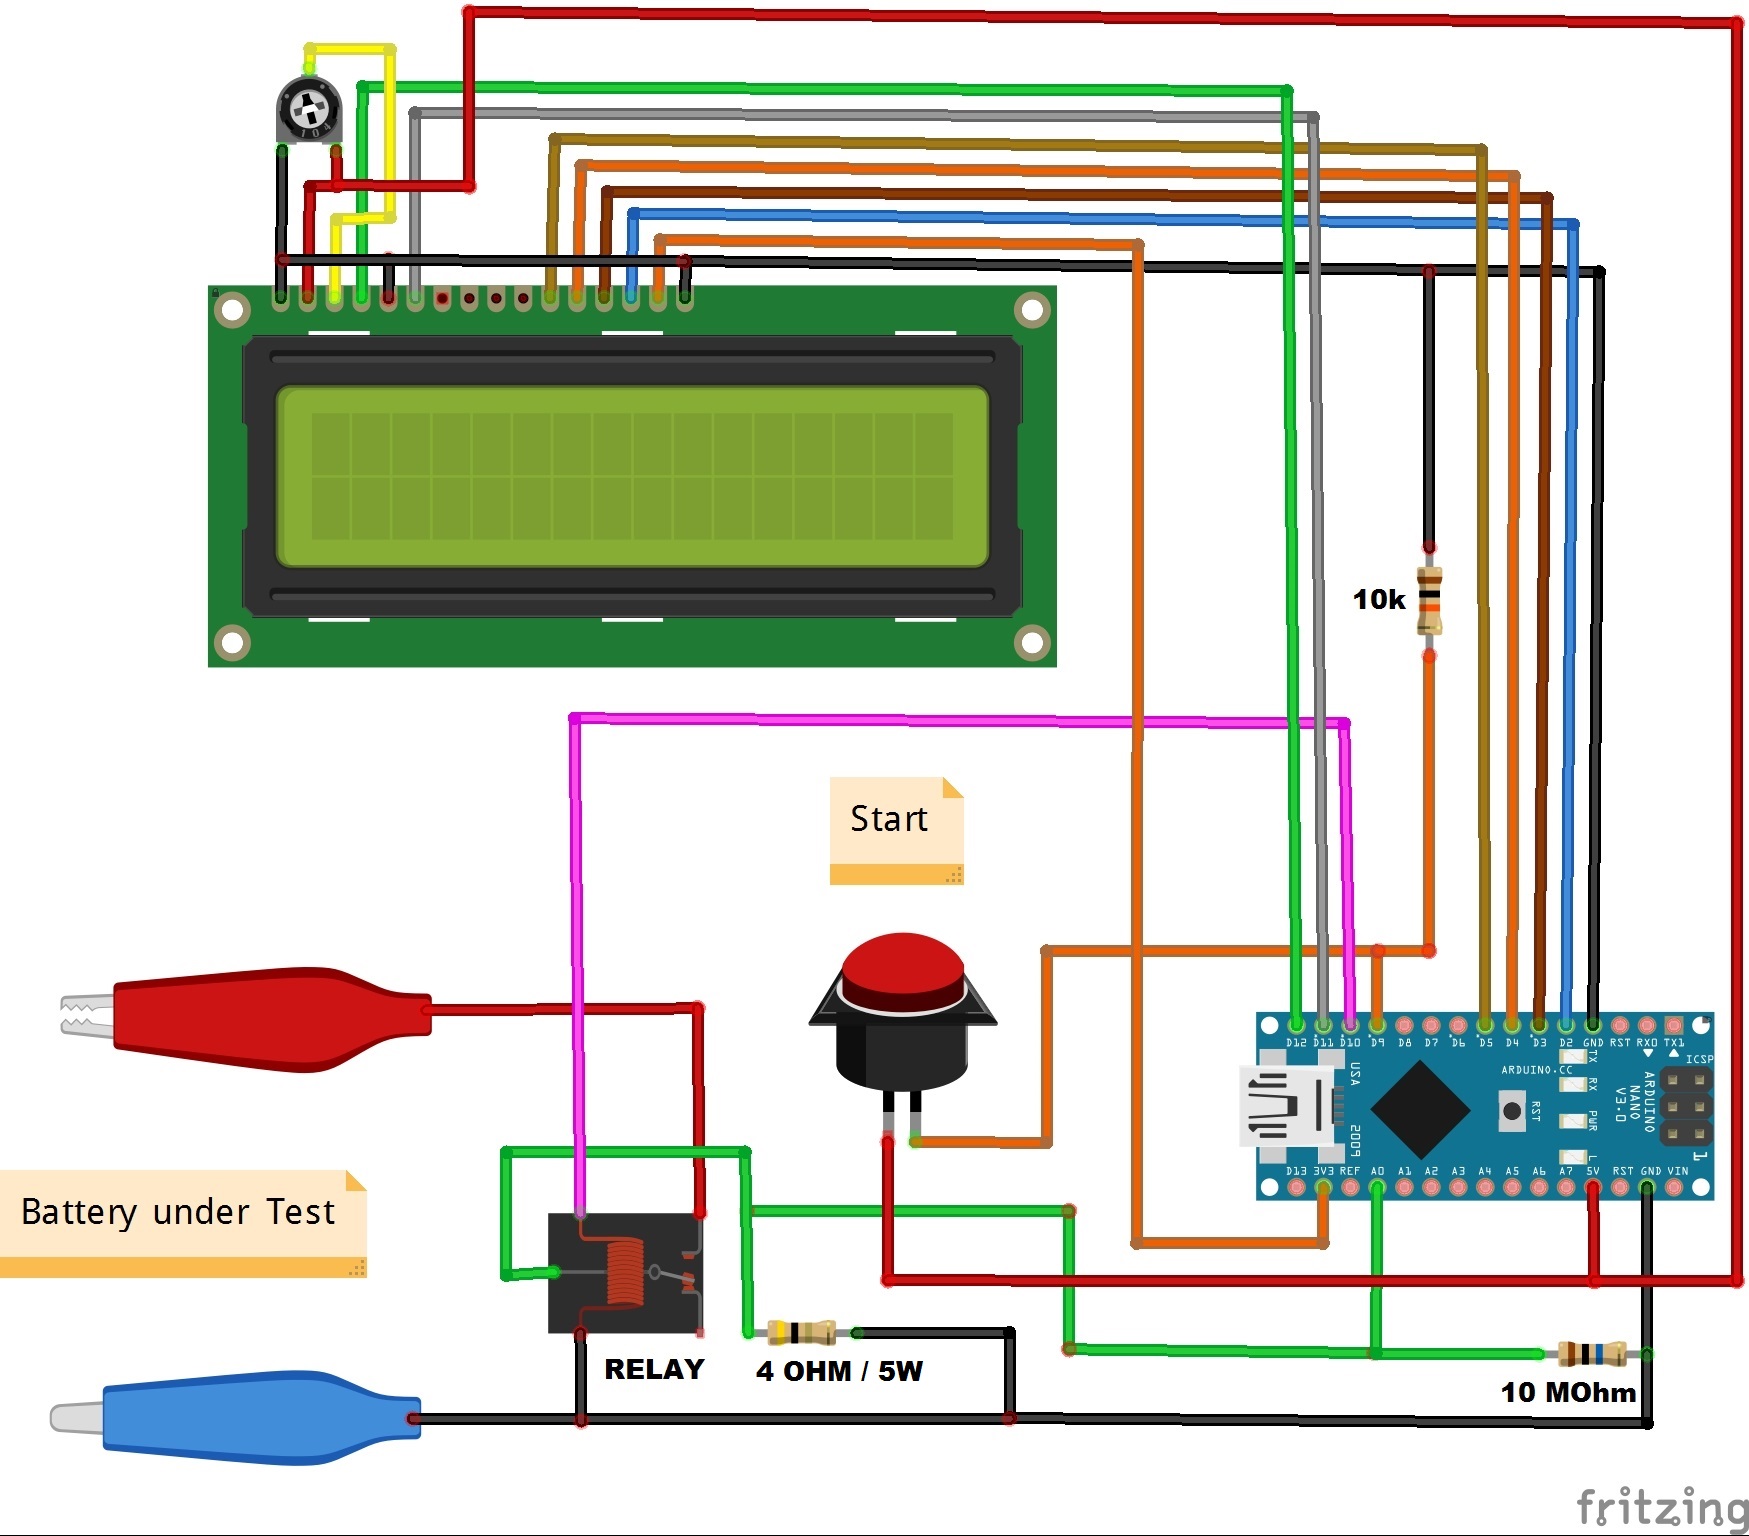
Devise is very simple and consist only a few components:
- Arduino Nano microcontroller
- LCD display
- Small relay for 5V
- 5W resistor
- Two small resistors
- Button
When we press the start button, the test battery is connected in parallel with the 4 ohm resistor and is discharged through it. The voltage is read by the microcontroller every half a second so 7200 measurements are obtained in one hour. Using Ohm's law, you can find out the current delivered to the load. Then simply multiplies 1 Per 7200 hour by the current value, and adds the resulting numbers until the battery is discharged below 3V, and then the display shows the measurement result in mA per hour.
First we need to connect the full charged battery. The display shows the current battery voltage. As soon as we press the start button, the battery testing begins. The following information is now displayed on the screen:
- Number of measurements performed
- Battery voltage
- and power over time in miliamp per hours. As we see the voltage is slowly decreasing. The test ends when the voltage reaches 3 volts and the battery is considered empty. This may take some time depending on the capacity of the battery.
When the battery voltage drops to 3 volts, the measurement is completed and the display shows the actual battery capacity as well as the number of measurements taken.
Finally, the device is installed in a suitable box and is another useful tool in the electronic laboratory.


Comments
Please log in or sign up to comment.