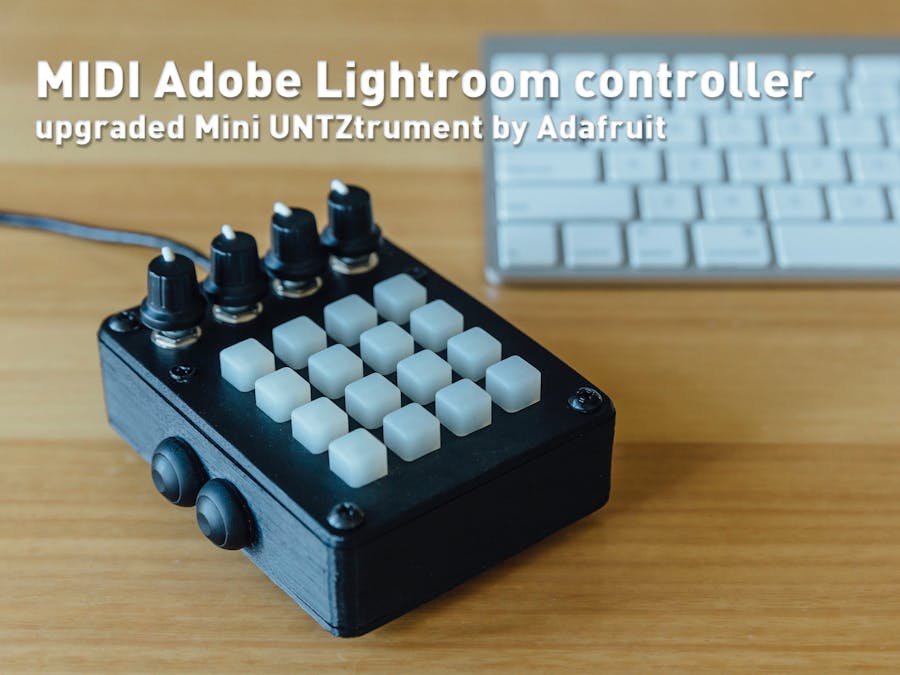
Being a commercial photographer I use Lightroom almost daily.
I am always trying to save time sitting in front of the computer, especially when working on a lot of different images at the same time. Using a dedicated controller for Lightroom can be extremely time saving and I was looking for an affordobale DIY version - small enough to fit into one hand while using by other hand to control it.
Adafruit has some great and detailed projects on their website and I stumbled upon this one:
https://learn.adafruit.com/mini-untztrument-3d-printed-midi-controller/overview
This looked very promising and I just needed to change a few details to make it more suitable as a Lightroom MIDI controller.
- Replace the 4 analogue potentiometers with digital Encoders to avoid start and end points
- Add pushbuttons to add more functionality
- Make the main body slimmer
- Reinforce the USB connector
So, I slightly revised the main body but mainly followed their detailed instructions to put it all together. I additionally drilled 4 holes (2 on each side) for the 4 pushbuttons. The pushbuttons I used are IP67 rated - not that I want them to use in the rain - but I choose them for their size (especially the connectors end), comfort and how nicel they click.
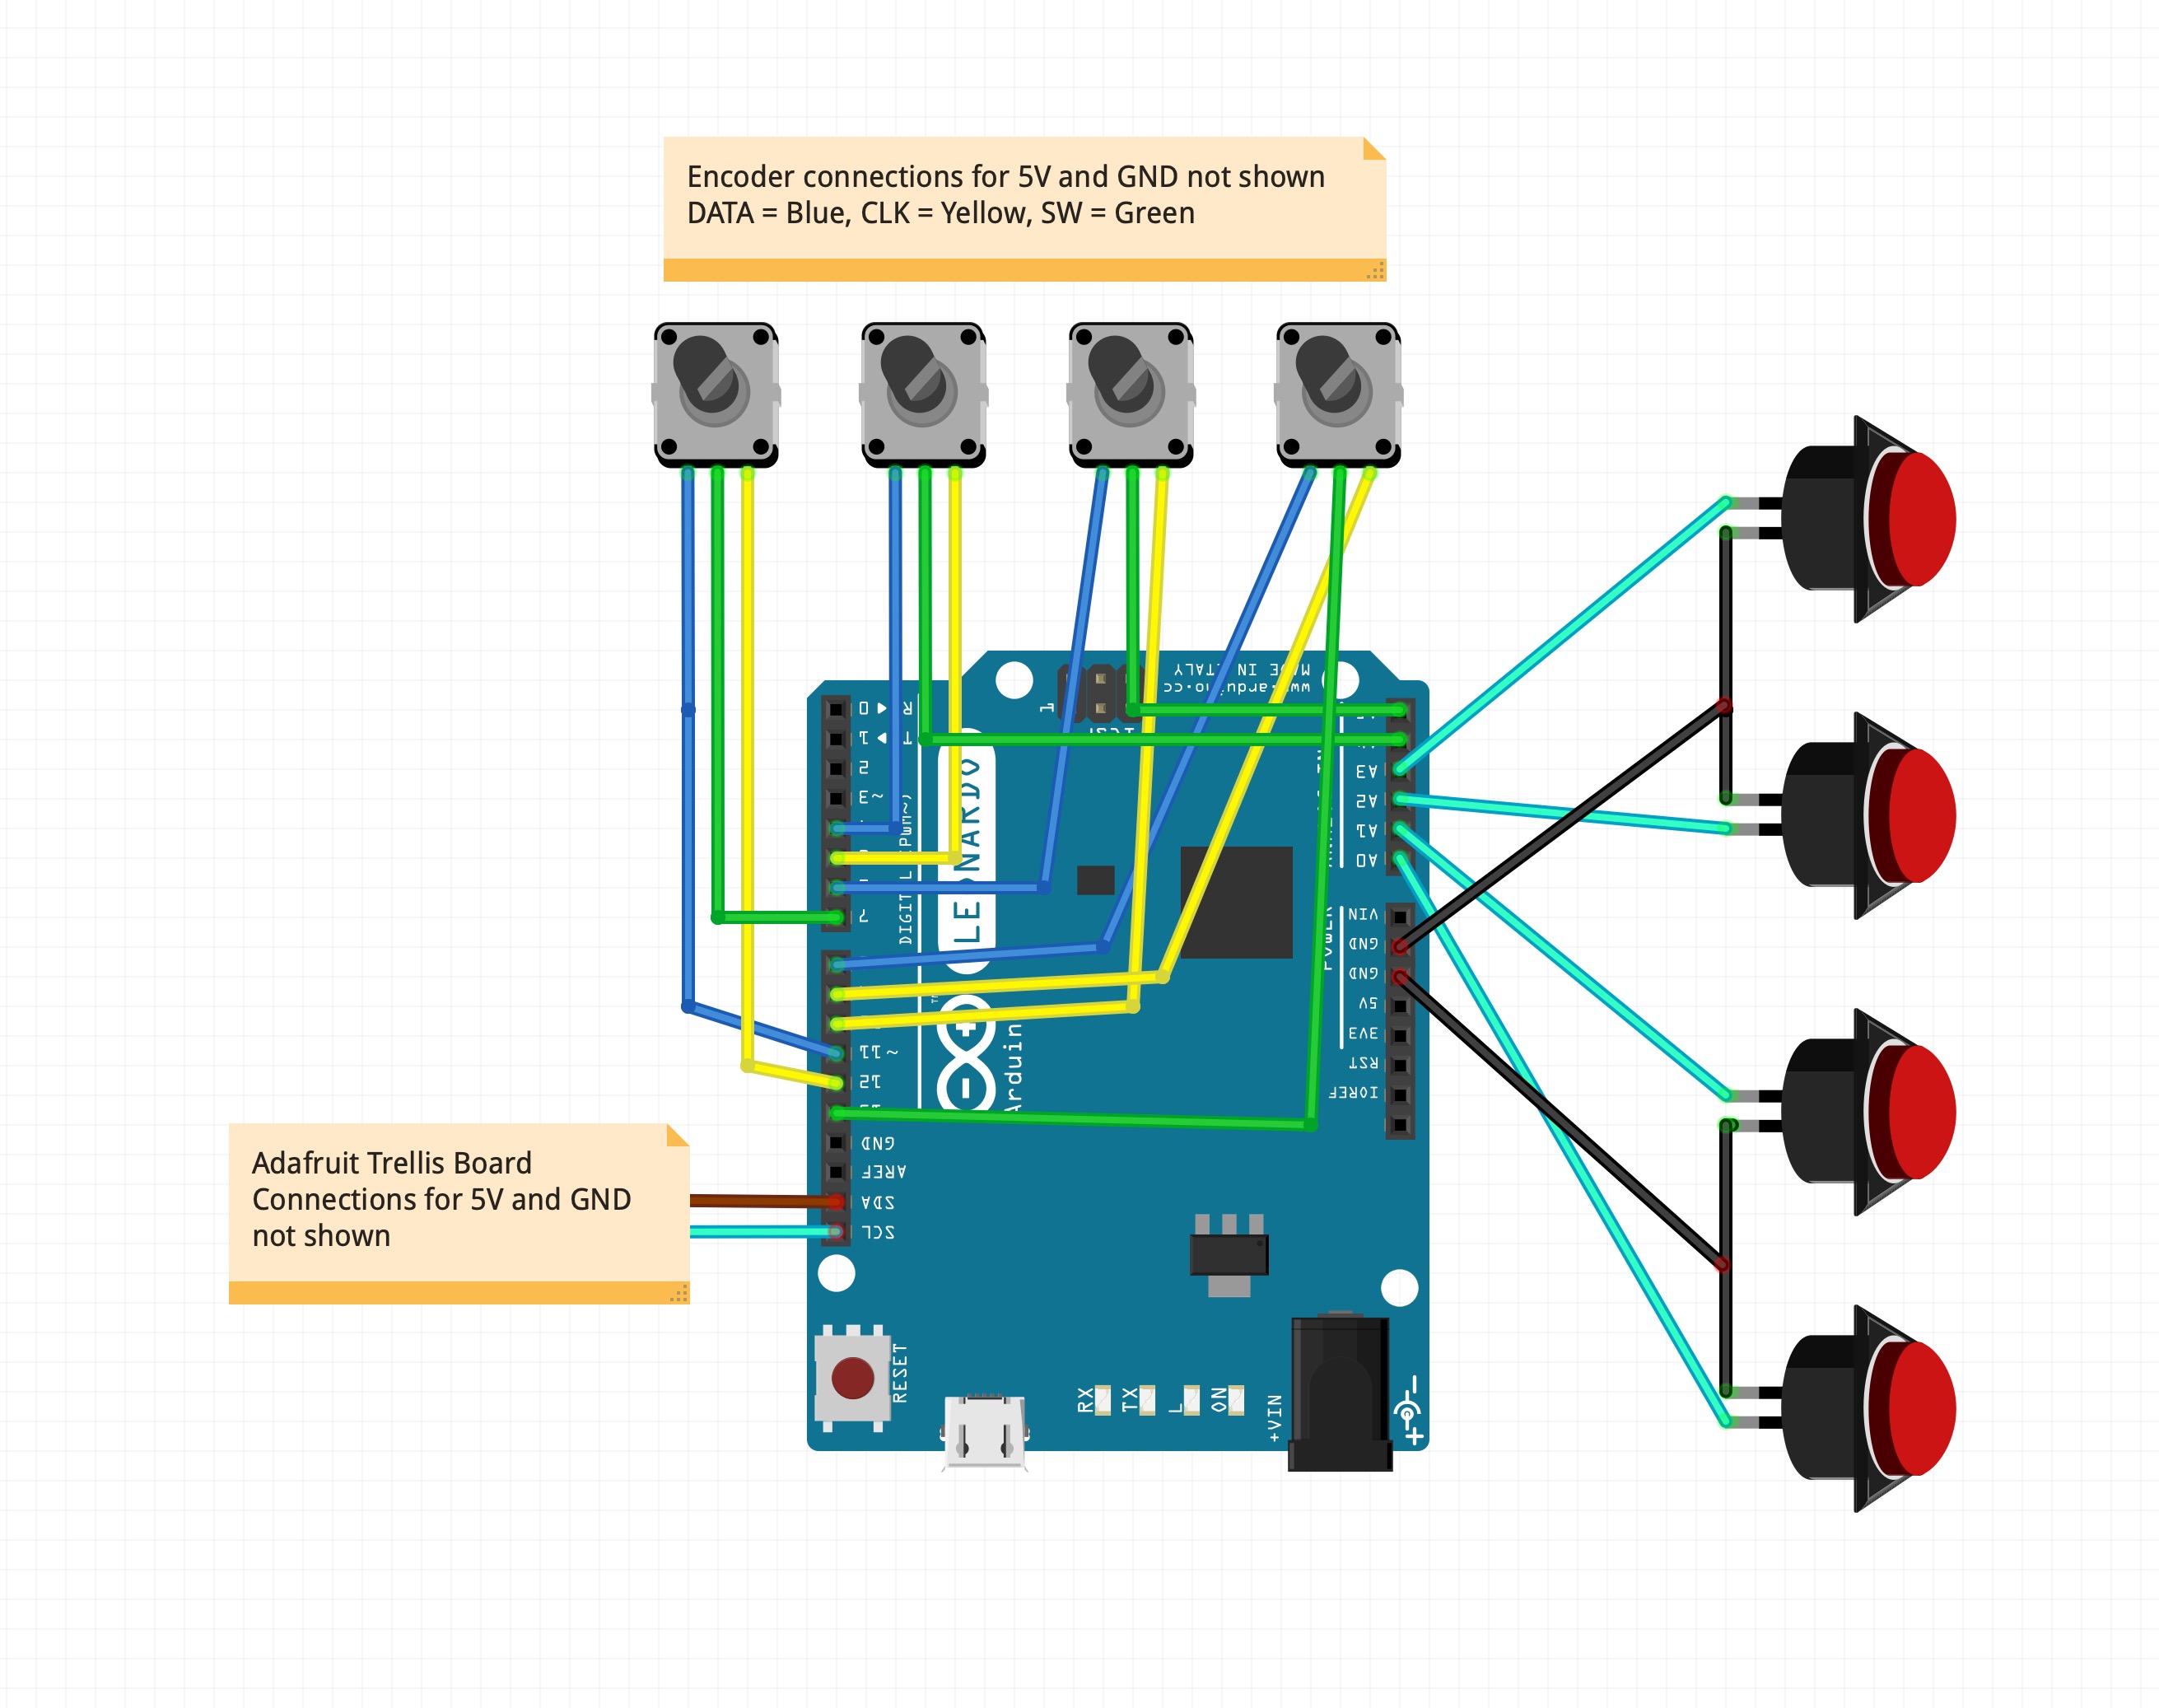
I think it's best to use this list to solder the connections instead of using the schematics - as it can be confusing at first.
Please note this is one of my earlier projects, the soldering the technique can be improved in many areas. As you can see there are a lot of wires to be dealt with. Many more than the original project by Adafruit and they even had a bigger main body to fit it all in!
The circuit boards of the rotary encoders just fit it with a small overlap. There isn't much room for the side pushbuttons. Lot's of this can be done better but my unit is working reliably since a long time without any issues so no need to change it.
Rotary Encoders with Pushbutton
Encoder 1

DT  >  11
CLK >  12
SW  >  7
+   >  5V
GND >  GND

Encoder 2

DT  >  4
CLK >  5
SW  >  A4
+   >  5V
GND >  GND

Encoder 3

DT  >  6
CLK >  10
SW  >  A5
+   >  5V
GND >  GND

Encoder 4

DT  >  8
CLK >  9
SW  >  13
+   >  5V
GND >  GND
Pushbuttons for the side
Pushbutton 1 (Right UP)      > A0 & GND
Pushbutton 2 (Right DOWN)    > A1 & GND
Pushbutton 3 (Left UP)       > A2 & GND
Pushbutton 4 (Left DOWN)     > A3 & GND
Adafruit Trellis Board
SDA > SDA
SCL > SCL
GND > GND
5V > 5VOnce it's all connected and also fits into the housing - pad on the back - it's time to upload the code.
You need to install the hardware add-on TeeOnArdu by Adafruit for Arduino IDE!
Open the sketch and select “TeeOnArdu (Leo on TeensyCore)” from the Tools→Board menu and “MIDI” from the Tools→USB Type menu. Unplug and replug the USB cable from the device and then quickly press the Upload button (if this fails the first time, try again, there’s about a 10 second window for uploading the code).
In most cases, once the Arduino Leonardo has the MIDI uploaded, it won't be able to upload new code until the reset button is pressed. Keep this in mind when attempting to upload new sketches.
The libraries you need are:
How to use it!In order to use this device with Lightroom you need to install the software MIDI2LR by rsjaffe. It's free and brilliant for this use. Once installed it should recognise your Arduino Leonardo as a MIDI device. Otherwise try Rescan MIDI device and make sure you uploaded the code as a MIDI.
I added a configuration file (XML) of my setup but feel free to change it to your needs - there are endless ways to configure it and you will find all the documentation on the MIDI2LR website on how to do it.
Please note in order to make the encoders work properly make sure to adjust the CC channel settings (right click on a CC channel) to "Two's Compliment" with a resolution of approx. 400 > Then "Apply to all"
Also note: Pushbutton 3 and 4 ( which I placed on the left hand side of the device) are NOT sending any MIDI commands. I use them as Shift buttons, e.g. Encoder 1 changes the exposure. Left Button Up + Encoder 1 changes the temperature.
I am very happy with this project and I use this controller on a daily basis. I can run through and adjust a lot of photos without ever needing to touch the keyboard and mouse. After a few hours of use the mapping of the buttons and encoders came more naturally and I didn't need to look at my reference list anymore
The design can be of course improved. Something that sits in the hand even better or more buttons and encoders?


Comments
Please log in or sign up to comment.