


Hardware components | ||||||
_ztBMuBhMHo.jpg?auto=compress%2Cformat&w=48&h=48&fit=fill&bg=ffffff) |
| × | 1 | |||
 |
| × | 1 | |||
 |
| × | 1 | |||
 |
| × | 1 | |||
 |
| × | 1 | |||
Software apps and online services | ||||||
 |
| |||||
For more details regrading this visit my blog
https://www.electronicsisfun08.in/2022/12/lcd-liquid-crystal-display-lcd-liquid.html
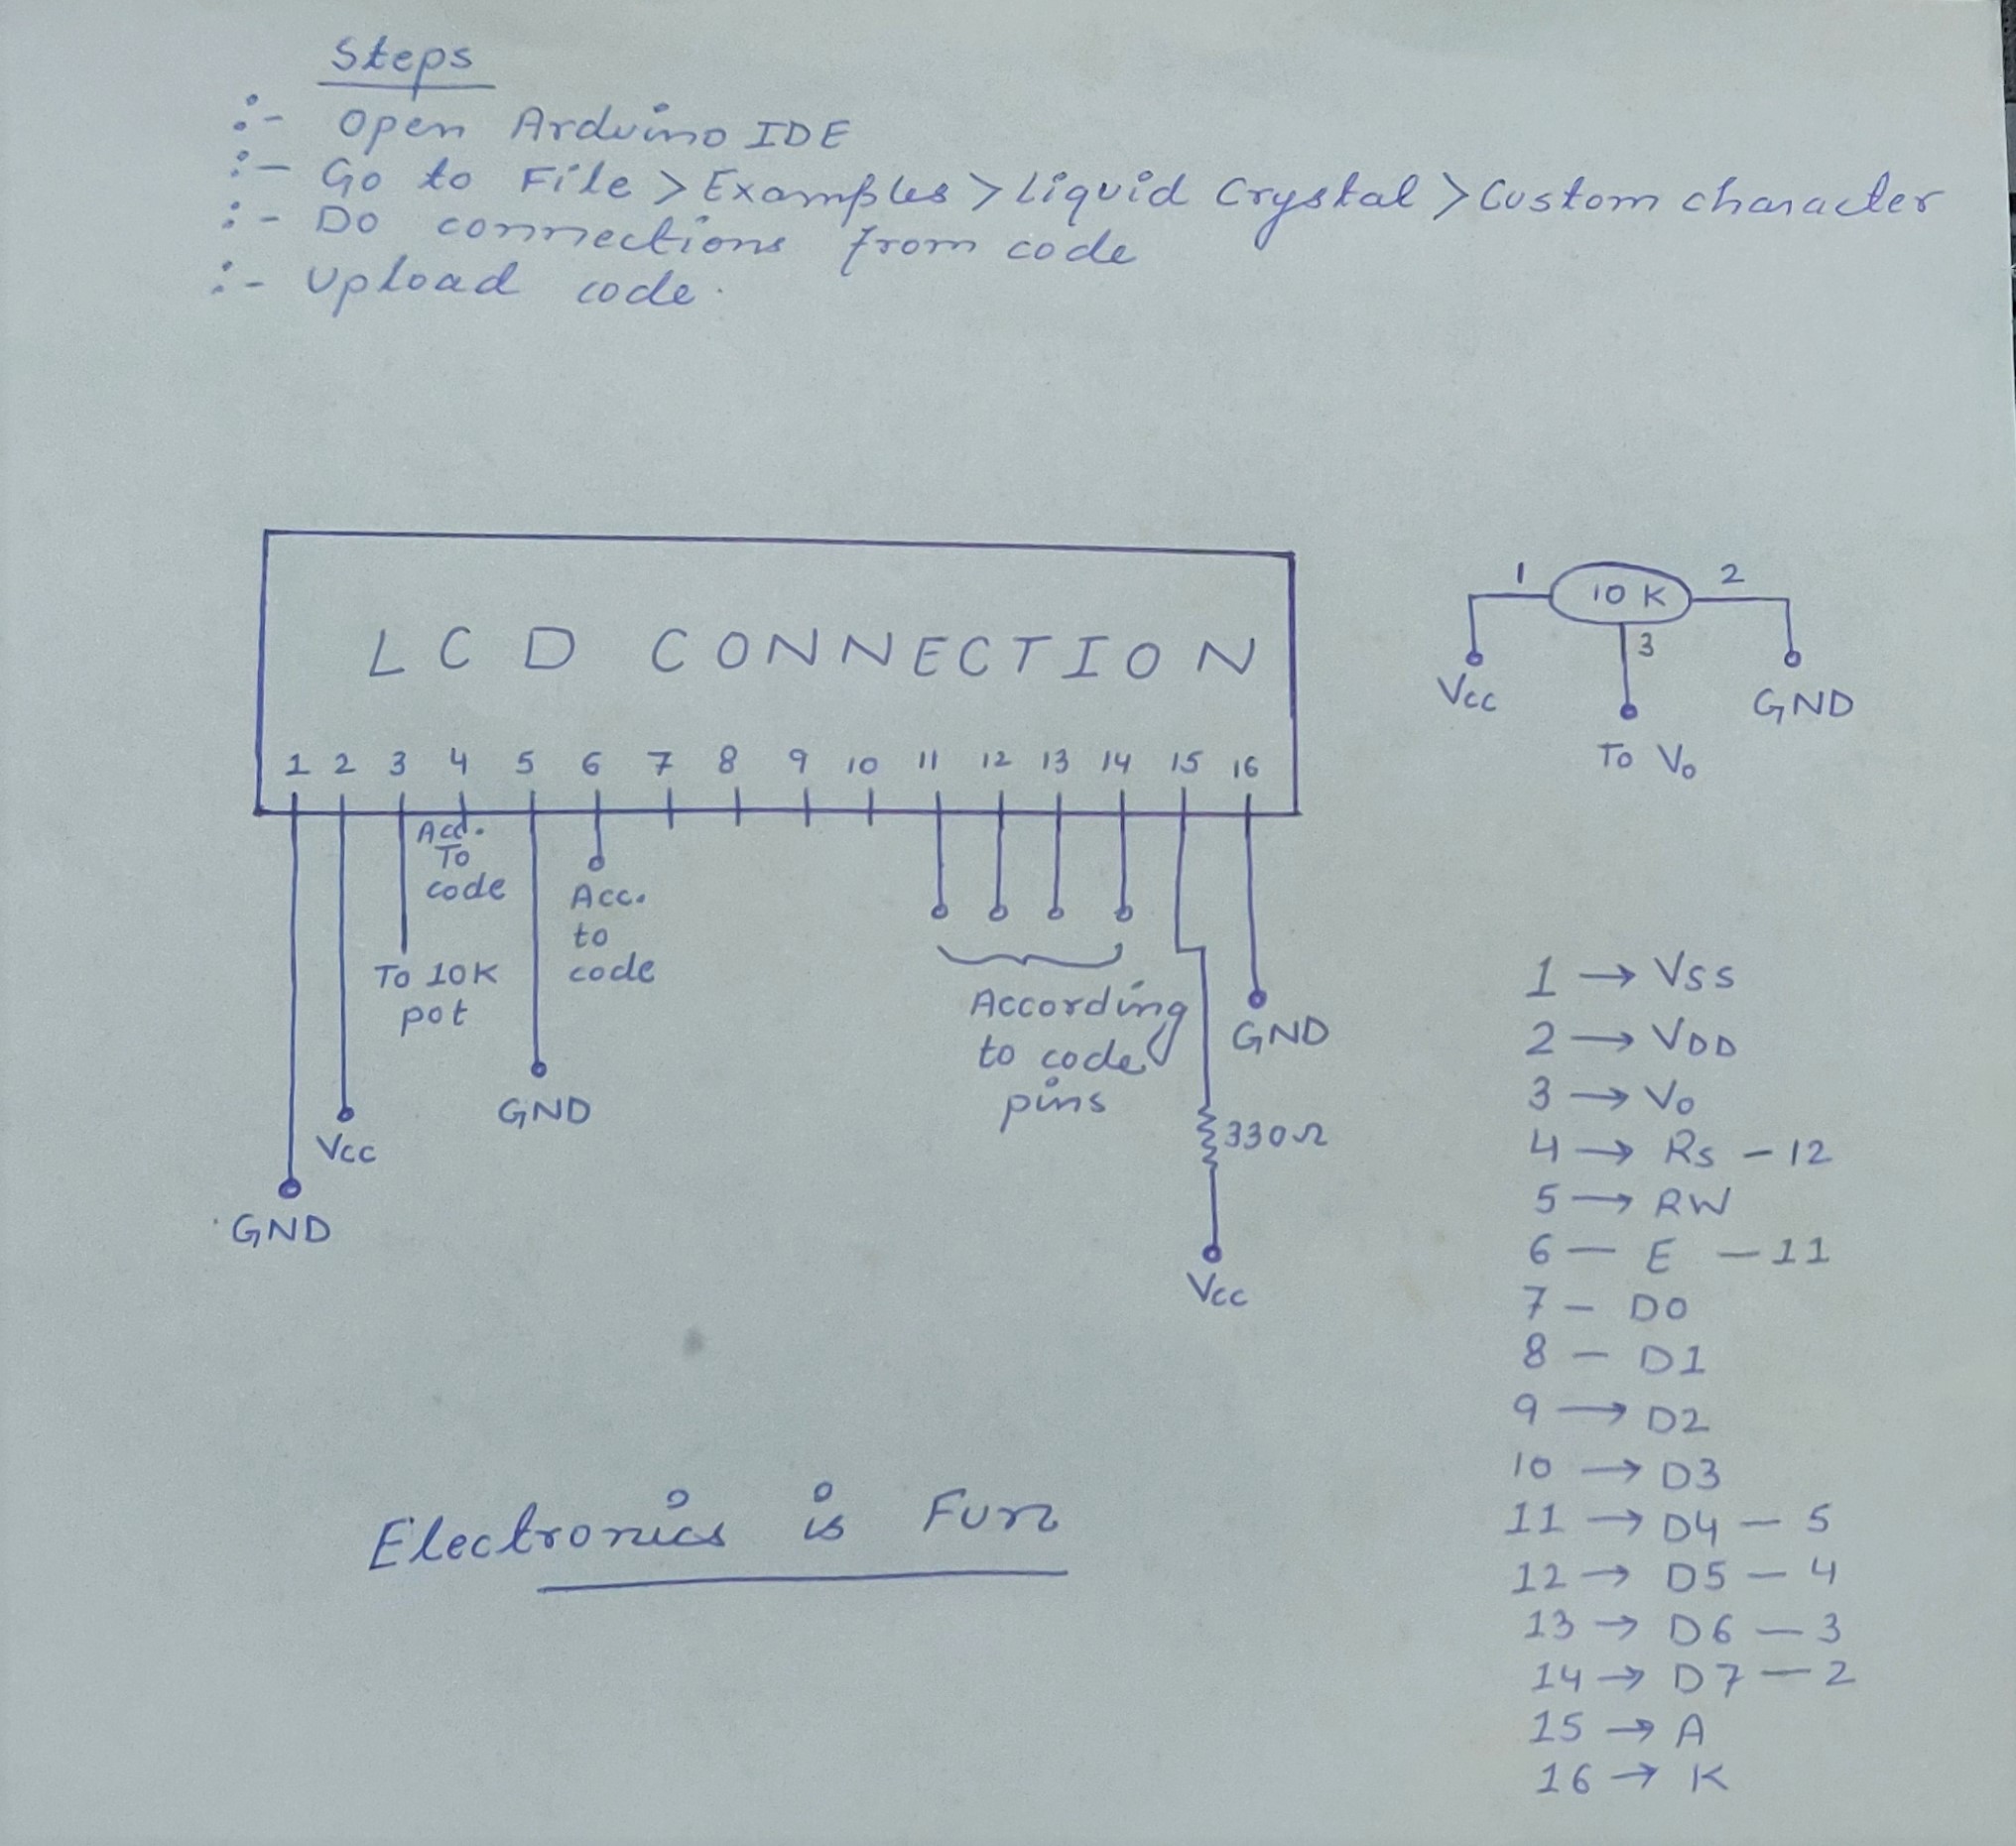
Hey friends. In this project I'll show you How to do 16 x 2 LCD display connections.
So, Let's get started
Want to make yours..?
Watch the video to make yours.
If you like this project do comment on YouTube video, and do not forget to subscribe my channel, link is below
link is : https://www.youtube.com/channel/UCaXI2PcsTlH5g0et67kdD6g
If you have any doubt regarding this project, you can Telegram me at +919557024177.
If you have any suggestions or project idea, kindly reach out to my channel or Telegram me at above no.
You're most welcome.
Steps to make this project:
1. Gather components like Arduino Uno, LCD display, 10K Potentiometer, Bread Board, 330 ohm resistor, Jumper wires
2. Put Arduino on Breadboard.
3. Connect LCD display on Breadboard.
4. Connect stapler pins as jumper to LCD on breadboard.
5. Connect 330 ohm resistor with pin 15 to Vcc.
6. Connect pin 1 of LCD to GND.
7. Connect pin 2 of LCD to +5v.
8. Connect pin 3 of LCD to 10K potentiometer middle pin.
9. Connect 1st pin of Pot to +5v and 2nd pin to GND.
10. Connect pin 4 of LCD to 12 on Arduino as according to code.
11. Connect pin 5 of LCD to GND.
12. Connect pin 6 of LCD to 11 on Arduino as according to code.
13. Connect pin 11 of LCD to 5 on Arduino as according to code.
14. Connect pin 12 of LCD to 4 on Arduino as according to code.
15. Connect pin 13 of LCD to 3 on Arduino as according to code.
16. Connect pin 14 of LCD to 2 on Arduino as according to code.
17. Connect pin 15 of LCD to 330 ohm to +5v.
18. Connect pin 16 of LCD to GND.
I hope you all understand the process of connection of 16 x 2 LCD display.


Comments
Please log in or sign up to comment.