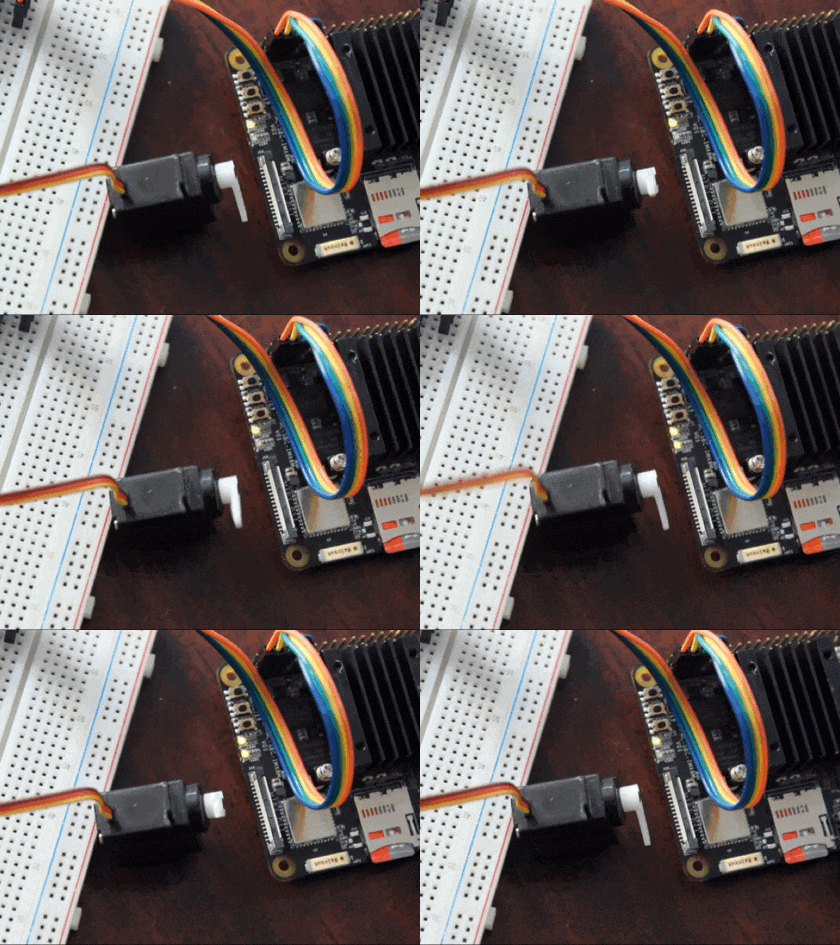
These are the step-by-step instructions on how to set up a MaaXBoard to drive multiple servos with an accurate PWM external add-on card.
The goal is to be able to control these motors with Python. We will reuse code originally written for RaspberryPi by Adafruit's Tony DiCola (Thanks Tony). Only few modifications are required to get everything working on the MaaXBoard.
Prerequisites:Go through the MaaXBoard headless setup here first.
Components listBeside the board itself, we will need a few external parts:
PCA9685 servo driver
The external control will use the PCA9685 chip which allows the control up to 16 independent channels (i.e. 16 servo) leveraging a single I2C bus. There are multiple shields with PCA9685 made for Raspberry Pi. We can use the shield from Adafruit, or as an alternative, the shield from WaveShare.
GPIO adaptor (optional)
Since the heatsink on the MaaxBoard is quite high, if you use the shield from WaveShare you may also need an adapter to mount it. We can use a GPIO riser or a right-angle GPIO adapter for raspberry pi. This will allow to mount any external shield “vertically” which is even more convenient in case you have a fan mounted on your MaaxBoard heatsink.
Servo motor
When selecting the type of servo motor for your project, you need to pay attention to the type of motor you are using. There are few standard labels (SG90, MG90S, MG995, MG996R, etc) but the PCA9685 is compatible for most of the variants.
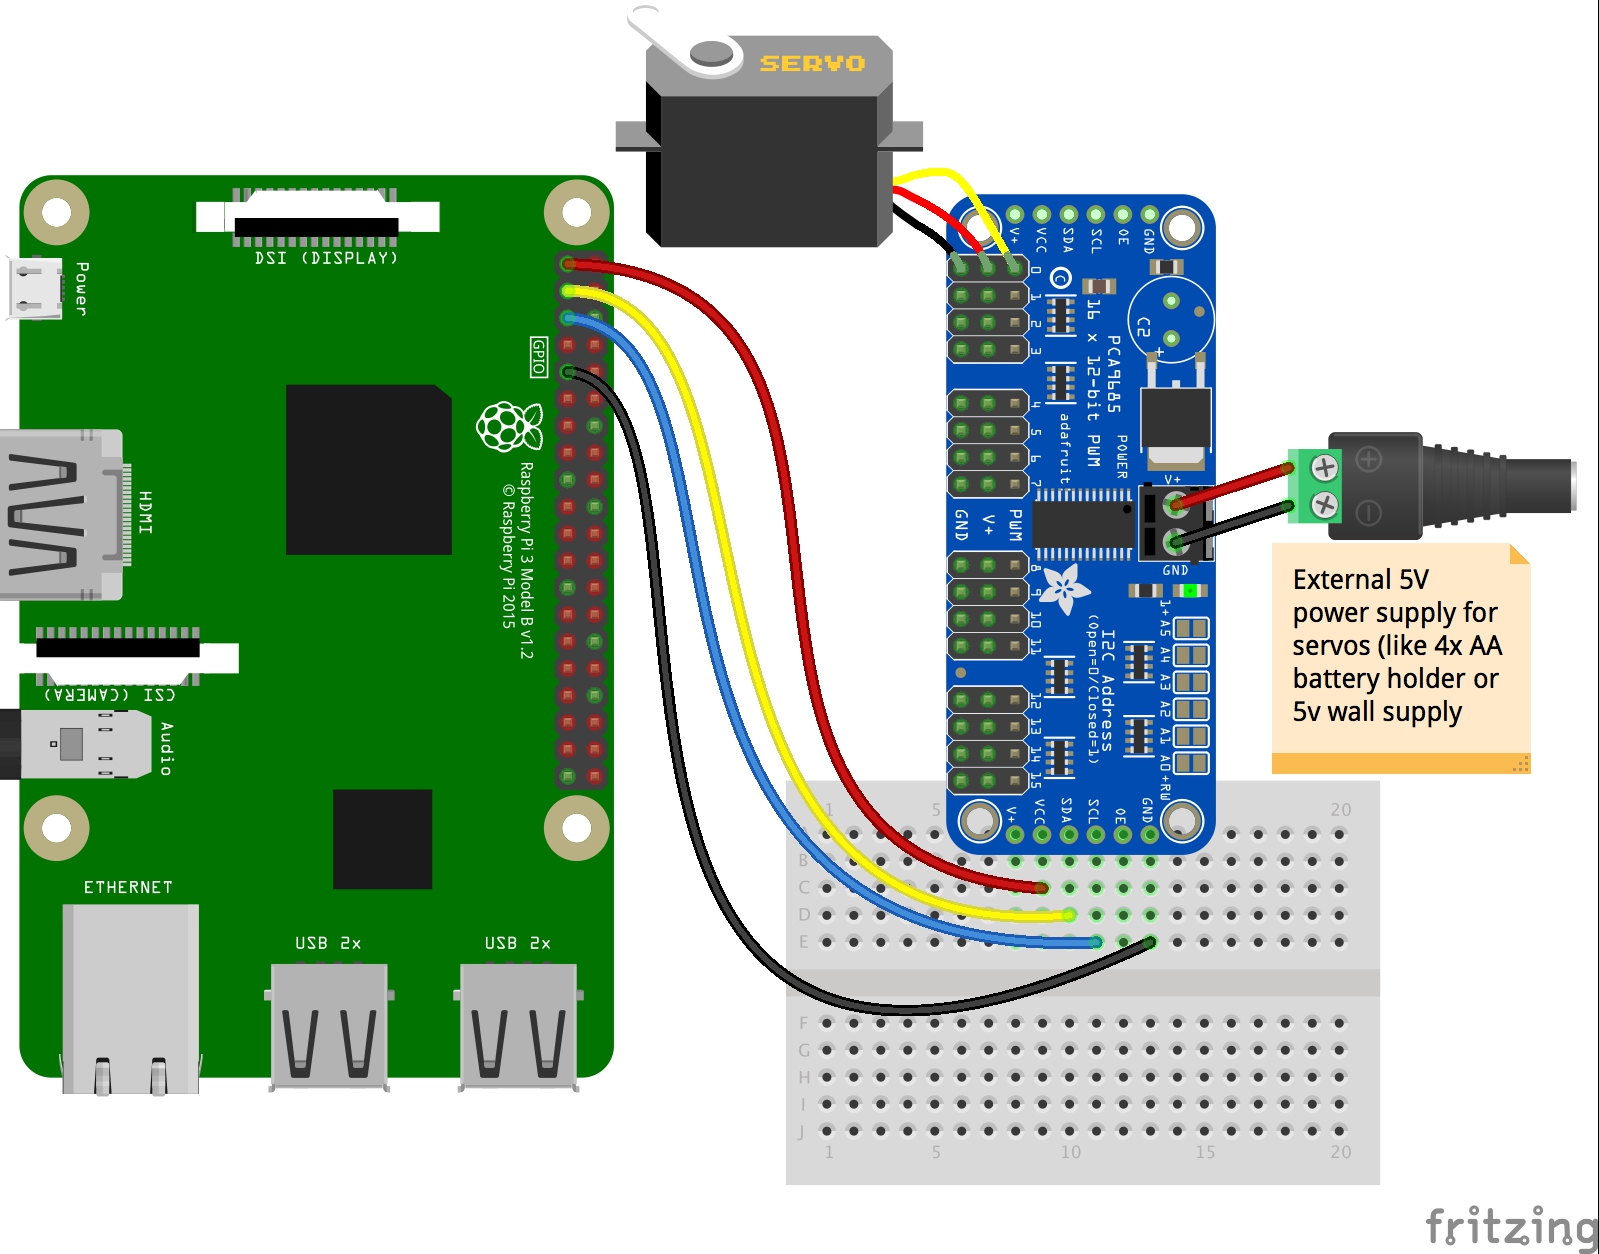
AssemblyOnce you have all the parts, you need to install the servo driver and attach the servos to it.
NOTE: the shield from Adafruit is different from the one from Waveshare. While the Waveshare version uses an onboard 5V/3A regulator to power the servos (eventually with a battery as a power backup) the Adafruit version gives you the flexibility to use an external power supply to provide 5V to the servos. If you plan to use many servos (max 16) the Adafruit version might be a better choice since you won’t power the servos directly from of the raspberry power supply (5V).
SOFTWARE INSTALLI2ctoolsOnce you have connected the shield we need to make sure that the hardware is recognized. For this reason we need to install i2ctools package. Connect to your board over SSH and install the package
sudo apt install i2c-toolsTo allow our user to access i2c-dev hw without using sudo we need to add a custom rule. We first create a custom rule file
sudo touch /etc/udev/rules.d/50-i2c.rulesThen edit the file with nano editor:
sudo nano /etc/udev/rules.d/50-i2c.rulesand make sure the content is the following
SUBSYSTEM=="i2c-dev", GROUP="i2c", MODE="0660"Now we add our user to the “i2c” group and set permissions:
sudo adduser ebv i2c
sudo chmod g+rw /dev/i2c-*
sudo reboot
Once the board has been rebooted connect to it over ssh and check that the shield has been detected. Run:
sudo i2cdetect -y 1The output of the i2cdetect (for /dev/i2c-dev-1) should look like this:
To use the device with Python we need to install few libraries.
sudo apt install git build-essential python-devTo control GPIO and PWM with Python we need to download three libraries by Adafruit directly from GitHub. Create a work folder and pull the libraries into it.
cd ~/
mkdir example
cd example
git clone https://github.com/adafruit/Adafruit_Python_PureIO.git
git clone https://github.com/adafruit/Adafruit_Python_GPIO.git
git clone https://github.com/adafruit/Adafruit_Python_PCA9685.git
Install tree so you can check the directories:
sudo apt install treeNow print the directory tree:
tree -dThe example directory's tree should look like this:
The Adafruit libraries need to be modified to run on the MaaxBoard. Luckily, it's only a minor modification. Create your “test” folder like this:
cd ~/
cd example
mkdir test
cd test
Create symlinks of the actual Python libraries we are going to use for our simple test Python application:
ln -s ../Adafruit_Python_GPIO/Adafruit_GPIO/ .
ln -s ../Adafruit_Python_PureIO/Adafruit_PureIO/ .
ln -s ../Adafruit_Python_PCA9685/Adafruit_PCA9685/ .
NOTE: we could also compile and install these libraries (system-wide install) but doing this allows us to directly modify the code and use it case-by-case.
Now we need to modify two files of the GPIO library to make sure the MaaXBoard is recognized as a linux system (same as if it was a RaspberryPi).
The two files to be modified are I2C.py and Platform.Py.
Open I2C.py using nano:
cd Adafruit_GPIO
nano I2C.py
We need to add one line in the get_default_bus() (around line 40) function by adding the bolded elif statement:
elif plat == Platform.BEAGLEBONE_BLACK:
# Beaglebone Black has multiple I2C buses, default to 1 (P9_19 and P9_20).
return 1
elif plat == Platform.MAAXBOARD:
return 1
For Platform.py we need to add one more define to select MAAXBOARD. Still in the test/Adafruit_GPIO directory, open Platform.py in nano:
nano Platform.pyAdd the bolded lines below (around line 24):
# Platform identification constants.
UNKNOWN = 0
RASPBERRY_PI = 1
BEAGLEBONE_BLACK = 2
MINNOWBOARD = 3
JETSON_NANO = 4
MAAXBOARD = 5
In the def platform_detect() function, add the bold lines:
...
# Handle Beaglebone Black
# TODO: Check the Beaglebone Black /proc/cpuinfo value instead of reading
# the platform.
plat = platform.platform()
print(plat)
if plat.lower().find('armv7l-with-debian') > -1:
return BEAGLEBONE_BLACK
...
elif plat.lower().find('tegra-aarch64-with-ubuntu') > -1:
return JETSON_NANO
elif plat.lower().find('aarch64-with-debian') > -1:
return MAAXBOARD
...
Final Platform.py should look something like this:
Now we are ready to use one of the example provided by Adafruit. Thanks to the portability of Python code, no modifications are needed here. We copy the simpletest.py file into our test directory:
cd example
cp Adafruit_Python_PCA9685/examples/simpletest.py test
Execute the test file.
cd example/test
python ./simpletest.py
If everything is working correctly your servo motor will move until you exit the script with CTRL-C.
NOTE: for this example we are controlling channel N.0 so make sure to connect your servo to the numbered header in position zero of your shield.
ConclusionNow you can control multiple servo motors for your mechanical assembly like pan-tilt-zoom or animatronics or industrial prototypes. Always make sure to control servo type and maximum current rating when you plan to use more than one servo on the external shield, eventually adding a specific power supply dedicated only to the servo shield.


Comments
Please log in or sign up to comment.